Category Archives: Cooking and Recipes

Best Buffalo Wing Recipe | How to make CRISPY Hot Wings

Why is this the BEST Buffalo Wing Recipe? Because I’ll show you how to make CRISPY hot wings that are FULL of flavor – using my Dad’s secret ingredient! I’ll share my Buffalo Sauce Recipe & also discuss the RATIO of Hot Sauce to Butter (it’s a ‘hot’ topic!).

[lwptoc]

Buffalo wing recipe

Cook this Buffalo Wing Recipe on Any Grill or Oven

Today I’m cooking Buffalo wings in an Ooni Pizza Oven for a wood-fired effect but u can make this buffalo chicken wing recipe on any grill or oven. Best of all this Buffalo Wing Recipe is EASY to make, easy to customize to your tastes, and so much fun to eat!

Give it a try & let me know what tips YOU have to share.

Best Buffalo Wing Recipe – The Video

Buffalo Wing Recipe Video

SKIP AHEAD in the video with these timestamps:

  • 00:38 Kamado & Ooni Pizza Oven views
  • 01:10 Fuel Source (lump charcoal + cooking wood)
  • 01:20 Wings in Marinade
  • 01:50 Getting the Ooni Oven up to temp (watch the temp gauge climb!) 02:20 FIRE – it’s a beautiful thing!
  • 02:35 Wings are ready to cook WITHOUT sauce
  • 03:30 Buffalo Sauce Recipe Ingredients. Discussion on Hot Sauce to Butter Ratio
  • 06:40 Buffalo Sauce Mixed (see below for recipe itself)
  • 07:10 Wings at 10 Minutes
  • 07:30 Wings at 20 Minutes
  • 07:38 Wings IN SAUCE
  • 07:55 Sauced Wings ready to CRISP
  • 08:09: Wings back in oven to CRISP
  • 08:37 Wings DONE
  • 09:00 Let’s Eat!
  • 10:00 Bonus: The Drippins!
  • Share this vid: https://youtu.be/N1mR_M31MB8

Best Buffalo Wing Sauce Recipe

Before we get into the recipe for the Buffalo Wing Sauce, let me give you a few notes:

  • This recipe is so freaking easy I didn’t show the actual melting of butter or mixing of ingredients in the video because I figured you are smart enough to know how to do that.
  • IMPORTANT:we do NOT cook the wings with the sauce on to start. Instead we cook the wings WITHOUT sauce first.
  • U can make the Buffalo Sauce Recipe after you get the wings started cooking. See Step 4 in the Buffalo Wing Sauce Recipe below for more on how & when to sauce the wings.

Buffalo Wing Sauce Recipe Step-by-Step

Step 1: Marinate the Wings (OPTIONAL)

Wing Marinade
Wings in Marinade
  1. Put defrosted wings into zip lock bag with a combo of rub of your choice (I used Paul Prudhomme’s Red Magic which is great on chicken too) + 1 TB of EVOO + 1 TB of Kosher Salt.
  2. Mix the wings around in the bag with the marinade ingredients so wings are well coated
  3. Marinate the wings for up to 24 hours.
  4. I did 12 hours for the vid, but you can do it in as little as 1 hour if you don’t have time.
  5. Although u can skip this step, if you do it, you’ll get an extra ‘depth’ of flavor beneath the buffalo sauce so do the marinade if you can.

Step 2: Gather Ingredients for Buffalo Sauce

Best Buffalo Wing Recipe
Buffalo Wing Sauce Ingredients
  • Franks Red Hot Sauce (ORIGINAL not the “Buffalo” version)
  • Butter
  • Good Season’s Italian Dressing Dry Mix (1 Packet) – the SECRET Ingredient!
  • My vid only used 3 basic ingredients in the sauce itself (salt was added later), but you can experiment next time with a little Lemon Juice, Fresh Basil, Worcester Sauce, Smoke Paprika, other Rubs, or whatever you like

Step 3: Decide YOUR Ratio of Hot Sauce to Butter

The ratio of hot sauce to butter that produces the best Buffalo Wing Recipe it a ‘HOT’ Topic and one that’s full of controversy. But the answer is really quite simple – the correct ratio of Franks Red Hot Sauce to Butter depends on YOUR preference.

What’s the “Official” ratio of Frank’s Red Hot Sauce to Butter?

On the Frank’s Red Hot Sauce website you’ll find this answer

The Official ratio is 3 parts butter to 2 parts hot sauce

But that’s NOT my preference.

Instead I like to use a ratio of hot sauce to butter that’s MY preferred ratio is the opposite…

3 parts hot sauce to 2 parts butter.

In my opinion, this will give you a nice MEDIUM heat buffalo wing that looks like this when sauced…(BUT do NOT sauce the wings yet – we’ll do that later in the recipe AFTER the wings cook). This pic is must a little preview 🙂

Best Buffalo Wing Recipe
Wings in Sauce

But that’s my preference. YOURS may be different so change the hot sauce to butter ratio depending on what you like.

What’s the Math on 3: 2 hot sauce to butter like in my vid?

  • For 2 tablespoons of butter, use 3 tablespoons of Hot Sauce.
  • In this vid I used 1/4 cup melted butter (4 TB) to 1/3 cup hot sauce (6 TB).

HOT OFF THE PRESSES – My “Buffalo Insider” says here are the TRUE ratios from hoods of his town…

  • MILD Wings: 3 parts butter to 2 parts hot sauce
  • MEDIUM Wings: 4 parts hot sauce to 2 parts butter
  • HOT Wings: Only Frank’s, no butter (and find the Frank’s Xtra Hot version if you can)
  • NUCLEAR Wings: 1 Cup of Frank’s Xtra Hot to 2 TB of Habanero Mash (but be careful – it’ll put hair on your chest for sure!)

How much sauce do you need?

In my vid, I had enough sauce for 12 wings + extra to dip in. If you are making more wings, make more sauce.

Step 4: Mix Buffalo Sauce Ingredients:

  1. Melt Butter
  2. Add ingredients to a medium size mixing bowl and mix
  3. Do NOT put the wings in the mix until AFTER you cook them to temp (165F)

It will look something like this…

Step 5: AFTER wings are cooked at or near temp (165 F), THEN…

At this point YOU have a decision to make. Do you want your Buffalo wings WET or DRY? I.E. do you want the Buffalo sauce dripping on the wings or do you like the Buffalo Sauce cooked onto the wings?

The answer to that question will determine if you are done cooking or not. If you like WET Buffalo Wings then sauce them & either serve them immediately. If you like DRY Buffalo Wings then you’ll put them back in the oven. In BOTH cases you’ll put cooked wings in sauce for this step…

Buffalo Wing Sauce Recipe

It’s YOUR CHOICE:

  • If you like WET wings, sauce wings AFTER they are cooked & serve immediately.
  • If you like CRISPY wings, sauce wings AFTER initial cook to temp & then put them back in oven for 5 mins with sauce ON so wings will crisp up with sauce on them.

If you do like CRISPY Buffalo Wings like me, then here’s what they’ll look like if you cook the sauce onto them.

CRISPY Buffalo Wings
These Buffalo Wings are Crispy and Amazing!

Step 6: EAT & ENJOY

Congratulations, you’ve just made the best Buffalo Wing Recipe on the planet. Now grab a beer (if you don’t already have one) and enjoy eating your awesome Buffalo Wings.

I’m guessing when you’re done, it will look something like this…

What happened to the wings?

These wings are AWESOME. They are the Best Buffalo Wings you will ever have because they are easy to make and have the perfect combo of FLAVOR + HEAT AND the wings are CRISPY.

It’s time for YOU to try this recipe. Give it a shot and let me know what you like or what you might do different.


About the Products used:

Because of the Coronavirus pandemic, chicken wings are in short supply so I could only find I Costco Party wings – normally I’d cook the whole wing with all 3 sections (drumstick, wing, and tips).

Here are the other products I cooked with if you are interested…


What to Read Next

best outdoor pizza ovens
Big Green Egg Best Accessories

Let’s Cook Naan Bread Mini Pizzas | Naan Bread Pizza Recipe

I’ll show you how to cook Naan Bread Mini Pizzas in a pizza oven or grill using a pizza stone. Watch my boys and I prepare the Naan Bread pizza recipe and then cook the Naan Mini Pizza’s on an Ooni Pro Pizza Oven. You can make Naan Pizza on any grill using a PIZZA STONE or even your kitchen oven – it only takes a couple minutes to cook the Naan Bread.


Naan Bread Pizza – The Video

Share this vid: https://youtu.be/S51-n-Tt984

About the Naan Bread Mini Pizza Recipe

This recipe is a 3-step process

  1. Gather the ingredients – we used Naan Bread, Pizza Sauce, Mozzarella, Pepperoni, fresh Basil, etc but you can use whatever you like. Because we’re using MINI Naan bread, you can makes lots of different varieties of pizzas to try.
  2. Make the Naan Bread Pizzas
  3. Cook the Naan Bread Pizza’s in the pizza oven or on your grill using a pizza stone or in your oven without a pizza stone.

Don’t forget to EAT the pizza’s too 🙂


Naan Bread Pizza Recipe Result?

naan bread pizza

The boys & I had great fun making these mini naan bread pizzas. There was just one problem – we loved them so much we ate them too fast! Doh! 🙂


Product Shopping List

As promised in the vid, here are all the cooking products mentioned or shown in this vid via convenient Amazon Affiliate Links.

//z-na.amazon-adsystem.com/widgets/onejs?MarketPlace=US&adInstanceId=69678103-4f01-4cb4-9563-1f5c285acbf3

For More Pizza Supplies and Vids check out…

Best Traeger Grill Accessories – Traeger Cooking Surfaces

Traeger Cooking Surfaces – If you’re a Traeger Grill Enthusiast, you’ll enjoy this discussion of the best COOKING SURFACE accessories to buy for your Traeger – from griddles and grill racks, from jalapeno popper holders to grilling baskets, and so much more, we’ve got you covered.

[lwptoc]

Traeger Cooking Surface

Editor’s Note: This article is part of our series about the Best Traeger Brand Accessories. Other articles in the series discuss the best Traeger Accessories for Grill Add-on Parts, BBQ Tools, Pellets, Cookbooks, Cleaning Tools, Prep Tools, Spices & Rubs, and even Traeger Swag.

Traeger cooking surface

Why Add More Traeger Cooking Surface Accessories?

When you purchase a Traeger Grill, you’re buying a quality product that will give you great satisfaction for many years to come, and you can certainly enjoy it ‘as is,’ but as with any high-end grill hobby, there’s always going to me more tools you’re going to want to add to your Traeger Toolkit. It’s in this spirit that we wrote this article as we try to highlight some of the best cooking surfaces to consider adding to your Traeger Grill.


Traeger Brand Cooking Surfaces

If you want Traeger cooking surface accessories that are official Traeger Brand, this is your section. You’ll find smoke shelves, grill racks, baskets, and even a chicken stand for beer-can chicken. Check ’em out…

Traeger Brand Smoke Shelves

The 2 most popular options for smoke shelves are the Traeger BAC350 34 Series Smoke Shelf and Traeger BAC349 22 Series Smoke Shelf. Pick the one that best fits your size of Traeger.

amzn_assoc_tracking_id = “thathelpfulda-20”; amzn_assoc_ad_mode = “manual”; amzn_assoc_ad_type = “smart”; amzn_assoc_marketplace = “amazon”; amzn_assoc_region = “US”; amzn_assoc_design = “enhanced_links”; amzn_assoc_asins = “B016YQGBME”; amzn_assoc_placement = “adunit”; amzn_assoc_linkid = “33aeb2fa7d1897c52d17e5f4e91626d1”; //z-na.amazon-adsystem.com/widgets/onejs?MarketPlace=US amzn_assoc_tracking_id = “grill-site-20”; amzn_assoc_ad_mode = “manual”; amzn_assoc_ad_type = “smart”; amzn_assoc_marketplace = “amazon”; amzn_assoc_region = “US”; amzn_assoc_design = “enhanced_links”; amzn_assoc_asins = “B017080C9S”; amzn_assoc_placement = “adunit”; amzn_assoc_linkid = “efe4ff6cadd6d32e91e16b6a0b99f16f”; //z-na.amazon-adsystem.com/widgets/onejs?MarketPlace=US

Traeger Brand Grill Racks

Traeger’s grill racks are also size specific to your particular grill. The 2 most popular choices are the Traeger Grills 11380 Texas/Pro 34 Grill Rack and the Traeger BAC351 22 Series Grill Rack .

amzn_assoc_tracking_id = “grill-site-20”; amzn_assoc_ad_mode = “manual”; amzn_assoc_ad_type = “smart”; amzn_assoc_marketplace = “amazon”; amzn_assoc_region = “US”; amzn_assoc_design = “enhanced_links”; amzn_assoc_asins = “B019QM8NSI”; amzn_assoc_placement = “adunit”; amzn_assoc_linkid = “22cd56f8789e12111ca3e3348e13306c”; //z-na.amazon-adsystem.com/widgets/onejs?MarketPlace=US amzn_assoc_tracking_id = “grill-site-20”; amzn_assoc_ad_mode = “manual”; amzn_assoc_ad_type = “smart”; amzn_assoc_marketplace = “amazon”; amzn_assoc_region = “US”; amzn_assoc_design = “enhanced_links”; amzn_assoc_asins = “B019ZEG9B0”; amzn_assoc_placement = “adunit”; amzn_assoc_linkid = “791f63006eb39f79a0722924c5afde97”; //z-na.amazon-adsystem.com/widgets/onejs?MarketPlace=US

Traeger Brand Cooking Grates

Change out your grates with cast iron or porcelain cooking surfaces with these options.

amzn_assoc_tracking_id = “grill-site-20”; amzn_assoc_ad_mode = “manual”; amzn_assoc_ad_type = “smart”; amzn_assoc_marketplace = “amazon”; amzn_assoc_region = “US”; amzn_assoc_design = “enhanced_links”; amzn_assoc_asins = “B07GRPK5VL”; amzn_assoc_placement = “adunit”; amzn_assoc_linkid = “3e2a4de6fa3e525b3def86de9d808f98”; //z-na.amazon-adsystem.com/widgets/onejs?MarketPlace=US amzn_assoc_tracking_id = “grill-site-20”; amzn_assoc_ad_mode = “manual”; amzn_assoc_ad_type = “smart”; amzn_assoc_marketplace = “amazon”; amzn_assoc_region = “US”; amzn_assoc_design = “enhanced_links”; amzn_assoc_asins = “B01IF1HKL2”; amzn_assoc_placement = “adunit”; amzn_assoc_linkid = “1cec112ed90dfd5985d26d42bf0df3ce”; //z-na.amazon-adsystem.com/widgets/onejs?MarketPlace=US

Traeger Brand Miscellaneous Cooking Surfaces

Wanna cook beer can chicken on your Traeger? How about a pizza? Ever thought about using a grilling basket in your Traeger? What about Rib Racks and Chicken Hangers? Or maybe a griddle? Check out these options to up your Traeger Game…

amzn_assoc_tracking_id = “grill-site-20”; amzn_assoc_ad_mode = “manual”; amzn_assoc_ad_type = “smart”; amzn_assoc_marketplace = “amazon”; amzn_assoc_region = “US”; amzn_assoc_design = “enhanced_links”; amzn_assoc_asins = “B019ZEQHF8”; amzn_assoc_placement = “adunit”; amzn_assoc_linkid = “2ffce77687e964994c5609f9fb320952”; //z-na.amazon-adsystem.com/widgets/onejs?MarketPlace=US amzn_assoc_tracking_id = “grill-site-20”; amzn_assoc_ad_mode = “manual”; amzn_assoc_ad_type = “smart”; amzn_assoc_marketplace = “amazon”; amzn_assoc_region = “US”; amzn_assoc_design = “enhanced_links”; amzn_assoc_asins = “B01BH3SFGO”; amzn_assoc_placement = “adunit”; amzn_assoc_linkid = “d16d1733a8c24b5f5aa95c6e2871a2b5”; //z-na.amazon-adsystem.com/widgets/onejs?MarketPlace=US amzn_assoc_tracking_id = “grill-site-20”; amzn_assoc_ad_mode = “manual”; amzn_assoc_ad_type = “smart”; amzn_assoc_marketplace = “amazon”; amzn_assoc_region = “US”; amzn_assoc_design = “enhanced_links”; amzn_assoc_asins = “B01BI87KAA”; amzn_assoc_placement = “adunit”; amzn_assoc_linkid = “1879b1a4758a7df71cba47199be2f0f5”; //z-na.amazon-adsystem.com/widgets/onejs?MarketPlace=US amzn_assoc_tracking_id = “grill-site-20”; amzn_assoc_ad_mode = “manual”; amzn_assoc_ad_type = “smart”; amzn_assoc_marketplace = “amazon”; amzn_assoc_region = “US”; amzn_assoc_design = “enhanced_links”; amzn_assoc_asins = “B016YQG2C8”; amzn_assoc_placement = “adunit”; amzn_assoc_linkid = “ef0f3264cf369adaf25107889bfd127c”; //z-na.amazon-adsystem.com/widgets/onejs?MarketPlace=US amzn_assoc_tracking_id = “grill-site-20”; amzn_assoc_ad_mode = “manual”; amzn_assoc_ad_type = “smart”; amzn_assoc_marketplace = “amazon”; amzn_assoc_region = “US”; amzn_assoc_design = “enhanced_links”; amzn_assoc_asins = “B01E9EYSXM”; amzn_assoc_placement = “adunit”; amzn_assoc_linkid = “db7a56dec2182e331b47c09fa0fd7fee”; //z-na.amazon-adsystem.com/widgets/onejs?MarketPlace=US amzn_assoc_tracking_id = “grill-site-20”; amzn_assoc_ad_mode = “manual”; amzn_assoc_ad_type = “smart”; amzn_assoc_marketplace = “amazon”; amzn_assoc_region = “US”; amzn_assoc_design = “enhanced_links”; amzn_assoc_asins = “B00SVI62SM”; amzn_assoc_placement = “adunit”; amzn_assoc_linkid = “975c62d3c938e27ff09d4fe69e018f1d”; //z-na.amazon-adsystem.com/widgets/onejs?MarketPlace=US amzn_assoc_tracking_id = “grill-site-20”; amzn_assoc_ad_mode = “manual”; amzn_assoc_ad_type = “smart”; amzn_assoc_marketplace = “amazon”; amzn_assoc_region = “US”; amzn_assoc_design = “enhanced_links”; amzn_assoc_asins = “B01E9EYQMK”; amzn_assoc_placement = “adunit”; amzn_assoc_linkid = “bcfc466f61634d658de1b5cb98606e36”; //z-na.amazon-adsystem.com/widgets/onejs?MarketPlace=US

Want our advice? If you can only pick one to start, give strong consideration to the Traeger Reversible Griddle (you will use it all the time!), the Traeger Stainless Steel Grilling Basket or the Traeger Rib Rack – all three are consistently the highest rated and probably cooking surfaces you’ll use a lot.


Traeger Grill 3rd Party Cooking Surfaces

If you can’t find the best Traeger cooking surface accessory from the official Traeger Brand, you’ll be happy to know there are lots of other quality alternatives. Some of our favorites are Cave Tools Jalapeno Pepper Holders, the Camp Chef Smoker Jerky Rack (it’s soooo good!), the BBQ Hack griddle (big enough for pancakes, burgers, and more), and the Bull Rack BR4 (grill, smoke, dry, and cure meats). Before you buy, just be sure these accessories will fit your specific Traeger Grill.

amzn_assoc_tracking_id = “grill-site-20”; amzn_assoc_ad_mode = “manual”; amzn_assoc_ad_type = “smart”; amzn_assoc_marketplace = “amazon”; amzn_assoc_region = “US”; amzn_assoc_design = “enhanced_links”; amzn_assoc_asins = “B01IBNZIT0”; amzn_assoc_placement = “adunit”; amzn_assoc_linkid = “2732b1ca8d8770566af4af8336404153”; //z-na.amazon-adsystem.com/widgets/onejs?MarketPlace=US amzn_assoc_tracking_id = “grill-site-20”; amzn_assoc_ad_mode = “manual”; amzn_assoc_ad_type = “smart”; amzn_assoc_marketplace = “amazon”; amzn_assoc_region = “US”; amzn_assoc_design = “enhanced_links”; amzn_assoc_asins = “B0028Y4FHK”; amzn_assoc_placement = “adunit”; amzn_assoc_linkid = “a38b0206a4381702f9bfae48681bcaff”; //z-na.amazon-adsystem.com/widgets/onejs?MarketPlace=US amzn_assoc_tracking_id = “grill-site-20”; amzn_assoc_ad_mode = “manual”; amzn_assoc_ad_type = “smart”; amzn_assoc_marketplace = “amazon”; amzn_assoc_region = “US”; amzn_assoc_design = “enhanced_links”; amzn_assoc_asins = “B07CZ59TD7”; amzn_assoc_placement = “adunit”; amzn_assoc_linkid = “834363a0bec95f9263f2a7e54ae74af1”; //z-na.amazon-adsystem.com/widgets/onejs?MarketPlace=US amzn_assoc_tracking_id = “grill-site-20”; amzn_assoc_ad_mode = “manual”; amzn_assoc_ad_type = “smart”; amzn_assoc_marketplace = “amazon”; amzn_assoc_region = “US”; amzn_assoc_design = “enhanced_links”; amzn_assoc_asins = “B01M1R9P8Y”; amzn_assoc_placement = “adunit”; amzn_assoc_linkid = “450b4869560f9c747d13fdefb51dcf18”; //z-na.amazon-adsystem.com/widgets/onejs?MarketPlace=US amzn_assoc_tracking_id = “grill-site-20”; amzn_assoc_ad_mode = “manual”; amzn_assoc_ad_type = “smart”; amzn_assoc_marketplace = “amazon”; amzn_assoc_region = “US”; amzn_assoc_design = “enhanced_links”; amzn_assoc_asins = “B07J5LKJ86”; amzn_assoc_placement = “adunit”; amzn_assoc_linkid = “ff5cd230c93f3672415cf053efc4eba8”; //z-na.amazon-adsystem.com/widgets/onejs?MarketPlace=US amzn_assoc_tracking_id = “grill-site-20”; amzn_assoc_ad_mode = “manual”; amzn_assoc_ad_type = “smart”; amzn_assoc_marketplace = “amazon”; amzn_assoc_region = “US”; amzn_assoc_design = “enhanced_links”; amzn_assoc_asins = “B07BL4MZDW”; amzn_assoc_placement = “adunit”; amzn_assoc_linkid = “c05848d211749f75041b32af9deb68dc”; //z-na.amazon-adsystem.com/widgets/onejs?MarketPlace=US amzn_assoc_tracking_id = “grill-site-20”; amzn_assoc_ad_mode = “manual”; amzn_assoc_ad_type = “smart”; amzn_assoc_marketplace = “amazon”; amzn_assoc_region = “US”; amzn_assoc_design = “enhanced_links”; amzn_assoc_asins = “B01M629DPC”; amzn_assoc_placement = “adunit”; amzn_assoc_linkid = “e51b1edd4f7426a3bf3b123163c00b20”; //z-na.amazon-adsystem.com/widgets/onejs?MarketPlace=US amzn_assoc_tracking_id = “grill-site-20”; amzn_assoc_ad_mode = “manual”; amzn_assoc_ad_type = “smart”; amzn_assoc_marketplace = “amazon”; amzn_assoc_region = “US”; amzn_assoc_design = “enhanced_links”; amzn_assoc_asins = “B07KGH83PD”; amzn_assoc_placement = “adunit”; amzn_assoc_linkid = “c9af9bc98789d64e07b418a9e60f792b”; //z-na.amazon-adsystem.com/widgets/onejs?MarketPlace=US amzn_assoc_tracking_id = “grill-site-20”; amzn_assoc_ad_mode = “manual”; amzn_assoc_ad_type = “smart”; amzn_assoc_marketplace = “amazon”; amzn_assoc_region = “US”; amzn_assoc_design = “enhanced_links”; amzn_assoc_asins = “B01IS098VA”; amzn_assoc_placement = “adunit”; amzn_assoc_linkid = “062e99cd1f8a6c50ecae701d054246e7”; //z-na.amazon-adsystem.com/widgets/onejs?MarketPlace=US

More Traeger Accessories

Are you looking for ideas for more Traeger accessories beyond just the best cooking surfaces to add? How about cookbooks, rubs & spices, or grill add-on parts? Check out these links…

Traeger Rubs & Spices
Traeger Cookbooks

//z-na.amazon-adsystem.com/widgets/onejs?MarketPlace=US&adInstanceId=30ea2e95-9a18-495d-a1ee-c80c778058ad

Best Outdoor Pizza Ovens for Every Budget in 2021

Everybody loves pizza and there’s nothing like making your own pie at home, that’s why so many people are adding pizza ovens to their outdoor kitchens. Wanna cook a Neapolitan style pizza in 90 seconds? You can do that when your outdoor pizza oven can heat up to 900 degrees Fahrenheit like the pizza ovens on this page can do. But you can also cook a lot more than just pizza in these backyard oven – crispy coal-fired chicken wings, seared steaks, succulent veggies, amazing homemade breads, and more – an entire universe of delectable delights await you. If you’re in the market for a pizza oven, this article is for you – we’ll discuss the best outdoor pizza ovens for every budget and help you get your own pizzeria set up in no time.


[lwptoc]

best outdoor pizza ovens

Best Pizza Ovens – Top Picks

If you are in a hurry and only want to know our top picks without reading the article, here’s a quick summary…

Best Pizza Ovens – Best Overall

#1 Overall SMALLOoni Pro Outdoor Pizza Oven (Wood & Gas Model)

Ooni Pro

#1 Overall LARGEChicago Brick Oven 750

Chicago Brick Oven 750

Best Pizza Ovens by Budget

Best Pizza Ovens by Purpose


best pizza ovens

How to Shop for an Outdoor Pizza Oven – Questions to Consider

Before you go shopping for an outdoor pizza oven, please do yourself a favor and answer a few questions. The following questions will help you narrow down your choices and pick the pizza oven that’s best for your family’s needs.

1 – What SIZE pizza oven are you looking for?

You’ll find outdoor pizza ovens now come in all shapes and sizes – from small portable pizza ovens that help you cook one pie at a time to some pretty massive brick ovens that will have you cranking out pizzas so fast you’ll need to apply for a pizzeria business license!

SpaceSaver Pizza Ovens

If space IS an issue, choose one of these models:

Ooni Pizza Ovens
RoccBox
Pizzacraft PC6000

Full Size Pizza Ovens

If space is NOT an issue and you want to create a professional style wood fired oven or even a real brick oven in your backyard, then choose one of these models:

pizza oven
IlFornino Pizza Ovens Main Page
Chicago Brick Oven Main Page

2 – What FUEL do you want to use?

WOOD ONLY Pizza Ovens

Are you looking for a traditional wood-fired pizza oven that can cook pizzas with a wood fuel source like lump charcoal, wood chucks, wood logs, or wood pellets? Here are our picks for the best wood-fired pizza ovens that ONLY use WOOD fuel sources…

pizza oven
IlFornino Professional
Ooni 3
CBO 750

GAS Only Pizza Ovens

So you want the speed and convenience of a gas-fired pizza oven? Here are our picks for the best propane pizza ovens that ONLY use gas as a fuel source…

Ooni Pizza Ovens
Camp Chef Italia
Pizzacraft PC6000

MULTI FUEL Pizza Ovens

Do you want a pizza oven that can use wood AND gas fuel sources? If you want the best of both worlds so you can cook with both wood and gas, pick up one of these pizza ovens…

Ooni Pro
RoccBox
CBO 750 Hybrid Fuel

3 – How Much Do You Want to Spend?

You don’t have to spend a fortune to make great pizzas at home. Then again, if you have the budget and you want to go big, it’s great to know that you have options. Whatever your desires, we can help you decide on the best outdoor pizza oven for YOUR budget…

Best Pizza Ovens – Under $500

Ooni 3
RoccBox
Camp Chef Italia

Best Pizza Ovens – Under $1000

Ooni Pro
IlFornino Piccolino

Best Pizza Ovens – Over $1000

CBO 750
pizza oven
IlFornino Professional
IlFornino Platinum Plus

best pizza oven

Best Pizza Ovens – How We Picked

At Lord of the Grills, we are actual consumers and we work hard to provide our readers with well-thought out recommendations based on careful consideration of potential customers needs and our own experiences.

We’re also smart enough to realize that we don’t know it all. As a result, we often include references from other quality websites that will allow you to do further research to validate our recommendations and help you make the best decision. Here are some other articles we found helpful.


ooni pro pizza oven

Best Pizza Ovens – More about our Top 2 Picks

Pick any pizza oven from our list above and you’ll likely be very happy. Our recommendations are provided to help you find the best pizza oven for YOUR situation – whether that be a small, portable model or a larger brick oven in your back yard. It’s wonderful to have so many choices for outdoor pizza ovens and we hope we’ve helped you narrow down the best pizza oven for your needs.

All that being said, we DO believe there are a couple pizza ovens that really stand out from the crowd and if you’re serious about getting the best outdoor pizza ovens, you’ll surely need to include these on your shopping list…

#1 Overall LARGE: Chicago Brick Oven 750

Chicago Brick Oven

Chicago Brick Oven features:

  • MADE IN THE USA:
  • PROPRIETARY DESIGN: CBO’s proprietary low-dome design, flue system and refractory materials create their signature FlameRoll, which generates temperatures as high as 1,000°F!
  • BUILT TO LAST: an investment to your outdoor entertainment space.
  • DURABILITY: reinforced with stainless steel fibers to ensure long-term strength and durability.
  • INCOMPARABLE FLAVOR: Everything tastes better when it’s wood-fired.

See the Chicago Brick Oven in action

#1 Overall SMALL: Ooni Pro Outdoor Pizza Oven

Ooni Pro
  • HOT: Heats up to 932ºF and can cook delicious pizza in just 60 seconds
  • FLEXIBLE: Ooni Pro runs on wood, charcoal, pellets and gas (with attachment).
  • Versatile: Ooni Pro is perfect for cooking 16” pizzas as well as roasting meat, fish and vegetable dishes in minutes
  • High heats: the insulated steel body and stone baking board mean optimum heat retention

See the Ooni Pro in action


Pizza Accessories, Anyone?

Once you get the pizza oven, you’ll want some accessories to go with it. We’ve got you covered there too. Check out this page with a full list of Pizza Accessories too…

Click the pic to see pizza accessories

Best Pizza Cookbooks

If you’re gonna get into the outdoor pizza lifestyle, you should do yourself a favor and get 1 or more cookbooks about pizza, wood-fired cooking, etc. Here’s a link to 4+ star rated pizza cookbooks…

How to Cook Chicken on your Big Green Egg – 5 Delicious Kamado Chicken Recipes

There’s nothing like cooking chicken in the Big Green Egg, Kamado Joe, or similar kamado-style grill. In this article, we’ll give you 5 different chicken video recipes to try in your kamado. Given any of them a try and become a grilling champ – whether that be in your neighborhood cooking challenge or just your family backyard.

All of the video recipes on this page have over 100k views on YouTube so you can be assured they are tried and true. Let us know which ones you try and if you have any tips to share too.


[lwptoc]

Kamado Chicken Recipes

Recipe #1 – Kamado Smoked Chicken Wings

Let’s start with something easy – smoking wings on your Big Green Egg is a snap. This video from Eric C on YouTube is very helpful – it’s got over 1,000 likes on YouTube. What I love about the vid is that Eric is not necessarily a professional cook – he’s just an Average Joe like the rest of us and yet his video is full of great tips about how to smoke BBQ Wings on your Big Green Egg. Check it out.

Smoked Chicken Wing Recipe

Did you know – Eric has his own cookbook on Amazon – Recipes for Duck Lovers.


Recipe #2 – Kamado Rotisserie Chicken Recipe

If you haven’t done a rotisserie chicken on your kamado, what are you waiting for? Not only is it fun to do, but cooking a rotisserie on your kamado is perhaps the juiciest way of making chicken in your Big Green Egg. The next vid is from Kamado Joe – makers of the world-famous “JoeTisserie” rotisserie attachment – an essential kamado grilling accessory that fits the Kamado Joe, Big Green Egg, and more.

Kamado Rotisserie Chicken Recipe

If you don’t have a JoeTisserie rotisserie attachment yet for your Big Green Egg, you can get one here…

amzn_assoc_tracking_id = “grill-site-20”; amzn_assoc_ad_mode = “manual”; amzn_assoc_ad_type = “smart”; amzn_assoc_marketplace = “amazon”; amzn_assoc_region = “US”; amzn_assoc_design = “enhanced_links”; amzn_assoc_asins = “B01CCHXXHA”; amzn_assoc_placement = “adunit”; amzn_assoc_linkid = “9cfa28eaf96df523cdd6ff1b8aa2c64a”;

TIP: Be sure to get the right SIZE for your egg, the Classic should fit the BGE LARGE, and the Big Joe size fits the BGE XL.


Recipe #3 – Brick Chicken aka Spatchcock Chicken Recipe

There’s a fellow named Malcom Reed on YouTube who runs a channel called “HowtoBBQRight” – if you have have a Big Green Egg or just like to BBQ, you need to be watching this guy – he’s got LOADS of great content on his channel and his related website. One of my fav recipes of his is this one – Malcom’s “Brick Chicken” Recipe is a twist on the standard spatchcock chicken recipe. Watch it and see what you think…

Brick Chicken Recipe

As Malcom says, “All you need is a fresh chicken, a couple bricks, and some basic ingredients to create a delicious tasting bird right on your grill.”

Do you need a good knife to slice meat and/or cut through smaller chicken bones? Check out these options…

Did you know?

Spatchcocking chicken on a Big Green Egg is super popular. Here are 2 more vids on this cooking technique that both have over 500 likes on YouTube.

The Backyard BBQ Show

Chips & Charcoal


Recipe #4 – Beer Can Chicken on the Big Green Egg

The recipe with the highest view count on YouTube on our list today is this one. It comes to us from FlamingRoosterBBQ’s channel and it features end-to-end instructions for cooking Beer Can Chicken on your kamado.

Beer Can Chicken Recipe

FlamingRoosterBBQ has the full recipe with text instructions on their website and you can find that here.

Amazon has a wide selection of beer can chicken holders, one of the highest rated, most popular beer can chicken holder is this one by Chef Steve Raichlen…

amzn_assoc_tracking_id = “grill-site-20”; amzn_assoc_ad_mode = “manual”; amzn_assoc_ad_type = “smart”; amzn_assoc_marketplace = “amazon”; amzn_assoc_region = “US”; amzn_assoc_design = “enhanced_links”; amzn_assoc_asins = “B0007ZGUK2”; amzn_assoc_placement = “adunit”; amzn_assoc_linkid = “011d6f455b4cbc67b10c762e8466717d”;

Recipe #5 – Firecracker Chicken on the Big Green Egg

Malcom Reed scores another on the charts today as his Firecracker Chicken recipe is approaching 3,000 likes on YouTube! As he says ” I use a whole chicken cut into 8 pieces (wings, breast, legs, & thighs). I like having both white and dark meat, but’s you can just use the pieces you like” when you make this chicken recipe.

Firecracker Chicken Recipe

Ideas for Big Green Egg Accessories?

If you’re like me, you’re always on the lookout for more recipes to try in your Big Green Egg and more accessories to buy. Hopefully the chicken recipes on this page will keep you busy for while – be sure to let us know which ones you tried. And if there are recipes YOU have to share, send them our way – we’ll be happy to feature you as the source and send you a shout out.

Meanwhile, I love to shop for more accessories for my kamado and if that sounds like you, check out this page for some ideas…

Big Green Egg Best Accessories

How to Cook Wood Fired Wings

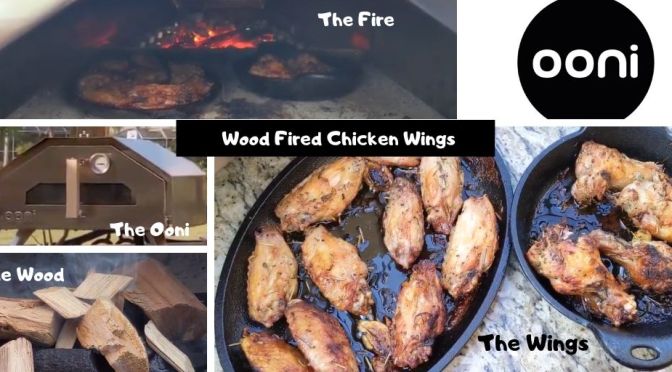
Wanna cook some wood-fired wings? Trying to find the recipe for making Anthony’s Coal Fired Wings? I’ve got you covered. Today we’ll be cooking wood fired chicken wings using a combo of lump charcoal and wood chunks – I’ll show it to you all in video form on this site and give you a link to get the full recipe with detailed cooking instructions from our grilling site if you want to do this cook yourself.

As you’ll see in the vid, I’ll be making my wood fired wings in an Ooni Pro Pizza Oven, but you can use this recipe for any brick oven, kamado, or even your regular oven. Grab a beer and let’s cook wood fired chicken wings!

Wood Fired Chicken Wings

Wood Fired Wings Cooking Notes

For the full recipe that I used in the video along with detailed cooking instructions please visit my grilling site: LordoftheGrills.com

About this recipe: This recipe is a 3-step process

  1. The marinade (6-24 hours)
  2. Cooking the Wings (20-30 minutes)
  3. Making the caramelized onions. (20-30 minutes cooked at same time as wings)

Actually there is a 4th step – EATING the wings!!

Again for the full recipe with detailed cooking instructions visit my grilling site: LordoftheGrills.com


About the Products used:

I used Costco Party wings and the other spices & fresh ingredients noted in the recipe on this page: https://lordofthegrills.com/wood-fire…

Meanwhile, here are all the cooking products mentioned or shown in this vid


Wood Fired Wings – The Result

wood fired wings

The result: I felt pretty good about this cook – the process was easy, my family loved the flavor, and I believe I can repeat this cook again and again with ease.

If you try this cook, let me know how it turns out. As always, please remember, I’m just an Average Joe so if you have any tips to share, I’d love to hear them so I can learn too.

Cheers!


Did You Know?

If you enjoy reading That Helpful Dad’s articles, you may also like…

Wood Fired Chicken Wings Recipe | Anthony’s Coal Fired Wings Style

Today we’ll be cooking some wood fired chicken wings using a combo of lump charcoal and wood chunks. I’ll show you how to cook wood fired wings in an Ooni Pro Pizza Oven, but you can use this recipe for any brick oven, kamado, or even your regular oven. Grab a beer and let’s cook wood fired wings!

Wood Fired Chicken Wings
Wood Fired Wings in an Ooni Pro

[lwptoc]

Wood Fired Chicken Wings – The Video


Wood Fired Chicken Wings – The Recipe

You can use whatever chicken wings you like (I’m using Costco’s Party Wings in the vid) and you can cook your wood fired wings with any recipe flavor you like, but our recipe today features a flavor style of wings made popular by the restaurant Anthony’s Coal Fired Pizza which is…

Rosemary Garlic Wings with Caramelized Onions

This recipe ideally uses a 3-Step Process

  1. Marinate Wings 6-24 hours
  2. Cook the Chicken Wings
  3. Prepare the Caramelized Onions

I suppose the only ‘required’ step is #2 (cook the wings) and obviously if you are using a different flavor style than the Rosemary Garlic + Onions that would change Steps 1 & 2.

There are many versions of Anthony’s Coal Fired Wings online, here’s one I like best from Copykat.com and my recipe is a version of it. Thanks, @CopyKatRecipes!

Step 1: The Marinade

Ingredients for Marinade

Use the following marinade PER POUND of wings…

Remember – these ingredients are PER POUND of wings so if you have more than 1 pound, increase the ingredients accordingly.

To make the marinade simply put all these ingredients in a small bowl and mix them up, or just toss it all in a gallon-size Ziploc bag and mix them in there.

Once the marinade is done, put your wings in the ziploc bag too, seal the bag, and then mix the wings around to get them coated with the marinade.

Once the wings are good and coated then put them in the fridge in that ziploc bag and let the marinade do it’s magic.

If you can leave the wings in for 24 hours that’s great, but if you’re in a pinch, any amount of time is better than nothing. In the recipe video I have here, I marinated my wings for 6 hours and they still came out with great flavor. Here’s what my wings looked like after I took them out of the fridge…(and BEFORE the cook)

Rosemary & Garlic Marinated Wings

Step 2: The Cook

DISCLAIMER – it should go without saying that you need to be careful when cooking on any grill and that’s true here too. PLEASE USE HAND PROTECTION. If you buy an Ooni, they’ll often throw in a pair of their Ooni Pizza Oven Gloves but there are many other good options too and even a pair of welding gloves would work great.

As I mentioned at the start, and as shown in the vid, I’m cooking my wood fired chicken wings on an Ooni Pro. I love my Ooni and I give it my full, honest endorsement that it’s an awesome addition to my outdoor kitchen.

Ooni Pro

That said, you can make this recipe in another outdoor oven like a brick oven or a kamado, or you can just do in in your regular oven too, but if you want that ‘coal-fired’ flavor try to use a wood-fired oven if you can.

After you have completed Step 1 – The Marinade, now it’s time to take the wings out of the fridge – I’d recommend you do this about 1 hour in advance of the cook. When you take them out of the fridge go ahead and throw a light coating of salt on them. If you don’t know about the amazing benefits of salt, you really need to read the book Salt, Fat, Acid, Heat (the Salt section alone will change your cooking life). For this part of the salt process, my friends and I like using Maldon Sea Salt flakes (the larger size will add a bit of crunch to the crisp on your finished wings).

Now for the cook itself…

The Fuel – a combo of lump charcoal + wood chunks
  • Start your wood-fired oven
    • For the Ooni Pro, I used a combo of lump charcoal for the base and then added wood chunks to increase the fire.
      • For the lump charcoal, like the Western Brand from Walmart of Kamado Joe Big Block
      • For the wood, I like the Weber Wood Chunks (in this case Apple & Hickory; Weber’s bag is a great price) or the Smoak Kiln Dried Cooking Wood (which is especially good for wood-fired pizza, but a bit more expensive). When you add wood, be sure to let any ‘white billowing smoke’ dissipate before you add your wings so you don’t over smoke them. Remember, this recipe is ‘wood-fired’ NOT smoked wings – if you want to cook smoked wings, a kamado or regular smoker would be better than a pizza oven, but that’s a whole different story. .
  • Preheat the pan (if you are using cast-iron)
    • For my cast-iron, I’m always a fan of Lodge Cast Iron (then again I am from Pennsylvania originally so perhaps I’m biased). In this video, I used a Lodge Serving Griddle and Lodge 14-Ounce Serving Dish
    • My next purchase though will be the Ooni Sizzler and Ooni Grizzler pan because the are cast iron pans that have removable handles (read: so you don’t burn your hands)!
    • Take the pan out after about 10 minutes and let it cool for a minute or so. Then put your wings on the pans (but not into the oven yet).
  • Get the oven temp up to 500-600 degrees
    • (On the Ooni Pro this should take about 15 minutes or so, with the main oven door ON).
    • If you are doing the Anthony’s Coal Fired Wings recipe, then WHILE YOU ARE GETTING OVEN UP TO TEMP, START STEP 3 – Caramelizing Onions (see Step 3 Below)
  • Now go ahead and put your wings into the oven
    • (On the Ooni Pro, keep the main oven door ON)
    • (On the Ooni Pro, I keep my wings near the front door and away from the main heat in the back so they will bake and not burn).
  • Let the wings cook on 1 side for about 10 minutes
    • If you have not already cracked open a beer, now is the time.
  • After 10 minutes take the wings out of the oven, flip them over, then put them back in for another 10 minutes or until you reach your desired temperature (165F or 75C is my goal).
    • (On the Ooni Pro, keep the main oven door ON)
    • (On the Ooni Pro, I still keep the wings near the front door)
    • (On the Oon Pro, you may need to add more wood to keep the temp at 500+, do so now).
  • After 20 minutes your wings should be at 165F/75C and crispy enough for most people. You can take them out of the oven and eat them now or if you are doing the Anthony’s Coal Fired Wings recipe add the onions you’ve had cooking (from Step 3 below).
    • Personally, I like my wings ‘well done’ so I put them back into the oven for another 5-10 minutes
    • (On the Ooni Pro, the coals & flames should be starting to die down so now I’ll move the wings to the rear of the oven so they can really crisp up without burning. I’ll also leave the main door OFF on the Ooni Pro for this step so I can monitor and make sure they are not burning.
  • Once you have the wings where you like from an internal temp (165F/75C) and skin crispiness standpoint, you can take them out of the oven and eat them now or if you are doing the Anthony’s Coal Fired Wings recipe add the onions you cooked from Step 3 (below)

Here’s what your wings should look like…

Wood Fired Chicken Wings
Wood Fired Wings 🙂

STEP 3: The Onions

This step is only for those who are doing the Anthony’s Coal Fired Wings recipe and want to add Caramelized Onions on top.

**YOU SHOULD BE DOING THIS WHILE YOUR WINGS ARE COOKING. I like to do this step while my oven is preheating.

Ingredients for Caramelized Onions

Use the following ingredients PER POUND of wings…

How I made caramelized onions in the video…

  • While slicing the onions, heat your EVOO In a small sauté pan over medium heat.
  • Add onions, salt and pepper.
  • Cook the onions over low heat for 20-30 minutes
  • You’ll know their done when the onions are golden brown.
  • Your onions should be done (aka. “caramelized”) by the time your wings are done, and if so, you can simply add your onions over the top of your wings after you plate the wings on your serving dish.
  • Garnish with a little fresh parsley and you’ve got a winner!

You can see my finished wings below in “The Results” section…


Wood Fired Wings – Results

Well, let’s see how our cook came out vs the goal (Anthony’s Coal Fired Wings)…

Here’s a pic of the real deal from Anthony’s.

Anthony’s Coal Fired Chicken Wings

Here’s how my version came out…

Mike’s Wood Fired Wings

While there may be no substitute for the original from Anthony’s, I felt pretty good about this cook – the process was easy, my family loved the flavor, and I believe I can repeat this cook again and again with ease.


YOUR Ideas – Recipe Tips, What to Cook Next, etc

If you’ve tried this recipe, let me know how it turned out in the comments.

If you have an Ooni Pro or another wood fired oven and you like it, please share your tips and feedback.

If you want an easy way to find our grilling accessories to buy on Amazon, check out the Lord of the Grills shopping portal.

Until next time, keep grillin’.

~Mike

Best Product Alert – Dalstrong Knives Review

Dalstrong Knives? If you’ve shopped for knives online then you’ve seen the advertising for Dalstrong on Amazon and elsewhere. Yes the ads are compelling, but are Dalstrong knives any good? In this article I’ll share a Dalstrong Knife Review in the form of my personal experience with these knives and explain why I give them a big THUMBS UP! I’ll also share a link to the Dalstrong VIP Club where you can get alerts to unadvertised special deals.


Why did I buy a Dalstrong Knife?

I’ve been in the market for some good knives for years but could never pull the trigger (mostly because the sets I had on my wishlist from WÜSTHOF, Zwilling, and Shun are so darn expensive). Because of their advertising and consistently high ratings, my friends and I have been watching the Dalstrong knives for a few years and after some additional research (and a great sale from Dalstrong), I finally decided to pull the trigger – buying the Dalstrong Knife Block Set you see in the pic along with a couple other knives noted below.

After my cooking buddies and I tried them out, we all came away with the same opinion…

Wow – Dalstrong knives are incredible – sharp, durable, high quality, and great in appearance!

Although I always tell my readers I’m just an Average Joe, I sure do feel like a chef when I’m using a Dalstrong knife!


Which Dalstrong Knives Should You Buy First?

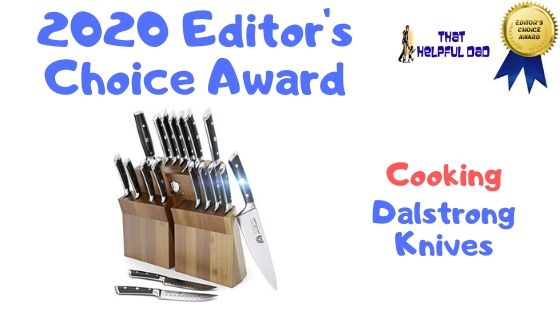
If you’re like I was and need a full set of knives then I highly recommend the Dalstrong Knife Block Set because it pretty much has everything you need from a kitchen knife perspective. This includes:

(1)Carving/Slicer (9″), (1)Bread Knife (9″), (1)Kiritsuke Chef Knife (8.5″), (1)Chef Knife (8″), (1)Santoku Knife (7″), (1)Nakiri Knife (7″), (1)Boning Knife (6″), (1)Utility Knife (6.5″), (1) Serrated Utility Knife (6″), (6) Straight Edge Steak Knives (5″), (1) Paring Knife (3.5″), (1)Bird’s Beak Paring Knife (2.75″), (1)Gladiator Series Honing Steel (10″), and (1)Handmade Walnut Wood Block as shown here…

IMPORTANT NOTE: By itself the set is a fantastic value but the fact that it also includes a set of SIX Steak Knives makes it even more valuable. If you like steak knives that have a great weight/feel in your hand, you’ll love the Dalstrong Steak Knives. Not only are they hefty but they also include granton edges for smooth slicing through any meat on your plate.

On top of that the knife block itself is a work of art and looks fantastic in your kitchen!

What if I Don’t Need the Full Set?

If you don’t need a full set, you can get any of the knives individually but be sure to pick up a just a set of streak knives because they are that awesome and everyone I know who’s bought them has loved them.

Other Dalstrong knives I recommend include…

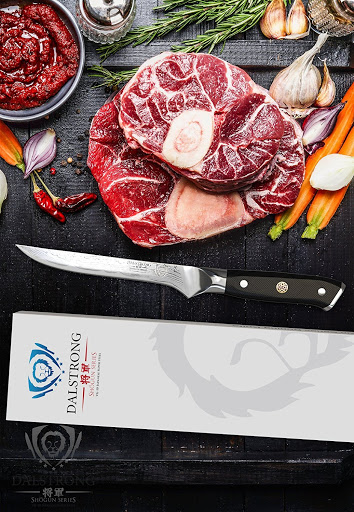
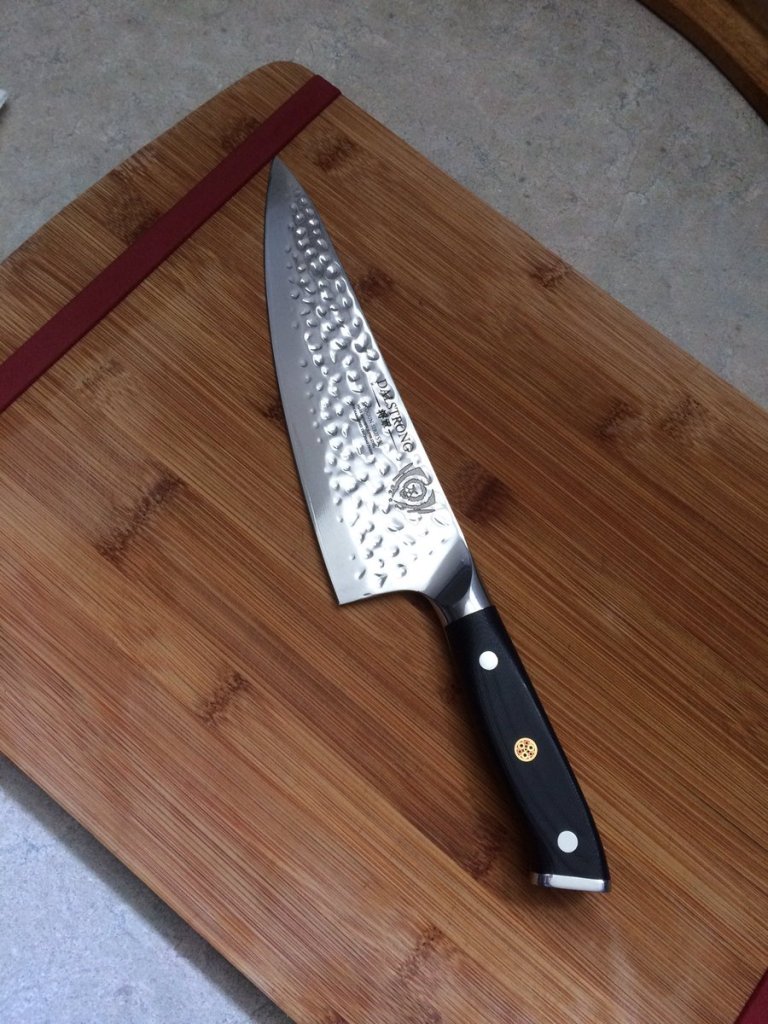
The 6″ Shogun Filet Knife, the incredibly useful 3″ Bird’s Beak Paring Knife, the 4.5″ Mini Cleaver (great for cheese tray party displays), the 6″ Shogun Chef’s Knife (my #1 favorite all-time knife!), and if you wanna be like Salt Bae pick up a 10″ Butcher’s Breaking Cimitar!

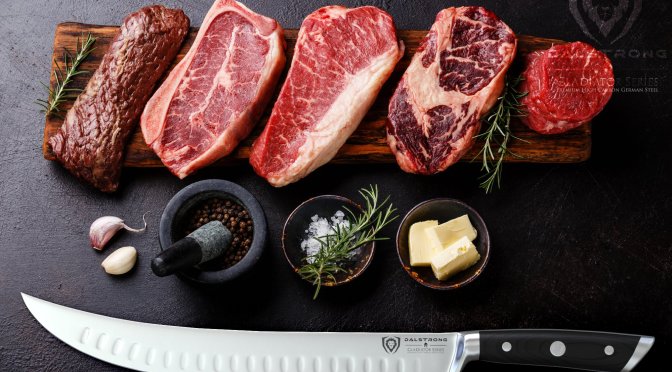
Here’s a little showcase for you…


QUICK TIP – Sign Up for Dalstrong Sales

Dalstrong’s Marketing Machine often runs special sales – including some amazing unadvertised sales that provide 25%, 50% off or more!

You can find out about these sales by signing up for the free Dalstrong VIP email club

Dalstrong
Click Here to Join the Dalstrong VIP Club

What about the Different Styles of Dalstrong Knives?

Dalstrong makes quite a number of different knife styles – they have them classified by ‘series’. These include the following:

My friends and I use the Gladiator Series for our everyday cutting needs and have a few Shogun blades for special occasions.


Any Cool Dalstrong Accessories to Consider?

Dalstrong has a number of knife maintenance items and accessories, here are three of my favorites…

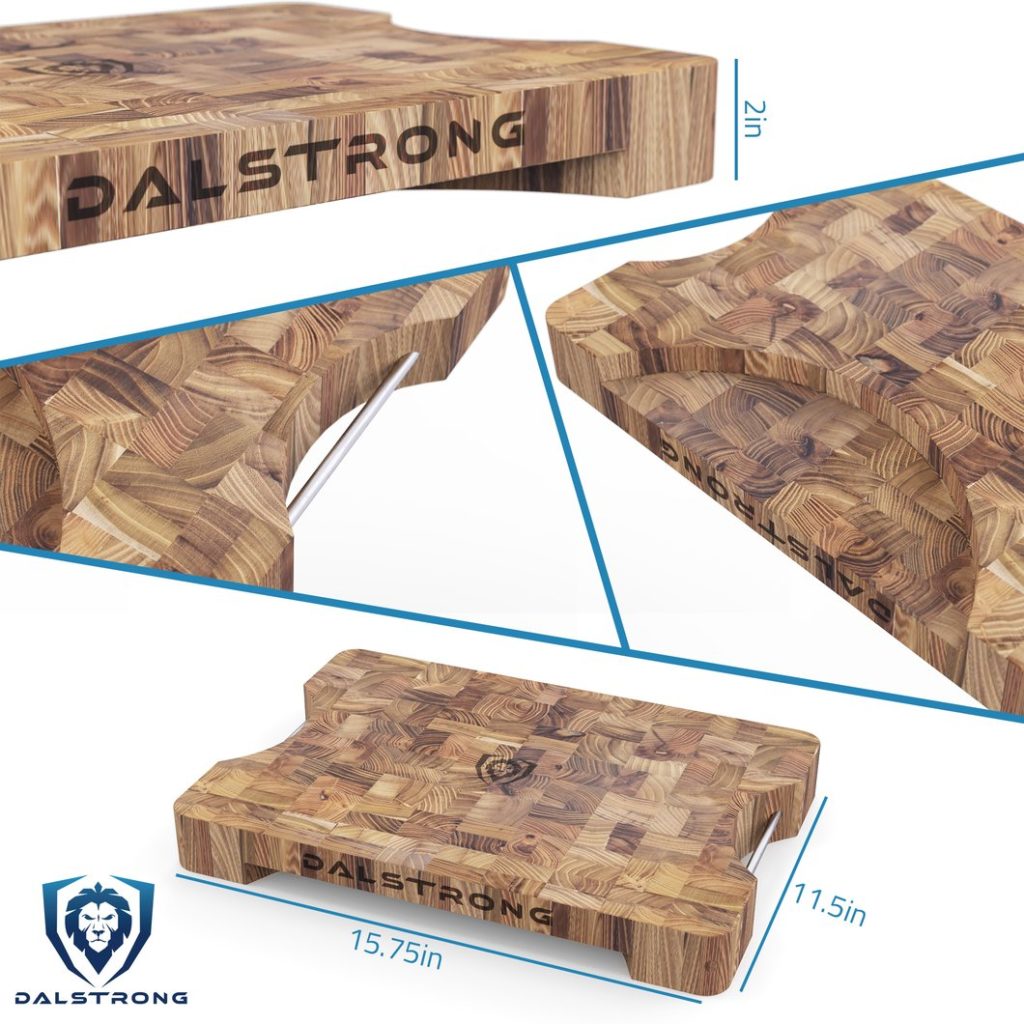
Teak Cutting Board
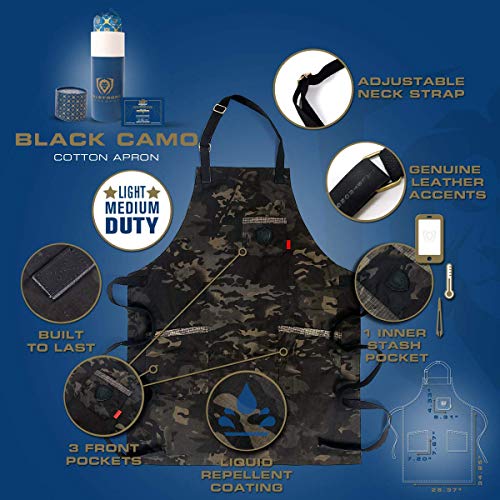
1 of many apron styles
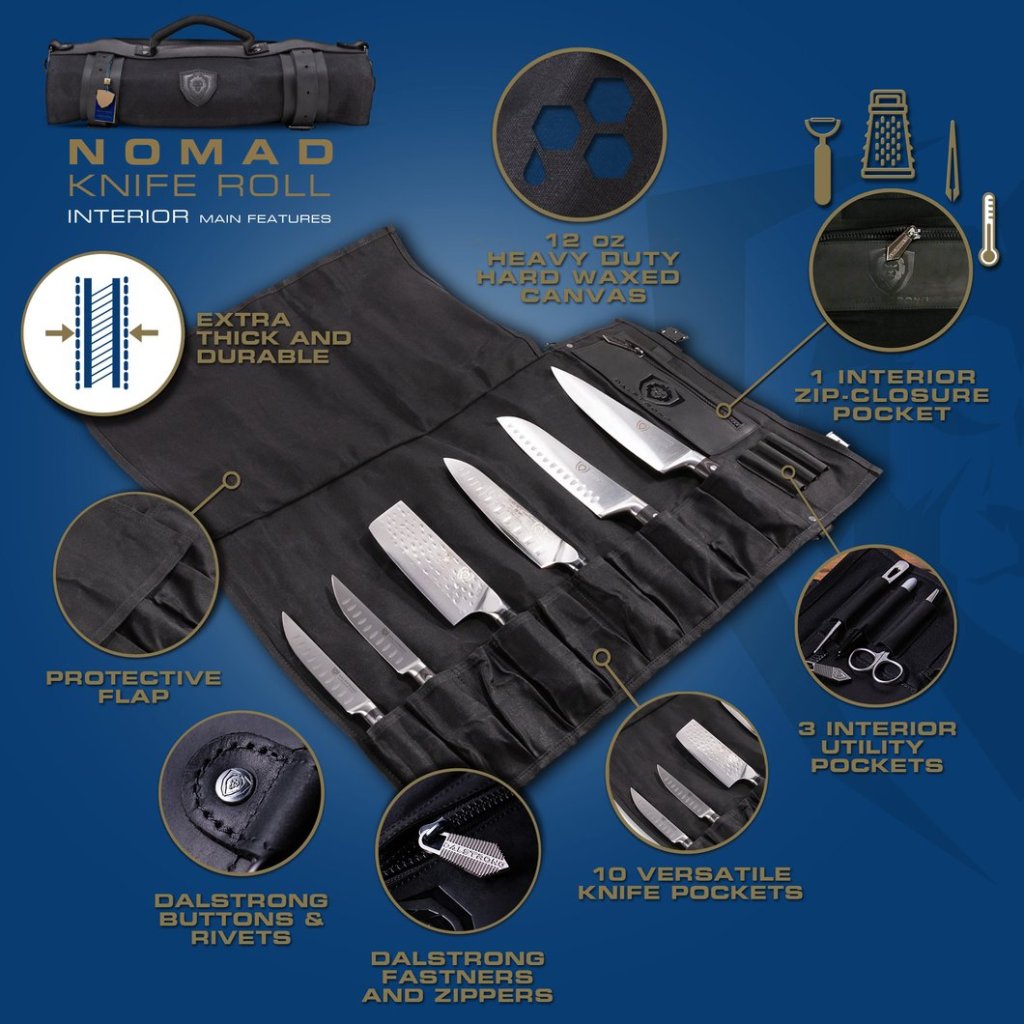
Knife Roll

Dalstrong Knives Review – The Bottom Line

Believe the hype – Dalstrong Knives live up to every expectation we have of them – they are strong, sharp, and beautiful to work with. Buy one or more Dalstrong knives today and you won’t regret it.


Did You Know?

If you enjoy reading That Helpful Dad’s articles, you may also like…


What to Read Next
Kamado Joe III Review – Editor’s Choice Award

Readers of this blog know I’m a Kamado Joe fan and we’ve talked about how awesome the Kamado Joe grill is in numerous prior articles.

Today I’m thrilled to be able to talk to you about the all new Kamado Joe III – a product which has earned the Helpful Dad Editor’s Choice Award.

In this article, we’ll take a look at the Kamado Joe III, I’ll provide you links to learn more, we’ll check latest prices, and talk about whether you should upgrade if you already have a kamado grill. Sound good? Let’s go!


Meet the Kamado Joe III

In 2019, the Kamado Joe company introduced the Kamado Joe III. Here’s Kamado Joe’s intro vid…

Although the vid only features the Classic and Big Joe models, the Kamado Joe III will eventually come in three sizes: the Classic III, the Big Joe III, and the new Pro Joe.

Here’s what they look like. You can also check latest prices…

Kamado Joe Classic III

Kamado Joe Big Joe III

Kamado Joe Pro Joe

So what, you say? Big deal? Why should you care?

Because the Kamado Joe III is a game changer.


What’s new with the Kamado Joe III?

As usual, Kamado Joe continues to innovate. The company that brought you the Divide and Conquer flexible cooking system, the JoeTisserie rotisserie, the pizza DoJoe, the safer air-lift hinge, the temperature controlling iKamand, a wide variety of easy to use cooking inserts, and so many more new products, has now introduced the SloRoller Hyperbolic Smoke Chamber

Wait, what?

The SloRoller Hyperbolic Smoke Chamber is a bit of a mouthful so let’s just call it the SloRoller.

OK, so what is it?

The SloRoller is “the first of its kind, the revolutionary SlōRoller leverages patented, Harvard science that transforms a Kamado Joe® into one of the world’s most optimal smokers.”

Blah, blah, blah. So what does that mean?

Kamado Joe says the benefit of the SloRoller is “by distributing smoke and heat in rolling, recirculating waves, the SlōRoller surrounds food in clouds of delicious smoke while evenly distributing heat—resulting in enhanced flavor and significantly reduced hot spots.”

The SloRoller is ideal for low and slow bbq cooking – think Franklin Barbeque, Big Bob Gibson, or your own backyard.

Let’s learn more about the SloRoller…

Pretty cool, huh?

I’m down for fewer hot spots and better flavor, how about you?


Kamado Joe III – Full Review

If you’re a regular reader of this blog, you know that our Kamado Joe articles have become so popular that we’ve started a new website called LordoftheGrills.com. We’ve published a full review of the Kamado Joe III and encourage you to read it. Click the following pic to read more about the Kamado Joe III, see the specs, get comparisons of the Kamado Joe III vs the Kamado Joe II, the Kamado Joe III vs the Big Green Egg, see everything that the Kamado Joe III comes with, and learn even more about the SloRoller….


What can you do with the Kamado Joe III?

There’s no better way to judge the new Kamado Joe III then to see it ‘in action.”

For that we turn to legendary Kamado Joe Chef John Setzler. John has already been busy experimenting with the Kamado Joe III – let’s see some of his latest cooks on this new grill…

Those are just a few examples. YouTube is filled with other cooks featuring the Kamado Joe III’s SloRoller.


Links to learn more

That said, if you’re like me, you probably like to read reviews from multiple trusted sources. This product is still quite new so there’s not a lot of reviews out there, in addition to our full review at LordoftheGrills, here are a few we found helpful…


So, should you upgrade to the Kamado Joe III?

As I wrote about on my expert review of the Kamado Joe III on the LordoftheGrills.com site, the question of whether to upgrade to the Kamado Joe III is interesting.

If you already have a kamado like the Kamado Joe Classic II or the Big Green Egg, you might not want to upgrade because you could buy the SloRoller insert (once it goes on sale), however even Kamado Joe says that using the insert with an older kamado may not get you the full performance that the SloRoller is designed for.

Why? Because the new Kamado Joe III is actually a larger kamado. In fact, the Kamado Joe Classic III is nearly 3 inches taller than the Kamado Joe Classic II and the Kamado Joe Big Joe III is over 4 inches taller than the Kamado Joe Big Joe II.

The reason the Kamado Joe III models are different goes back to that Harvard Science – the larger chamber is designed to take full advantage of the SloRoller by providing a ‘hyperbolic smoke chamber.’ Here’s what the science looks like…

If you use your kamado to do a lot of low and slow bbq cooking, then you’ll really benefit from the Kamado Joe III being specifically designed for the SloRoller Smoke Chamber.

Because the Kamado Joe III is so revolutionary, I am recommending that if you have the funds and you want the best kamado on the market today, then you should buy the Kamado Joe III.

And when you do send me a pic of all the great food you’re cooking – no better yet invite me over for a brew and some wings!

What are YOUR thoughts?

Have you already cooked on the Kamado Joe III? Do you have plans to buy one? Or do you have a different opinion? Let me know what you think in the comments.

amzn_assoc_placement = “adunit0”; amzn_assoc_search_bar = “true”; amzn_assoc_tracking_id = “thathelpfulda-20”; amzn_assoc_search_bar_position = “bottom”; amzn_assoc_ad_mode = “search”; amzn_assoc_ad_type = “smart”; amzn_assoc_marketplace = “amazon”; amzn_assoc_region = “US”; amzn_assoc_title = “Shop Kamado Joe Products”; amzn_assoc_default_search_phrase = “Kamado Joe”; amzn_assoc_default_category = “LawnAndGarden”; amzn_assoc_linkid = “3ed97b559d840c0c9b59ab67d4c85a7b”; amzn_assoc_default_browse_node = “2972638011”; //z-na.amazon-adsystem.com/widgets/onejs?MarketPlace=US

What to Read Next

Best Accessories for your Kamado Joe
Best Chromebooks Review
Live a Legacy Life
How to Live a Legacy Life

Best Turmeric Supplement – Why I love this Organic Turmeric Powder

If you’re a believer in the health benefits of turmeric and looking for the best turmeric supplement, this article can help you. We’ll talk about what turmeric is, why turmeric is healthy, how to use turmeric for weight loss, I’ll give you 3 recipes for Turmeric Smoothies, and recommend what I think is the best turmeric supplement.

If you’re in a hurry and just want to know which product I’m recommending that’s cool too. It’s FGO’s Raw Organic Turmeric Root Powder. Here’s a link to it on Amazon…

[amazon box = “B01CRXAYKS”]


Mike, That Helpful Dad

Editor’s Note: I’m Mike, AKA “That Helpful Dad” and this website is all about providing practical solutions to real life problems. I hope you enjoy today’s wisdom – if you do be sure to visit my home page and sign up for my free weekly emails. You can also follow me on YouTubeTwitterFacebook, and Pinterest. I’d love to hear from you so drop me a comment and let’s chat.


What is Turmeric?

WebMD provides us with a succinct and informative defintion for what is turmeric…

In the U.S., turmeric is best known as a spice. It’s one of the main components of curry powder. In India and other parts of Asia, turmeric is used to treat many health conditions. It is believed to have anti-inflammatory, antioxidant, and perhaps even anticancer properties.

WebMD

Why Add a Turmeric Supplement to Your Diet?

The health benefits of turmeric have been written about in detail by numerous trusted websites, including:

Potential Benefits of Turmeric

Turmeric is also believed to be good for helping with weight loss. Here are some articles on that too.


RECIPES: How I use Turmeric Supplements in my Diet

I’m not a complicated guy and I like to keep it simple. Personally I just use the Turmeric Supplement powder in my daily smoothies.

Here are 3 easy Turmeric Smoothie Recipes:

  1. Turmeric Shot – 1 TBSP FGO Turmeric Powder + 1 Oz Raw Honey + 1/3 Cup Almond Milk (I like Kirkland’s Organic Unsweetened Vanilla Almond Milk for this – you can get a 6 pack of it on Amazon or Costco for pretty cheap)
  2. Turmeric Berry Smoothie – 1 TBSP FGO Turmeric Powder + 1/4 cup Lifeway Original Kefir + 1 TB FGO Organic Acai Powder + 1 Oz Raw Honey + 1/4 cup fresh berries of your choice + 1-2 cups of Almond or Organic Whole Milk (your preference)
  3. Turmeric Peanut Butter Banana Smoothie – 1 TBSP FGO Turmeric Powder + 1 TSBP All Natural Peanut Butter (I like HomePlate’s Non-GMO Peanut Butter – it tastes awesome!) + 1 Organic Banana + 1/4 cup Lifeway Original Kefir + 1 Scoop Optimum Nutrition Whey Protein Powder (Double Chocolate flavor works great for this) + 1-2 cups of Almond or Organic Whole Milk (your preference)

If you have a turmeric smoothie recipe to share, please drop it in the comments below so I can try it too!


Why Do I Love FGO’s Turmeric Powder Supplement?

  • It’s 100% Raw;
  • It’s USDA-Certified Organic;
  • It actually tastes pretty mild (not overpowering) in my smoothies;
  • the amount you get is very reasonable for the price;
  • it comes with 100% money-back guarantee on Amazon;
  • I can add it to my Amazon Prime Subscribe & Save to save even more;
  • I’ve used other FGO products and have always been happy with their quality;

Pick up a packet of FGO’s Turmeric Powder today…

amzn_assoc_tracking_id = “thathelpfulda-20”; amzn_assoc_ad_mode = “manual”; amzn_assoc_ad_type = “smart”; amzn_assoc_marketplace = “amazon”; amzn_assoc_region = “US”; amzn_assoc_design = “enhanced_links”; amzn_assoc_asins = “B01CRXAYKS”; amzn_assoc_placement = “adunit”; amzn_assoc_linkid = “1b45539f0c3b3753cb008b37d7207733”; //z-na.amazon-adsystem.com/widgets/onejs?MarketPlace=US

Your Shopping List

In addition to the FGO Turmeric Root Powder, here are some quick links to the other products I talked about in this article:

amzn_assoc_tracking_id = “thathelpfulda-20”; amzn_assoc_ad_mode = “manual”; amzn_assoc_ad_type = “smart”; amzn_assoc_marketplace = “amazon”; amzn_assoc_region = “US”; amzn_assoc_design = “enhanced_links”; amzn_assoc_asins = “B07HL1NRGQ”; amzn_assoc_placement = “adunit”; amzn_assoc_linkid = “218a339fafef0064af2cfec109496ecc”; //z-na.amazon-adsystem.com/widgets/onejs?MarketPlace=US amzn_assoc_tracking_id = “thathelpfulda-20”; amzn_assoc_ad_mode = “manual”; amzn_assoc_ad_type = “smart”; amzn_assoc_marketplace = “amazon”; amzn_assoc_region = “US”; amzn_assoc_design = “enhanced_links”; amzn_assoc_asins = “B01BCCYJHE”; amzn_assoc_placement = “adunit”; amzn_assoc_linkid = “88714202e1f59447e2df1b5ecbb396c3”; //z-na.amazon-adsystem.com/widgets/onejs?MarketPlace=US amzn_assoc_tracking_id = “thathelpfulda-20”; amzn_assoc_ad_mode = “manual”; amzn_assoc_ad_type = “smart”; amzn_assoc_marketplace = “amazon”; amzn_assoc_region = “US”; amzn_assoc_design = “enhanced_links”; amzn_assoc_asins = “B07834YDRN”; amzn_assoc_placement = “adunit”; amzn_assoc_linkid = “679778e67a23224ece00f2fd227cb1dc”; //z-na.amazon-adsystem.com/widgets/onejs?MarketPlace=US amzn_assoc_tracking_id = “thathelpfulda-20”; amzn_assoc_ad_mode = “manual”; amzn_assoc_ad_type = “smart”; amzn_assoc_marketplace = “amazon”; amzn_assoc_region = “US”; amzn_assoc_design = “enhanced_links”; amzn_assoc_asins = “B00CMQD282”; amzn_assoc_placement = “adunit”; amzn_assoc_linkid = “a92d52b43ee04941a355ae34acbf6d14”; //z-na.amazon-adsystem.com/widgets/onejs?MarketPlace=US amzn_assoc_tracking_id = “thathelpfulda-20”; amzn_assoc_ad_mode = “manual”; amzn_assoc_ad_type = “smart”; amzn_assoc_marketplace = “amazon”; amzn_assoc_region = “US”; amzn_assoc_design = “enhanced_links”; amzn_assoc_asins = “B000QJ7CRE”; amzn_assoc_placement = “adunit”; amzn_assoc_linkid = “4292a8bcf427b0057eca3d904cc40a11”; //z-na.amazon-adsystem.com/widgets/onejs?MarketPlace=US amzn_assoc_tracking_id = “thathelpfulda-20”; amzn_assoc_ad_mode = “manual”; amzn_assoc_ad_type = “smart”; amzn_assoc_marketplace = “amazon”; amzn_assoc_region = “US”; amzn_assoc_design = “enhanced_links”; amzn_assoc_asins = “B000QSNYGI”; amzn_assoc_placement = “adunit”; amzn_assoc_linkid = “822b171f0d75a57bb3ae95c706ccc65b”; //z-na.amazon-adsystem.com/widgets/onejs?MarketPlace=US

Never Miss a Tip

Let’s stay in touch…


What to Read Next
Intermittent Fasting
Best Tents for Families