Tag Archives: grilling

LongHorn Steakhouse Parmesan Crusted Chicken Recipe

If you’ve ever sat down at a LongHorn Steakhouse and watched that golden, bubbling layer of cheese hit the table in front of you, you know the little thrill that comes right before the first bite. That parmesan crust is the reason half the tables in that restaurant order the same thing.

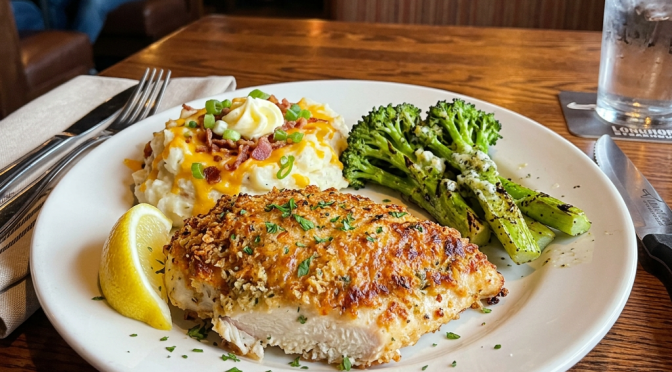
LongHorn Steakhouse’s Parmesan Crusted Chicken has been a menu staple for years, and it’s easy to see why — a juicy, marinated chicken breast gets topped with a melty parmesan-provolone blend and a garlicky, buttery panko crust, then run under the broiler until it’s golden and bubbling. It’s the kind of dish that feels like a restaurant treat but is honestly pretty simple to pull off in your own kitchen — no reservation, no wait for a table, and you can make it exactly as cheesy as you want.

This post may contain affiliate links. As an Amazon Associate I earn from qualifying purchases.

Why You’ll Love This Recipe

  • Tastes just like the original — the marinade and cheese-and-panko crust nail that same rich, savory flavor you remember from the restaurant.
  • Weeknight-friendly — from marinating to broiling, you’re looking at well under an hour of actual hands-on time.
  • Family-friendly — even picky eaters come around for melted cheese and crispy panko on top of chicken.
  • Flexible — sear it in a skillet, bake it, or throw it on the grill depending on what you’re in the mood for (or what the weather’s doing).

Ingredients

For the Chicken & Marinade

  • 4 boneless, skinless chicken breasts – pounded to an even 1/2-inch thickness so they cook evenly and stay juicy.
  • 1/3 cup olive oil – the base of the marinade; adds richness and helps everything else stick.
  • 1/3 cup ranch dressing – this is the secret to that tangy, herby LongHorn flavor. Use your favorite bottled ranch.
  • 2 tablespoons Worcestershire sauce – adds a savory, almost steakhouse-y depth.
  • 1 tablespoon minced garlic – fresh is best here, but jarred works in a pinch.
  • 1 teaspoon lemon juice – brightens up the marinade so it doesn’t taste flat.
  • 1/2 teaspoon black pepper, plus salt to taste – keep it simple; the ranch and cheese bring plenty of flavor later.
  • 2-3 tablespoons vegetable oil – for searing the chicken in a skillet (skip this if you’re grilling).

For the Parmesan Crust

  • 1/2 cup grated Parmesan cheese – the backbone of the crust; use the real stuff if you can, not the shelf-stable shaker kind.
  • 1/2 cup shredded provolone cheese – melts beautifully; Swiss or mozzarella work as substitutes if that’s what you’ve got on hand.
  • 6 tablespoons ranch dressing – mixed with the cheese to make a spreadable, tangy layer.
  • 3/4 cup panko breadcrumbs – gives the topping its signature crunch; regular breadcrumbs work but won’t be quite as crispy.
  • 4 tablespoons butter, melted – coats the panko so it toasts and browns instead of just sitting there.
  • 2 teaspoons garlic powder – stirred into the panko for extra flavor in every bite.

Directions

Marinate the Chicken

  1. Whisk together the olive oil, ranch dressing, Worcestershire sauce, garlic, lemon juice, and pepper in a bowl until combined.
  2. Place the chicken breasts in a zip-top bag or between two sheets of plastic wrap and pound to an even 1/2-inch thickness.
  3. Season lightly with salt, then add the chicken to the marinade, seal, and refrigerate for at least 30 minutes (or up to overnight for deeper flavor).

Cook the Chicken

  1. Heat 2-3 tablespoons of vegetable oil in a heavy skillet (cast iron if you’ve got it) over medium-high heat. Remove the chicken from the marinade, letting the excess drip off.
  2. Sear the chicken for 4-5 minutes per side, until golden brown and cooked through to 165°F internally.
  3. Prefer the grill? Cook the chicken over medium-high direct heat for 4-6 minutes per side instead — you’ll get a little smoky char that makes this even better.
  4. Transfer the cooked chicken to a baking sheet or oven-safe skillet and tent loosely with foil while you make the topping.

Build the Crust

  1. In a bowl, stir together the Parmesan, provolone, and 6 tablespoons of ranch dressing until well combined. If it’s too stiff to spread, microwave in 15-second bursts, stirring in between, until it loosens up.
  2. In a separate bowl, mix the panko, melted butter, and garlic powder until every crumb is coated.

Broil & Rest

  1. Set your oven to broil (or low broil around 450°F) and position a rack about 6 inches from the heat source.
  2. Spread the cheese mixture evenly over each piece of chicken, then top with the buttered panko mixture, pressing gently so it sticks.
  3. Broil for 3-4 minutes, watching closely, until the cheese is bubbling and the panko is golden brown.
  4. Let the chicken rest for 2-3 minutes before serving — this keeps all that cheesy topping in place instead of sliding off the second you cut in.

Tips & Variations

  • Pound the chicken evenly. This is the step guys skip, and it’s the one that matters most — an even thickness means the chicken finishes cooking at the same time all the way through instead of drying out on the thin end.
  • Make it spicy. Stir a pinch of cayenne or a few dashes of hot sauce into the cheese mixture if you want some heat behind that crust.
  • Bake instead of sear. If you’d rather not deal with a hot skillet, bake the marinated chicken at 425°F for 15-18 minutes, then add the toppings and broil as directed.
  • Prep ahead. The chicken can marinate overnight, and you can mix the panko topping a few hours ahead — just keep it in the fridge until you’re ready to broil.

FAQ

Can I use chicken thighs instead of breasts?
Yes — boneless, skinless thighs work well and stay extra juicy. Just keep an eye on your cook time since thighs are often a bit smaller and can cook a touch faster than breasts.

What’s the best way to reheat leftovers without drying them out?
Skip the microwave — it turns that crispy topping soggy. Reheat in a 350°F oven for 8-10 minutes instead, which brings the panko crust back to life.

Can I make this ahead of time for a dinner party?
You can marinate the chicken and mix the crust topping a day ahead, but hold off on searing and broiling until right before you serve — that panko crust is at its best fresh out of the oven.

What to Serve It With

Round out the plate with garlic mashed potatoes, a simple steamed green vegetable like broccoli or green beans, or a side salad to cut through all that cheese. If you’ve already got the grill fired up, grilled asparagus or corn on the cob makes an easy, no-fuss side to go with it.

Storage & Reheating

Store leftover chicken in an airtight container in the fridge for up to 3-4 days. I don’t recommend freezing this one — the cheese and panko topping loses its texture once thawed. To reheat, place it on a baking sheet in a 350°F oven for 8-10 minutes until warmed through and the topping re-crisps.

Recipe inspired by / adapted from LongHorn Steakhouse’s popular Parmesan Crusted Chicken. This is a homemade version built from widely shared copycat techniques — it’s not an official recipe, and this post isn’t affiliated with or endorsed by LongHorn Steakhouse.


LongHorn Steakhouse Parmesan Crusted Chicken (Copycat Recipe)

Servings: 4
Prep Time: 20 minutes (plus 30 minutes to overnight marinating)
Cook Time: 15 minutes
Total Time: about 35 minutes active, plus marinating time

Ingredients

  • 4 boneless, skinless chicken breasts, pounded to 1/2-inch thickness
  • 1/3 cup olive oil
  • 1/3 cup ranch dressing (for marinade)
  • 2 tablespoons Worcestershire sauce
  • 1 tablespoon minced garlic
  • 1 teaspoon lemon juice
  • 1/2 teaspoon black pepper, plus salt to taste
  • 2-3 tablespoons vegetable oil (for searing)
  • 1/2 cup grated Parmesan cheese
  • 1/2 cup shredded provolone cheese
  • 6 tablespoons ranch dressing (for crust)
  • 3/4 cup panko breadcrumbs
  • 4 tablespoons butter, melted
  • 2 teaspoons garlic powder

Instructions

  1. Whisk olive oil, 1/3 cup ranch dressing, Worcestershire sauce, garlic, lemon juice, and pepper together for the marinade.
  2. Pound chicken breasts to an even 1/2-inch thickness, season lightly with salt, and marinate for 30 minutes to overnight in the fridge.
  3. Heat vegetable oil in a skillet over medium-high heat and sear chicken 4-5 minutes per side until cooked through to 165°F (or grill over medium-high heat 4-6 minutes per side).
  4. Transfer chicken to a baking sheet and tent with foil.
  5. Mix Parmesan, provolone, and 6 tablespoons ranch dressing until spreadable.
  6. Mix panko, melted butter, and garlic powder until coated.
  7. Preheat broiler and position rack 6 inches from heat. Spread cheese mixture over chicken, top with panko mixture.
  8. Broil 3-4 minutes until bubbling and golden brown. Rest 2-3 minutes before serving.

Related Recipes

Santa Maria Style Tri-Tip Recipe Two Ways – Weber Kettle vs Traeger

Ah, Santa Maria! Just the name conjures images of sun-drenched vineyards and the smoky aroma of perfectly grilled tri-tip. This regional barbecue tradition from California’s Central Coast is all about simple, high-quality ingredients and letting the flavor of the beef shine through.

Today, we’re diving headfirst into the deliciousness of Santa Maria Style Tri-Tip. I’ll not only give you the classic recipe for the rub and the accompanying salsa but also provide two methods for cooking this fantastic cut: the traditional Santa Maria vibe using a Weber kettle with a Santa Maria attachment, and the ever-convenient Traeger pellet grill. So, whether you’re looking for that direct-heat char or the ease of pellet smoking, we’ve got you covered!

The Star of the Show: Santa Maria Tri-Tip

Tri-tip is a triangular cut of beef from the bottom sirloin. It’s known for its rich, beefy flavor and tender texture when cooked correctly. The Santa Maria style emphasizes this natural flavor with a simple yet impactful seasoning.


The Essential Santa Maria Rub

This rub is the heart and soul of Santa Maria barbecue. It’s minimal but delivers maximum flavor.

Ingredients:

  • 2 tablespoons coarse ground black pepper
  • 2 tablespoons kosher salt (or 1 tablespoon fine sea salt)
  • 1 tablespoon garlic powder

Instructions:

  1. Combine all ingredients in a small bowl.
  2. Generously rub the mixture all over the tri-tip, ensuring all surfaces are coated.
  3. Let the seasoned tri-tip rest at room temperature for at least 30 minutes, or up to a few hours in the refrigerator. Bringing it closer to room temperature before grilling helps it cook more evenly.

The Classic Accompaniment: Pico de Gallo (Santa Maria Style Salsa)

While not strictly part of the grilling process, a fresh and vibrant salsa is a must-have with Santa Maria tri-tip. This simple pico de gallo complements the richness of the beef perfectly.

Ingredients:

  • 2 ripe tomatoes, diced
  • 1/2 white onion, finely diced
  • 1-2 jalapeños, seeded and minced (optional)
  • 1/4 cup chopped fresh cilantro
  • Juice of 1 lime
  • Salt to taste

Instructions:

  1. Combine all ingredients in a bowl.
  2. Gently toss to combine.
  3. Season with salt to taste.
  4. Let it sit for at least 15 minutes to allow the flavors to meld.

Method 1: The Traditional Santa Maria Vibe on a Weber Kettle

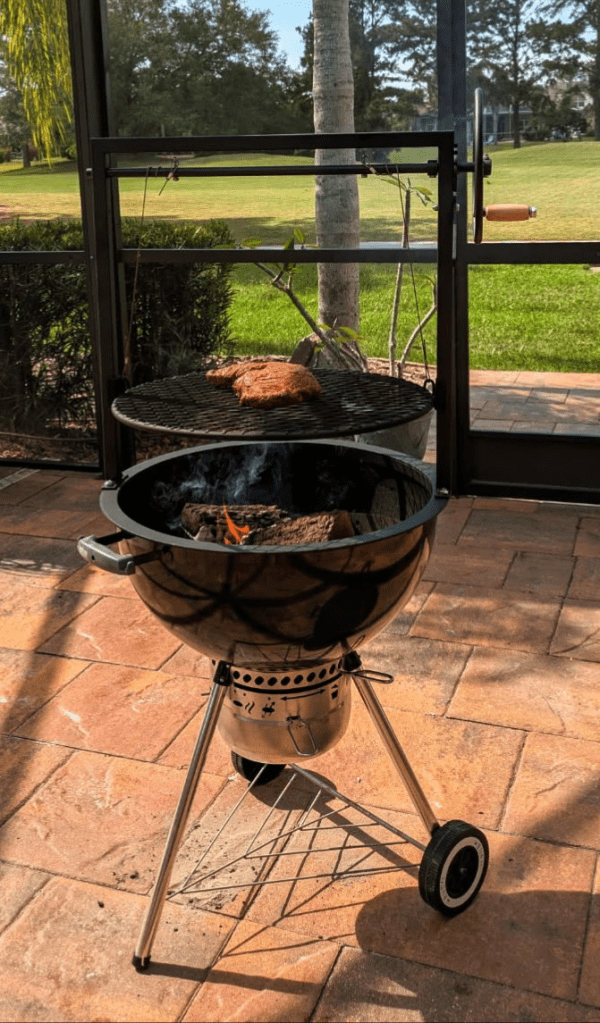
While a dedicated Santa Maria grill would be awesome – that’s also a pretty penny, but fear not, you can still capture that classic flavor with an inexpensive Weber Kettle and a Santa Maria attachment like this one – now you can easily transform your Weber kettle into a Santa Maria-style cooker.

Best of all this method utilizes direct heat, allowing for beautiful searing and that signature smoky essence from the coals.

What you’ll need:

Instructions:

  1. Set Up the Attachment and Coals: Install the Santa Maria grill attachment onto your Weber kettle. Light your charcoal in a chimney starter and pour the hot coals onto the charcoal grate, directly beneath where the tri-tip will sit on the elevated grate of the attachment. You’ll want a medium-hot bed of coals.
  2. Position the Tri-Tip: Place the seasoned tri-tip on the elevated grate of the Santa Maria attachment. This positions the meat closer to the heat source than the standard Weber grate, which is key for Santa Maria-style cooking.
  3. Sear: Since the meat is closer to the heat, it will sear relatively quickly. Keep a close eye on it and flip after about 3-4 minutes per side to develop a nice crust.
  4. Cook to Temperature: Continue to cook, flipping occasionally (about every 10 minutes) until the internal temperature reaches 130-135°F for medium-rare (or your desired level of doneness). The Santa Maria elevated grate allows you to control the heat by raising or lowering the cooking surface, or by adjusting the amount of charcoal. This will likely take another 20-40 minutes depending on the thickness of your tri-tip and the heat of your coals.
  5. Rest: Once cooked, remove the tri-tip from the grill and let it rest on a cutting board for 10-15 minutes.
  6. Slice and Serve: Slice the tri-tip against the grain and serve with the fresh pico de gallo, grilled garlic bread, and pinquito beans.

Method 2: Traeger Pellet Grill

Using a Traeger offers consistent temperature and a wonderful smoky flavor, making it a fantastic alternative.

What you’ll need:

Instructions:

  1. Preheat the Traeger: Preheat your Traeger to 225°F (107°C).
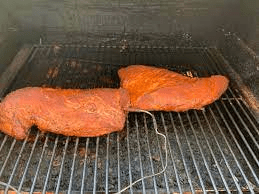
  2. Smoke the Tri-Tip: Place the seasoned tri-tip directly on the grill grates. Smoke for about 45-60 minutes, or until the internal temperature reaches around 115-120°F. This allows it to absorb that delicious smoky flavor.
  3. Increase the Heat: Crank up the Traeger to 450-500°F (232-260°C).
  4. Sear: Sear both sides of the tri-tip for about 3-4 minutes per side to create a nice crust.
  5. Cook to Temperature: Continue cooking until the internal temperature reaches 130-135°F for medium-rare (or your desired level of doneness).
  6. Rest: Remove the tri-tip from the Traeger and let it rest on a cutting board for 10-15 minutes.
  7. Slice and Serve: Slice against the grain and serve with your homemade pico de gallo and other favorite sides.

Which Method is Right for You?

Both methods yield fantastic results, just with slightly different nuances. The Weber with the Santa Maria attachment provides that direct heat sear and smoky charcoal flavor reminiscent of the traditional Santa Maria experience. The Traeger offers ease of use and consistent smoky flavor. Ultimately, the best method is the one that fits your equipment and preferences!

So, fire up your grill (whichever kind you choose!), grab a tri-tip, and experience the deliciousness of Santa Maria barbecue.

What are your favorite ways to cook tri-tip? Let us know in the comments below!

Elevate Your Burger Game: Top 5 Rubs for Hamburgers

There’s nothing quite like the sizzle of a hamburger hitting the grill on a warm summer day. While a great patty is essential, the right seasoning can take your burger from ordinary to extraordinary. If you’re looking to elevate your burger game, look no further. We’ve scoured the web and grilled up the top 5 rubs guaranteed to make your hamburgers a hit at your next cookout.

  1. Classic Burger Rub:
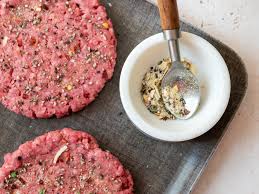
    • Product: Weber Gourmet Burger Seasoning: A classic blend from a trusted brand, this seasoning offers a perfect combination of kosher salt, garlic, and black pepper to enhance the flavor of your burger patties.
  2. Southwest Chipotle Rub:
  3. Garlic Herb Rub:
    • Product: McCormick Grill Mates Garlic, Herb & Wine Marinade: While technically a marinade, this versatile product can also be used as a dry rub. With flavors of garlic, rosemary, and thyme, it’s perfect for adding a touch of herbaceousness to your burgers.
  4. Maple Bacon Rub:
    • Product: Pork Barrel BBQ All American Seasoning & Rub: While not explicitly labeled for burgers, this rub’s combination of brown sugar, smoked paprika, and bacon flavor adds a unique twist to your burger patties, reminiscent of the classic maple bacon combination.
  5. Mediterranean Lemon Pepper Rub:

At the end of the day these rubs and seasoning blends are not only popular among grillmasters but also highly rated and frequently purchased by consumers so whether you’re a seasoned grilling aficionado or just starting out, these top 5 rubs are sure to impress your guests and elevate your burger game to new heights.

No matter which rub you choose, be sure to generously coat your burgers on both sides before grilling for maximum flavor. Whether you’re hosting a backyard barbecue or simply craving a delicious homemade burger, these top 5 rubs are sure to impress. So fire up the grill, grab your favorite toppings, and get ready to enjoy the ultimate burger experience!

How to Cook Wood Fired Wings

Wanna cook some wood-fired wings? Trying to find the recipe for making Anthony’s Coal Fired Wings? I’ve got you covered. Today we’ll be cooking wood fired chicken wings using a combo of lump charcoal and wood chunks – I’ll show it to you all in video form on this site and give you a link to get the full recipe with detailed cooking instructions from our grilling site if you want to do this cook yourself.

As you’ll see in the vid, I’ll be making my wood fired wings in an Ooni Pro Pizza Oven, but you can use this recipe for any brick oven, kamado, or even your regular oven. Grab a beer and let’s cook wood fired chicken wings!

Wood Fired Chicken Wings

Wood Fired Wings Cooking Notes

For the full recipe that I used in the video along with detailed cooking instructions please visit my grilling site: LordoftheGrills.com

About this recipe: This recipe is a 3-step process

  1. The marinade (6-24 hours)
  2. Cooking the Wings (20-30 minutes)
  3. Making the caramelized onions. (20-30 minutes cooked at same time as wings)

Actually there is a 4th step – EATING the wings!!

Again for the full recipe with detailed cooking instructions visit my grilling site: LordoftheGrills.com


About the Products used:

I used Costco Party wings and the other spices & fresh ingredients noted in the recipe on this page: https://lordofthegrills.com/wood-fire…

Meanwhile, here are all the cooking products mentioned or shown in this vid


Wood Fired Wings – The Result

wood fired wings

The result: I felt pretty good about this cook – the process was easy, my family loved the flavor, and I believe I can repeat this cook again and again with ease.

If you try this cook, let me know how it turns out. As always, please remember, I’m just an Average Joe so if you have any tips to share, I’d love to hear them so I can learn too.

Cheers!


Did You Know?

If you enjoy reading That Helpful Dad’s articles, you may also like…