Category Archives: Cooking and Recipes

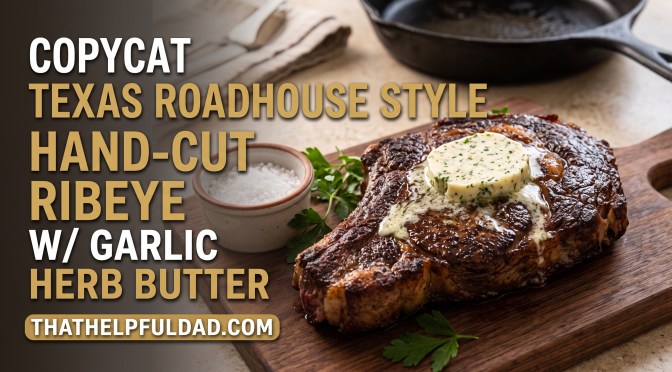
Copycat Texas Roadhouse Style Hand-Cut Ribeye with Garlic Herb Butter

If there is one thing I’ve learned over years of standing in front of a hot grill, it’s that you don’t need a white tablecloth or a $100 bill to get a steakhouse-quality steak on your plate. Texas Roadhouse built an empire on hand-cut, perfectly seasoned steaks topped with that iconic melting compound butter, and with just a few simple techniques, you can beat their waitlist right in your own backyard.

This post may contain affiliate links. As an Amazon Associate I earn from qualifying purchases.

Why You’ll Love This Recipe

  • Tastes Just Like the Original: The combination of a heavy, savory-sweet rub and whipped garlic herb butter delivers that exact signature steakhouse flavor.
  • Foolproof Technique: Using a heavy cast-iron skillet or a high-heat grill guarantees a deep, caramelized crust without overcooking the center.
  • Budget & Family Friendly: Feeding a family at a steakhouse adds up fast; making these at home gives you higher-quality cuts for a fraction of the price.
  • Make-Ahead Simplicity: You can roll the compound butter ahead of time, making dinner-time assembly virtually effortless.

Ingredients

For the Steak & Seasoning Rub:

  • Boneless Ribeye Steaks (12–14 oz each, 1 to 1.5-inch thick) – Look for heavy intramuscular marbling for maximum tenderness and flavor; NY Strip works well too.
  • Coarse Kosher Salt (1 tbsp) – Essential for pulling moisture to the surface and locking in juices through a pre-cook dry brine.
  • Coarse Black Pepper (1 tbsp) – Provides that sharp, aromatic steakhouse bite on the outer crust.
  • Garlic Powder (1 tsp) – Adds a deep, savory background flavor to the crust seasoning.
  • Onion Powder (1 tsp) – Enhances the natural umami and richness of the beef.
  • Brown Sugar (1/2 tsp) – The secret weapon; aids in rapid caramelization and gives that subtle copycat flavor bump.
  • Smoked Paprika (1/2 tsp) – Gives a touch of color and a mild hint of woodsmoke.

For the Garlic Herb Compound Butter:

  • Unsalted Butter (1/2 cup / 1 stick, softened) – Use good quality real butter at room temperature so it whips easily.
  • Minced Fresh Garlic (2 cloves) – Freshly grated or minced fine so it infuses evenly into the butter.
  • Fresh Parsley (1 tbsp, finely chopped) – Adds bright color and a fresh, clean herbal finish.
  • Worcestershire Sauce (1/2 tsp) – Adds a savory, rich depth of flavor to the whipped mixture.
  • Fine Sea Salt (1/4 tsp) – Balances the garlic and brings out the creaminess of the butter.

Step-by-Step Directions

1. Make the Garlic Herb Butter

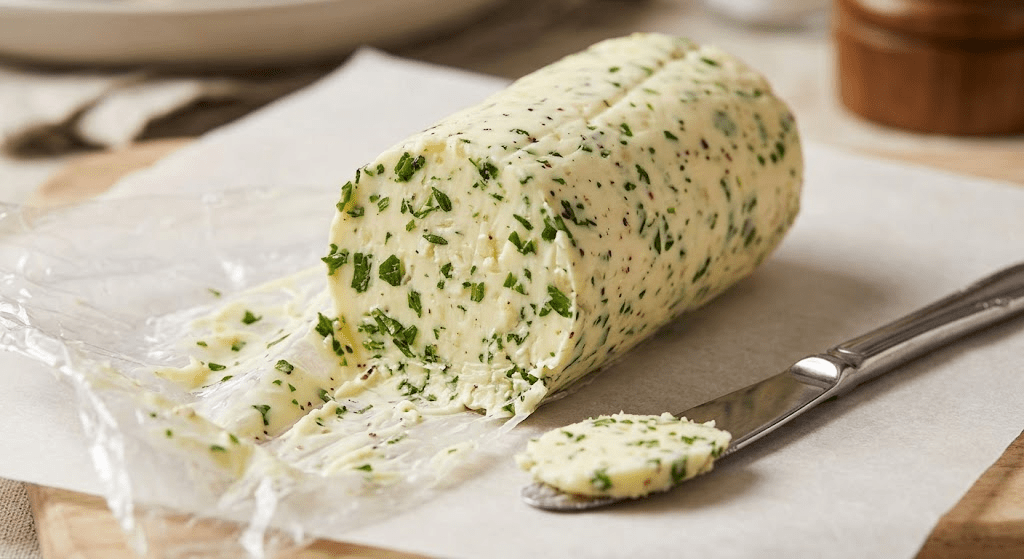
In a small bowl, combine the softened butter, minced garlic, chopped parsley, Worcestershire sauce, and fine sea salt. Use a fork to whip everything together until light and smooth. Transfer the butter onto a sheet of plastic wrap, shape it into a log, twist the ends tight, and chill in the fridge for at least 30 minutes to firm up.

2. Prep and Dry Brine the Steaks

Pat your ribeyes completely dry with paper towels—moisture is the enemy of a good sear. In a small ramekin, mix the kosher salt, black pepper, garlic powder, onion powder, brown sugar, and smoked paprika. Season the steaks generously on all sides, pressing the rub into the meat. For the best crust, let them sit at room temperature for 35–45 minutes before cooking.

3. Sear to Perfection

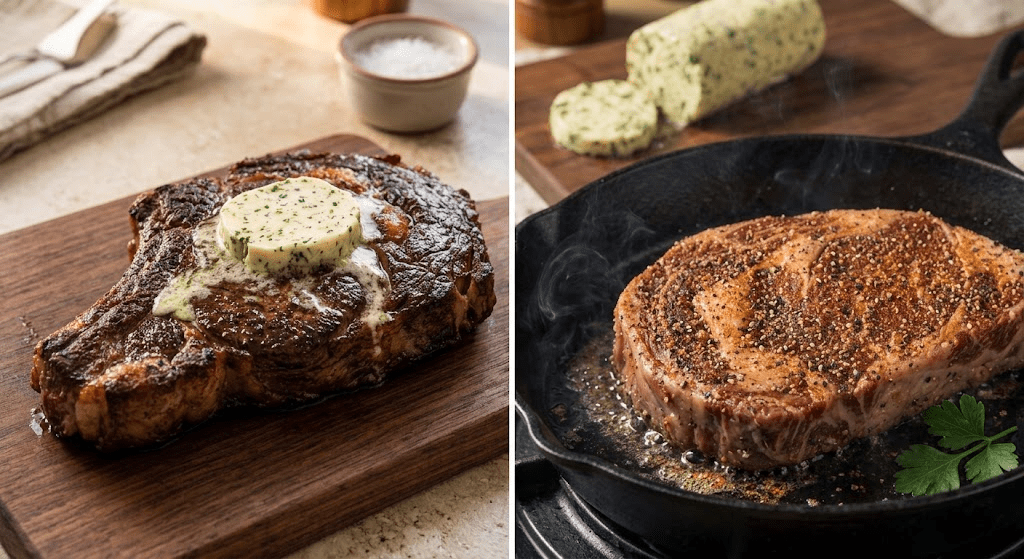
Preheat a heavy cast-iron skillet over high heat until it just begins to smoke (or fire up your grill for high direct heat). Place the steaks into the dry, hot skillet. Sear undisturbed for 3–4 minutes until a deep, dark mahogany crust forms. Flip and sear the other side for another 3–4 minutes.

4. Check Temp and Rest

Use an instant-read meat thermometer inserted into the thickest part of the steak. Pull the ribeyes off the heat at 130°F for Medium-Rare or 138°F for a solid Medium (the temperature will rise another 3–5°F as it rests). Immediately place a thick slice of the garlic herb butter on top of each hot steak, tent loosely with foil, and let rest for 5–7 minutes before slicing.

Tips & Variations

  • The “Pop” Factor: For a next-level touch, keep a bottle of aged balsamic vinegar at the table and drop just a few drops onto each slice right before eating.
  • Add an Umami Boost: Swap half the black pepper in the rub for finely ground dried mushroom powder or dark espresso coffee grounds to create an insanely rich crust.
  • Reversed-Sear Method: If your cuts are extra thick (1.5 inches or more), smoke or bake them low-and-slow at 225°F until they reach 115°F internal, then flash-sear them in a screaming-hot skillet for 60 seconds per side.

Frequently Asked Questions

Why is my steak tough even though I bought a ribeye?

Steak toughness usually comes down to cooking temperature or cutting into the meat too fast. Pulling the steak at the right internal temp (130°F–138°F) and allowing a full 5–7 minute rest allows the muscle fibers to relax and reabsorb juices.

Can I make the compound butter ahead of time?

Absolutely. You can make the garlic herb butter up to 5 days in advance and keep it in the refrigerator, or freeze the rolled log for up to 3 months. Slice off rounds as needed for steaks, chicken, or grilled vegetables.

Do I need oil in the pan when searing a ribeye?

Ribeyes have a high natural fat content. If you’re using a well-seasoned cast-iron skillet, you don’t need much oil at all. A tiny splash of high-smoke-point oil (like avocado oil) is fine, but the fat rendering off the steak will handle most of the work.

What to Serve It With

  • Loaded Baked Potatoes: Fluffy russets packed with sour cream, sharp cheddar, crisp bacon, and chives.
  • Grilled Asparagus: Tossed in olive oil, sea salt, and a squeeze of fresh lemon juice.
  • Homemade Chimichurri: If you want a fresh, herb-forward alternative to butter, try our homemade parsley and garlic chimichurri sauce.

Storage & Reheating

Store leftover steak in an airtight container in the refrigerator for up to 3 days. To reheat without drying it out or overcooking the center, place the steak on a wire rack over a baking sheet in a 250°F oven until warmed through (about 10–15 minutes), then finish with a quick 30-second flash sear in a hot pan.

Recipe inspired by Texas Roadhouse.

RECIPE SUMMARY

Texas Roadhouse Style Hand-Cut Ribeye

  • Prep Time: 15 mins
  • Cook Time: 10 mins
  • Resting Time: 40 mins
  • Servings: 2

Ingredients:

  • 2 Boneless Ribeye Steaks (12–14 oz each, 1 to 1.5-inch thick)
  • 1 tbsp Coarse Kosher Salt
  • 1 tbsp Coarse Black Pepper
  • 1 tsp Garlic Powder
  • 1 tsp Onion Powder
  • 1/2 tsp Brown Sugar
  • 1/2 tsp Smoked Paprika
  • 1/2 cup Unsalted Butter, softened
  • 2 cloves Garlic, minced
  • 1 tbsp Fresh Parsley, chopped
  • 1/2 tsp Worcestershire Sauce
  • 1/4 tsp Fine Sea Salt

Instructions:

  1. Make Butter: Mix softened butter, minced garlic, parsley, Worcestershire, and sea salt in a small bowl. Roll into a log in plastic wrap and chill for 30 minutes.
  2. Season Steak: Combine kosher salt, pepper, garlic powder, onion powder, brown sugar, and smoked paprika. Season steaks generously on all sides. Let sit at room temp for 35–45 minutes.
  3. Sear: Heat a cast-iron skillet over high heat until smoking. Sear steaks for 3–4 minutes per side until a deep crust forms.
  4. Finish: Check internal temp (130°F for Medium-Rare, 138°F for Medium). Top with a slice of garlic butter, tent with foil, and rest for 5–7 minutes before serving.

Related Recipes

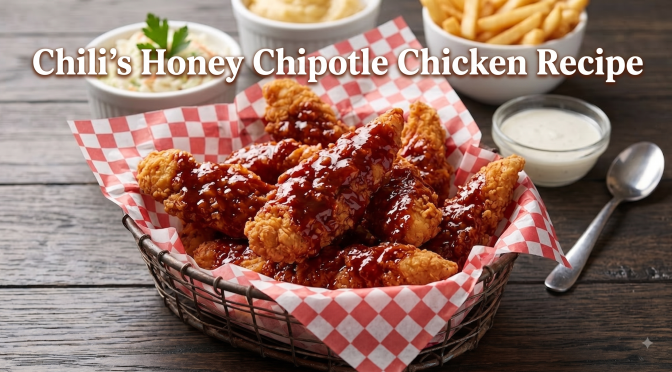
Chili’s Honey-Chipotle Chicken Crispers Recipe

Ask any table at Chili’s what they’re ordering and there’s a good chance somebody says “the honey chipotle ones.” There’s a reason that basket of crispy chicken tenders tossed in sticky, smoky-sweet sauce has stuck around on the menu for years — it hits that sweet, spicy, crunchy combo that’s almost impossible to stop eating.

Chili’s Honey-Chipotle Chicken Crispers are hand-breaded chicken tenders, fried until golden and crackly, then tossed in a sauce built from honey, chipotle, and a little tang from vinegar and ketchup. It’s the kind of dish that works as a game-day appetizer, a weeknight dinner the kids will actually eat, or something to bring to a potluck when you want to show up with something better than a bag of chips. Best part? You skip the drive and the wait for a table.

This post may contain affiliate links. As an Amazon Associate I earn from qualifying purchases.

Why You’ll Love This Recipe

  • Tastes just like the original — that sweet, smoky, slightly tangy honey chipotle sauce is the star, and it’s easy to nail at home.
  • Crazy crispy — a wet batter followed by a seasoned dry breading gives you that same crackly Chili’s-style crunch under the sauce.
  • Family-friendly — dial the heat up or down and everybody at the table is happy, from picky kids to guys who want it spicier.
  • Great for a crowd — whether it’s game day, a backyard hang, or just a Tuesday, this one disappears fast off a big platter.

Ingredients

For the Chicken

  • 1 1/2 pounds chicken tenderloins (about 10-12 pieces) – tenderloins fry up faster and stay juicier than cutting your own strips from breasts, but sliced chicken breast works fine in a pinch.
  • 6-8 cups vegetable or canola oil – for frying; you want enough to come at least 2-3 inches up the sides of your pot.

For the Batter

  • 1 large egg – helps the batter cling to the chicken and gives it a little richness.
  • 1/2 cup whole milk – thins the batter out; buttermilk works too if you want extra tang.
  • 1/2 cup chicken broth – adds savory depth you won’t get from milk alone.
  • 1 1/4 teaspoons salt – seasons the batter itself, not just the coating.
  • 1/4 teaspoon black pepper – basic background seasoning.
  • 1/4 teaspoon paprika – a little color and mild flavor.
  • 1/4 teaspoon garlic powder – rounds out the batter’s flavor.
  • 3/4 cup all-purpose flour – whisked in last to thicken the batter to a pancake-batter consistency.

For the Breading

  • 1 1/2 cups all-purpose flour – the dry coating that turns golden and crunchy in the fryer.
  • 1 1/2 teaspoons salt – don’t skip seasoning the breading itself — it’s your last chance to season the crust.
  • 3/4 teaspoon paprika – adds color and a mild smokiness to the crust.
  • 1/2 teaspoon black pepper – balances the sweetness of the sauce to come.
  • 1/2 teaspoon garlic powder – more savory backbone in every bite.

For the Honey Chipotle Sauce

  • 2/3 cup honey – the backbone of the sauce; use a mild honey so the chipotle doesn’t get buried.
  • 1/4 cup water – thins the sauce so it coats instead of clumping.
  • 1/4 cup ketchup – adds body and a little tomato tang.
  • 1 tablespoon apple cider vinegar – cuts through the sweetness so the sauce doesn’t taste like straight syrup.
  • 1-2 teaspoons ground chipotle chili powder – start with 1 teaspoon for mild heat and smoky flavor, add the second if you want more kick.
  • 1/2 teaspoon salt – balances the honey’s sweetness.
  • 1/2 teaspoon hot sauce (optional) – for a little extra heat on top of the chipotle.

Directions

Make the Sauce

  1. Combine the honey, water, ketchup, vinegar, chipotle chili powder, salt, and hot sauce (if using) in a small saucepan.
  2. Bring to a simmer over medium heat, stirring occasionally, and cook for about 2 minutes until slightly thickened. Remove from heat and set aside — it’ll thicken a bit more as it cools.

Mix the Batter and Breading

  1. In a mixing bowl, whisk together the egg, milk, chicken broth, salt, pepper, paprika, and garlic powder until smooth.
  2. Whisk in the 3/4 cup of flour until you have a batter about the consistency of pancake batter.
  3. In a separate shallow dish or pie plate, stir together the breading flour, salt, paprika, pepper, and garlic powder.

Fry the Chicken

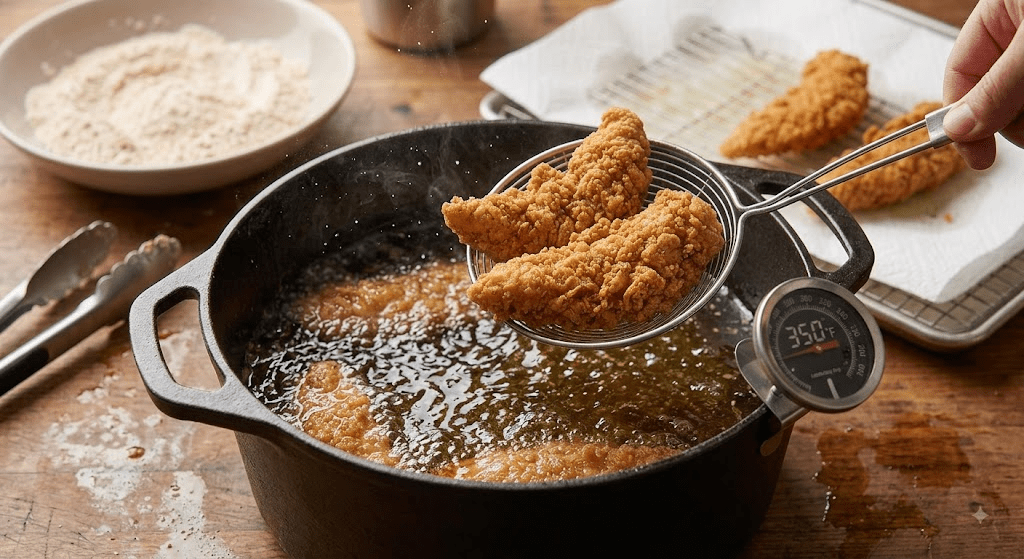
  1. Heat the oil in a Dutch oven or deep, heavy pot to 350°F. Use a thermometer if you’ve got one — guessing on oil temp is the number one way frying goes sideways.
  2. Dip each chicken tenderloin into the batter, letting the excess drip off, then drop it into the breading mixture and press to coat thoroughly on all sides.
  3. Working in batches of 3-4 pieces so you don’t crowd the pot, carefully lower the chicken into the hot oil. Fry for about 4 minutes, flipping once, until deep golden brown and cooked through to 165°F internally.
  4. Remove with a slotted spoon or spider strainer and drain on a paper towel-lined plate or wire rack. Let the oil come back up to 350°F between batches.

Toss and Serve

  1. Once all the chicken is fried, transfer it to a large bowl.
  2. Pour the honey chipotle sauce over the top and toss gently until every piece is coated.
  3. Serve immediately while it’s hot and the coating is still crispy.

Tips & Variations

  • Let the breaded chicken rest for a couple minutes before frying. This helps the coating set so it doesn’t slide off in the oil.
  • No deep fryer? No problem. A Dutch oven or heavy-bottomed pot with a thermometer clipped to the side works just as well.
  • Bake or air fry instead. Skip the batter, bread the chicken in just the seasoned flour mixture pressed on with a little buttermilk, then bake at 425°F for 18-20 minutes or air fry at 400°F for 12-14 minutes, flipping halfway, before tossing in sauce.
  • Turn up the heat. Add extra chipotle powder or a spoonful of the adobo sauce from a can of chipotles in adobo for a smokier, spicier version.
  • Serve the sauce on the side instead of tossing if you’re feeding picky eaters — that way everyone controls their own heat level.

FAQ

How spicy is this recipe?
With 1 teaspoon of chipotle powder it’s more smoky-sweet than hot — kid-friendly for most families. Bump it up to 2 teaspoons or add the hot sauce if you want more of a kick.

Can I use chicken breasts instead of tenderloins?
Yes, just slice boneless, skinless chicken breasts into strips about the same size as tenderloins so they cook evenly and stay crispy all the way through.

Why did my coating fall off in the fryer?
Usually it’s oil that’s not hot enough, which lets the coating soak up oil and separate, or not letting the excess batter drip off before breading. Keep the oil at a steady 350°F and give the breaded chicken a minute to rest before it goes in.

What to Serve It With

These crispers are made for classic sides — crinkle-cut fries, a cool and creamy coleslaw, or corn on the cob all balance out the sweet heat. A simple ranch or blue cheese dip on the side never hurts either, especially if you’ve got kids at the table who want to dunk everything.

Storage & Reheating

Store leftovers in an airtight container in the fridge for up to 3 days. For the best texture, reheat in a 400°F oven or air fryer for 6-8 minutes until hot and crispy again — the microwave will leave you with soggy breading. Freezing isn’t recommended once the chicken is sauced, since the coating loses its crunch when thawed.

Recipe inspired by / adapted from Chili’s Honey-Chipotle Chicken Crispers. This is a homemade version built from widely shared copycat techniques — it’s not an official recipe, and this post isn’t affiliated with or endorsed by Chili’s.


Chili’s Honey-Chipotle Chicken Crispers (Copycat Recipe)

Servings: 4
Prep Time: 20 minutes
Cook Time: 20 minutes
Total Time: about 40 minutes

Ingredients

  • 1 1/2 pounds chicken tenderloins (about 10-12 pieces)
  • 6-8 cups vegetable or canola oil, for frying
  • 1 large egg
  • 1/2 cup whole milk
  • 1/2 cup chicken broth
  • 1 1/4 teaspoons salt (for batter)
  • 1/4 teaspoon black pepper (for batter)
  • 1/4 teaspoon paprika (for batter)
  • 1/4 teaspoon garlic powder (for batter)
  • 3/4 cup all-purpose flour (for batter)
  • 1 1/2 cups all-purpose flour (for breading)
  • 1 1/2 teaspoons salt (for breading)
  • 3/4 teaspoon paprika (for breading)
  • 1/2 teaspoon black pepper (for breading)
  • 1/2 teaspoon garlic powder (for breading)
  • 2/3 cup honey
  • 1/4 cup water
  • 1/4 cup ketchup
  • 1 tablespoon apple cider vinegar
  • 1-2 teaspoons ground chipotle chili powder
  • 1/2 teaspoon salt (for sauce)
  • 1/2 teaspoon hot sauce (optional)

Instructions

  1. Combine honey, water, ketchup, vinegar, chipotle chili powder, salt, and hot sauce in a saucepan. Simmer 2 minutes, then set aside.
  2. Whisk together egg, milk, chicken broth, salt, pepper, paprika, and garlic powder, then whisk in 3/4 cup flour to make the batter.
  3. Mix breading flour, salt, paprika, pepper, and garlic powder in a shallow dish.
  4. Heat oil to 350°F in a Dutch oven or deep pot.
  5. Dip chicken tenderloins in batter, then coat in breading mixture.
  6. Fry in batches of 3-4 for about 4 minutes, flipping once, until golden brown and cooked through to 165°F.
  7. Drain on paper towels, then toss all the fried chicken with the honey chipotle sauce.
  8. Serve immediately.

Related Recipes

LongHorn Steakhouse Parmesan Crusted Chicken Recipe

If you’ve ever sat down at a LongHorn Steakhouse and watched that golden, bubbling layer of cheese hit the table in front of you, you know the little thrill that comes right before the first bite. That parmesan crust is the reason half the tables in that restaurant order the same thing.

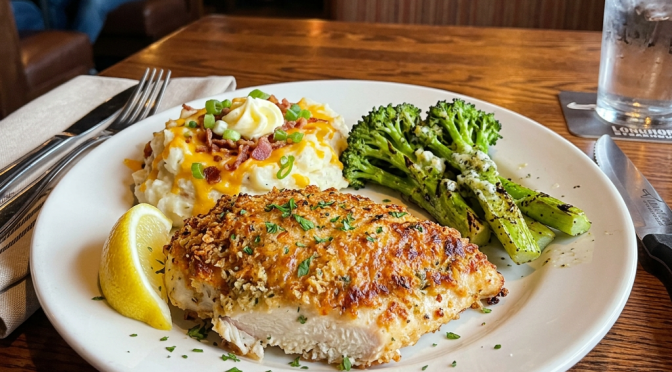
LongHorn Steakhouse’s Parmesan Crusted Chicken has been a menu staple for years, and it’s easy to see why — a juicy, marinated chicken breast gets topped with a melty parmesan-provolone blend and a garlicky, buttery panko crust, then run under the broiler until it’s golden and bubbling. It’s the kind of dish that feels like a restaurant treat but is honestly pretty simple to pull off in your own kitchen — no reservation, no wait for a table, and you can make it exactly as cheesy as you want.

This post may contain affiliate links. As an Amazon Associate I earn from qualifying purchases.

Why You’ll Love This Recipe

  • Tastes just like the original — the marinade and cheese-and-panko crust nail that same rich, savory flavor you remember from the restaurant.
  • Weeknight-friendly — from marinating to broiling, you’re looking at well under an hour of actual hands-on time.
  • Family-friendly — even picky eaters come around for melted cheese and crispy panko on top of chicken.
  • Flexible — sear it in a skillet, bake it, or throw it on the grill depending on what you’re in the mood for (or what the weather’s doing).

Ingredients

For the Chicken & Marinade

  • 4 boneless, skinless chicken breasts – pounded to an even 1/2-inch thickness so they cook evenly and stay juicy.
  • 1/3 cup olive oil – the base of the marinade; adds richness and helps everything else stick.
  • 1/3 cup ranch dressing – this is the secret to that tangy, herby LongHorn flavor. Use your favorite bottled ranch.
  • 2 tablespoons Worcestershire sauce – adds a savory, almost steakhouse-y depth.
  • 1 tablespoon minced garlic – fresh is best here, but jarred works in a pinch.
  • 1 teaspoon lemon juice – brightens up the marinade so it doesn’t taste flat.
  • 1/2 teaspoon black pepper, plus salt to taste – keep it simple; the ranch and cheese bring plenty of flavor later.
  • 2-3 tablespoons vegetable oil – for searing the chicken in a skillet (skip this if you’re grilling).

For the Parmesan Crust

  • 1/2 cup grated Parmesan cheese – the backbone of the crust; use the real stuff if you can, not the shelf-stable shaker kind.
  • 1/2 cup shredded provolone cheese – melts beautifully; Swiss or mozzarella work as substitutes if that’s what you’ve got on hand.
  • 6 tablespoons ranch dressing – mixed with the cheese to make a spreadable, tangy layer.
  • 3/4 cup panko breadcrumbs – gives the topping its signature crunch; regular breadcrumbs work but won’t be quite as crispy.
  • 4 tablespoons butter, melted – coats the panko so it toasts and browns instead of just sitting there.
  • 2 teaspoons garlic powder – stirred into the panko for extra flavor in every bite.

Directions

Marinate the Chicken

  1. Whisk together the olive oil, ranch dressing, Worcestershire sauce, garlic, lemon juice, and pepper in a bowl until combined.
  2. Place the chicken breasts in a zip-top bag or between two sheets of plastic wrap and pound to an even 1/2-inch thickness.
  3. Season lightly with salt, then add the chicken to the marinade, seal, and refrigerate for at least 30 minutes (or up to overnight for deeper flavor).

Cook the Chicken

  1. Heat 2-3 tablespoons of vegetable oil in a heavy skillet (cast iron if you’ve got it) over medium-high heat. Remove the chicken from the marinade, letting the excess drip off.
  2. Sear the chicken for 4-5 minutes per side, until golden brown and cooked through to 165°F internally.
  3. Prefer the grill? Cook the chicken over medium-high direct heat for 4-6 minutes per side instead — you’ll get a little smoky char that makes this even better.
  4. Transfer the cooked chicken to a baking sheet or oven-safe skillet and tent loosely with foil while you make the topping.

Build the Crust

  1. In a bowl, stir together the Parmesan, provolone, and 6 tablespoons of ranch dressing until well combined. If it’s too stiff to spread, microwave in 15-second bursts, stirring in between, until it loosens up.
  2. In a separate bowl, mix the panko, melted butter, and garlic powder until every crumb is coated.

Broil & Rest

  1. Set your oven to broil (or low broil around 450°F) and position a rack about 6 inches from the heat source.
  2. Spread the cheese mixture evenly over each piece of chicken, then top with the buttered panko mixture, pressing gently so it sticks.
  3. Broil for 3-4 minutes, watching closely, until the cheese is bubbling and the panko is golden brown.
  4. Let the chicken rest for 2-3 minutes before serving — this keeps all that cheesy topping in place instead of sliding off the second you cut in.

Tips & Variations

  • Pound the chicken evenly. This is the step guys skip, and it’s the one that matters most — an even thickness means the chicken finishes cooking at the same time all the way through instead of drying out on the thin end.
  • Make it spicy. Stir a pinch of cayenne or a few dashes of hot sauce into the cheese mixture if you want some heat behind that crust.
  • Bake instead of sear. If you’d rather not deal with a hot skillet, bake the marinated chicken at 425°F for 15-18 minutes, then add the toppings and broil as directed.
  • Prep ahead. The chicken can marinate overnight, and you can mix the panko topping a few hours ahead — just keep it in the fridge until you’re ready to broil.

FAQ

Can I use chicken thighs instead of breasts?
Yes — boneless, skinless thighs work well and stay extra juicy. Just keep an eye on your cook time since thighs are often a bit smaller and can cook a touch faster than breasts.

What’s the best way to reheat leftovers without drying them out?
Skip the microwave — it turns that crispy topping soggy. Reheat in a 350°F oven for 8-10 minutes instead, which brings the panko crust back to life.

Can I make this ahead of time for a dinner party?
You can marinate the chicken and mix the crust topping a day ahead, but hold off on searing and broiling until right before you serve — that panko crust is at its best fresh out of the oven.

What to Serve It With

Round out the plate with garlic mashed potatoes, a simple steamed green vegetable like broccoli or green beans, or a side salad to cut through all that cheese. If you’ve already got the grill fired up, grilled asparagus or corn on the cob makes an easy, no-fuss side to go with it.

Storage & Reheating

Store leftover chicken in an airtight container in the fridge for up to 3-4 days. I don’t recommend freezing this one — the cheese and panko topping loses its texture once thawed. To reheat, place it on a baking sheet in a 350°F oven for 8-10 minutes until warmed through and the topping re-crisps.

Recipe inspired by / adapted from LongHorn Steakhouse’s popular Parmesan Crusted Chicken. This is a homemade version built from widely shared copycat techniques — it’s not an official recipe, and this post isn’t affiliated with or endorsed by LongHorn Steakhouse.


LongHorn Steakhouse Parmesan Crusted Chicken (Copycat Recipe)

Servings: 4
Prep Time: 20 minutes (plus 30 minutes to overnight marinating)
Cook Time: 15 minutes
Total Time: about 35 minutes active, plus marinating time

Ingredients

  • 4 boneless, skinless chicken breasts, pounded to 1/2-inch thickness
  • 1/3 cup olive oil
  • 1/3 cup ranch dressing (for marinade)
  • 2 tablespoons Worcestershire sauce
  • 1 tablespoon minced garlic
  • 1 teaspoon lemon juice
  • 1/2 teaspoon black pepper, plus salt to taste
  • 2-3 tablespoons vegetable oil (for searing)
  • 1/2 cup grated Parmesan cheese
  • 1/2 cup shredded provolone cheese
  • 6 tablespoons ranch dressing (for crust)
  • 3/4 cup panko breadcrumbs
  • 4 tablespoons butter, melted
  • 2 teaspoons garlic powder

Instructions

  1. Whisk olive oil, 1/3 cup ranch dressing, Worcestershire sauce, garlic, lemon juice, and pepper together for the marinade.
  2. Pound chicken breasts to an even 1/2-inch thickness, season lightly with salt, and marinate for 30 minutes to overnight in the fridge.
  3. Heat vegetable oil in a skillet over medium-high heat and sear chicken 4-5 minutes per side until cooked through to 165°F (or grill over medium-high heat 4-6 minutes per side).
  4. Transfer chicken to a baking sheet and tent with foil.
  5. Mix Parmesan, provolone, and 6 tablespoons ranch dressing until spreadable.
  6. Mix panko, melted butter, and garlic powder until coated.
  7. Preheat broiler and position rack 6 inches from heat. Spread cheese mixture over chicken, top with panko mixture.
  8. Broil 3-4 minutes until bubbling and golden brown. Rest 2-3 minutes before serving.

Related Recipes

Mike’s AI Tips: The Fridge Snap Solution for Busy Nights

When it’s dinner time and the mental tax of deciding what to make feels heavier than the actual cooking, leverage Gemini’s visual recognition instead of stressing over a recipe search.

Does this sound like you?

It is 5:45 PM on a Tuesday. You just got home from work, the kids are asking what is for dinner, and you are standing in front of an open refrigerator with zero mental energy left to figure out a meal. Deciding what to cook after a long day often feels harder than the actual cooking.

When “dinner fatigue” sets in, you do not need to sit down, type out a long list of ingredients, or scroll through food blogs trying to find a recipe.

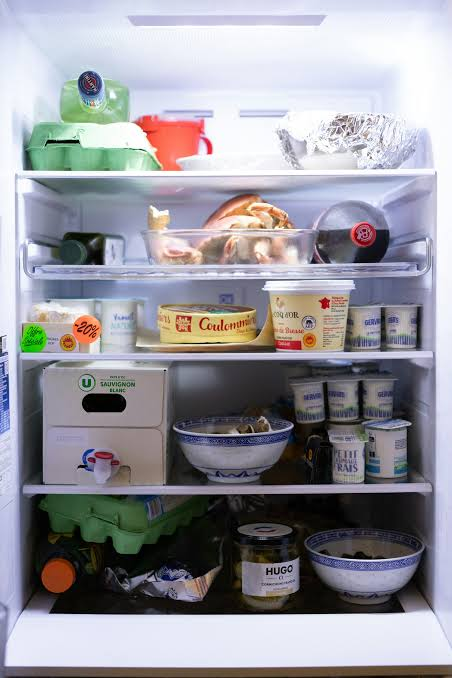
Did you know – You can solve this in under 30 seconds by taking a quick photo with Google Gemini. By leveraging Gemini’s visual recognition capabilities, you turn your smartphone camera into a instant sous-chef that reads your fridge shelves, identifies your ingredients, and gives you realistic meal options on the spot.

How to Use the Fridge Snap Tonight

Instead of pulling out ingredients one by one or settling for takeout, use this quick three-step routine:

1.Take a Clear Photo:

Open the Gemini app, tap the camera icon in the prompt bar, and snap a quick photo of your open refrigerator shelves or pantry setup. Make sure the main proteins, produce, and open jars are reasonably visible.

2.Send the Specific Prompt:

Type or speak this exact prompt alongside your photo:

“Give me 3 realistic 20-minute dinner ideas I can make using ONLY what you see here, plus basic pantry staples like oil, salt, pepper, and butter. Keep prep time under 10 minutes.”

3.Pick and Refine:

Gemini will analyze the image, recognize your ingredients, and give you brief, actionable ideas. If one looks good, reply: “Give me the step-by-step instructions for option #2.”

Why It Works So Well

  • Zero Brain Power Needed: You skip the endless scrolling through food blogs with 10-page backstories.
  • Reduces Food Waste: Uses up items sitting in the crisper drawer before they go bad.
  • Adapts to What You Have: If you’re missing an ingredient, tell Gemini on the spot (e.g., “I don’t have heavy cream, what can I swap in?”) and it adjusts instantly.

Practical Tips to Get the Best Results

  1. Include the Crisper Drawer: If you have fresh veggies hidden in drawers, pull the drawer open slightly before taking the photo so Gemini can see what greens or vegetables you have left.
  2. Mention Household Preferences: Add quick constraints to your prompt if needed, such as “Make option #1 kid-friendly” or “Keep it gluten-free.”
  3. Pantry Add-Ons: If you have canned black beans, rice, or pasta in the cupboard, mention them in your text prompt alongside the fridge photo to give Gemini more building blocks to work with.

Give this quick visual trick a try tonight before reaching for a delivery app—it takes 30 seconds to snap the picture, saves money, and gets dinner on the table fast.


Santa Maria Style Tri-Tip Recipe Two Ways – Weber Kettle vs Traeger

Ah, Santa Maria! Just the name conjures images of sun-drenched vineyards and the smoky aroma of perfectly grilled tri-tip. This regional barbecue tradition from California’s Central Coast is all about simple, high-quality ingredients and letting the flavor of the beef shine through.

Today, we’re diving headfirst into the deliciousness of Santa Maria Style Tri-Tip. I’ll not only give you the classic recipe for the rub and the accompanying salsa but also provide two methods for cooking this fantastic cut: the traditional Santa Maria vibe using a Weber kettle with a Santa Maria attachment, and the ever-convenient Traeger pellet grill. So, whether you’re looking for that direct-heat char or the ease of pellet smoking, we’ve got you covered!

The Star of the Show: Santa Maria Tri-Tip

Tri-tip is a triangular cut of beef from the bottom sirloin. It’s known for its rich, beefy flavor and tender texture when cooked correctly. The Santa Maria style emphasizes this natural flavor with a simple yet impactful seasoning.


The Essential Santa Maria Rub

This rub is the heart and soul of Santa Maria barbecue. It’s minimal but delivers maximum flavor.

Ingredients:

  • 2 tablespoons coarse ground black pepper
  • 2 tablespoons kosher salt (or 1 tablespoon fine sea salt)
  • 1 tablespoon garlic powder

Instructions:

  1. Combine all ingredients in a small bowl.
  2. Generously rub the mixture all over the tri-tip, ensuring all surfaces are coated.
  3. Let the seasoned tri-tip rest at room temperature for at least 30 minutes, or up to a few hours in the refrigerator. Bringing it closer to room temperature before grilling helps it cook more evenly.

The Classic Accompaniment: Pico de Gallo (Santa Maria Style Salsa)

While not strictly part of the grilling process, a fresh and vibrant salsa is a must-have with Santa Maria tri-tip. This simple pico de gallo complements the richness of the beef perfectly.

Ingredients:

  • 2 ripe tomatoes, diced
  • 1/2 white onion, finely diced
  • 1-2 jalapeños, seeded and minced (optional)
  • 1/4 cup chopped fresh cilantro
  • Juice of 1 lime
  • Salt to taste

Instructions:

  1. Combine all ingredients in a bowl.
  2. Gently toss to combine.
  3. Season with salt to taste.
  4. Let it sit for at least 15 minutes to allow the flavors to meld.

Method 1: The Traditional Santa Maria Vibe on a Weber Kettle

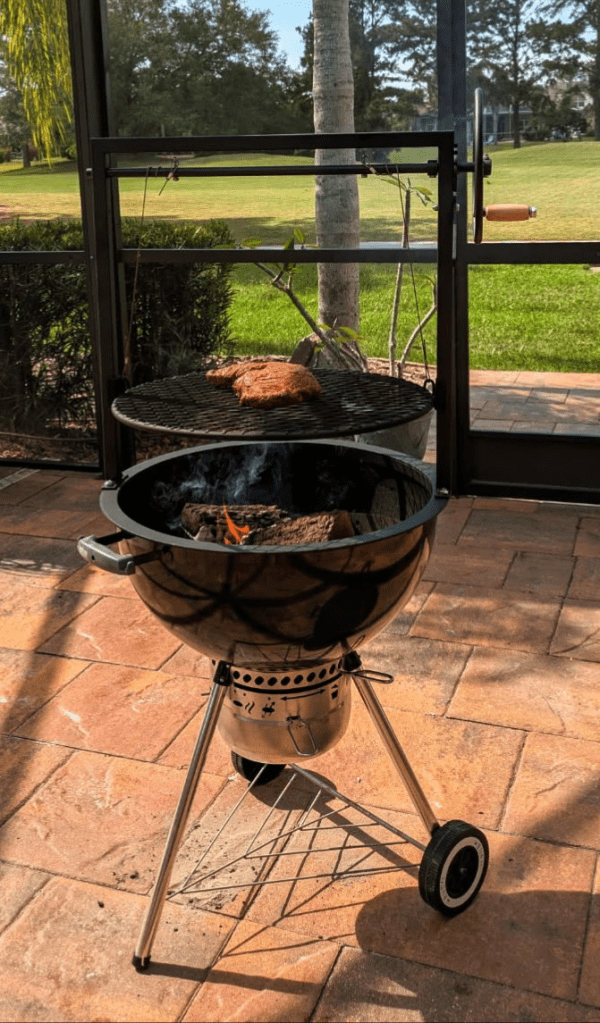
While a dedicated Santa Maria grill would be awesome – that’s also a pretty penny, but fear not, you can still capture that classic flavor with an inexpensive Weber Kettle and a Santa Maria attachment like this one – now you can easily transform your Weber kettle into a Santa Maria-style cooker.

Best of all this method utilizes direct heat, allowing for beautiful searing and that signature smoky essence from the coals.

What you’ll need:

Instructions:

  1. Set Up the Attachment and Coals: Install the Santa Maria grill attachment onto your Weber kettle. Light your charcoal in a chimney starter and pour the hot coals onto the charcoal grate, directly beneath where the tri-tip will sit on the elevated grate of the attachment. You’ll want a medium-hot bed of coals.
  2. Position the Tri-Tip: Place the seasoned tri-tip on the elevated grate of the Santa Maria attachment. This positions the meat closer to the heat source than the standard Weber grate, which is key for Santa Maria-style cooking.
  3. Sear: Since the meat is closer to the heat, it will sear relatively quickly. Keep a close eye on it and flip after about 3-4 minutes per side to develop a nice crust.
  4. Cook to Temperature: Continue to cook, flipping occasionally (about every 10 minutes) until the internal temperature reaches 130-135°F for medium-rare (or your desired level of doneness). The Santa Maria elevated grate allows you to control the heat by raising or lowering the cooking surface, or by adjusting the amount of charcoal. This will likely take another 20-40 minutes depending on the thickness of your tri-tip and the heat of your coals.
  5. Rest: Once cooked, remove the tri-tip from the grill and let it rest on a cutting board for 10-15 minutes.
  6. Slice and Serve: Slice the tri-tip against the grain and serve with the fresh pico de gallo, grilled garlic bread, and pinquito beans.

Method 2: Traeger Pellet Grill

Using a Traeger offers consistent temperature and a wonderful smoky flavor, making it a fantastic alternative.

What you’ll need:

Instructions:

  1. Preheat the Traeger: Preheat your Traeger to 225°F (107°C).
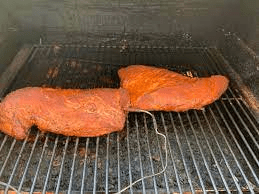
  2. Smoke the Tri-Tip: Place the seasoned tri-tip directly on the grill grates. Smoke for about 45-60 minutes, or until the internal temperature reaches around 115-120°F. This allows it to absorb that delicious smoky flavor.
  3. Increase the Heat: Crank up the Traeger to 450-500°F (232-260°C).
  4. Sear: Sear both sides of the tri-tip for about 3-4 minutes per side to create a nice crust.
  5. Cook to Temperature: Continue cooking until the internal temperature reaches 130-135°F for medium-rare (or your desired level of doneness).
  6. Rest: Remove the tri-tip from the Traeger and let it rest on a cutting board for 10-15 minutes.
  7. Slice and Serve: Slice against the grain and serve with your homemade pico de gallo and other favorite sides.

Which Method is Right for You?

Both methods yield fantastic results, just with slightly different nuances. The Weber with the Santa Maria attachment provides that direct heat sear and smoky charcoal flavor reminiscent of the traditional Santa Maria experience. The Traeger offers ease of use and consistent smoky flavor. Ultimately, the best method is the one that fits your equipment and preferences!

So, fire up your grill (whichever kind you choose!), grab a tri-tip, and experience the deliciousness of Santa Maria barbecue.

What are your favorite ways to cook tri-tip? Let us know in the comments below!

Naked Collagen Creamer – Why I like it and How to use it

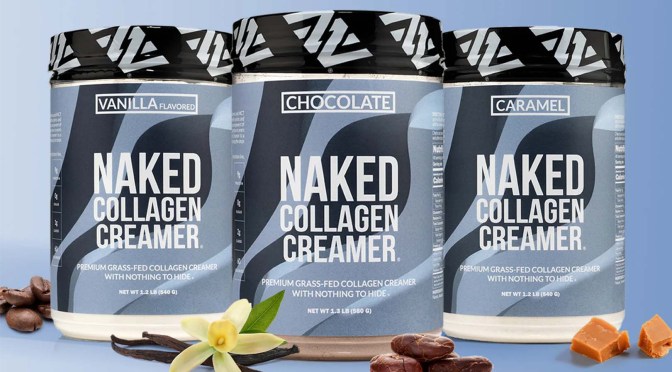
In the ever-evolving world of fitness nutrition, finding products that seamlessly blend health benefits with everyday convenience are always appreciated. I’ve found Naked Nutrition’s Collagen Creamer to be one such product – not only will it enhance your daily coffee or tea while promoting overall wellness, but there’s a lot of other things you can do with it too. In this article I’ll show you how. As a bonus I’ll also give you my new recipe for “Golden Milk” which now includes the Naked Collagen Creamer!

If you want to see the product on Amazon, you can find it here: Naked Nutrition Collagen Creamer.


Naked Collagen Creamer – Product Overview

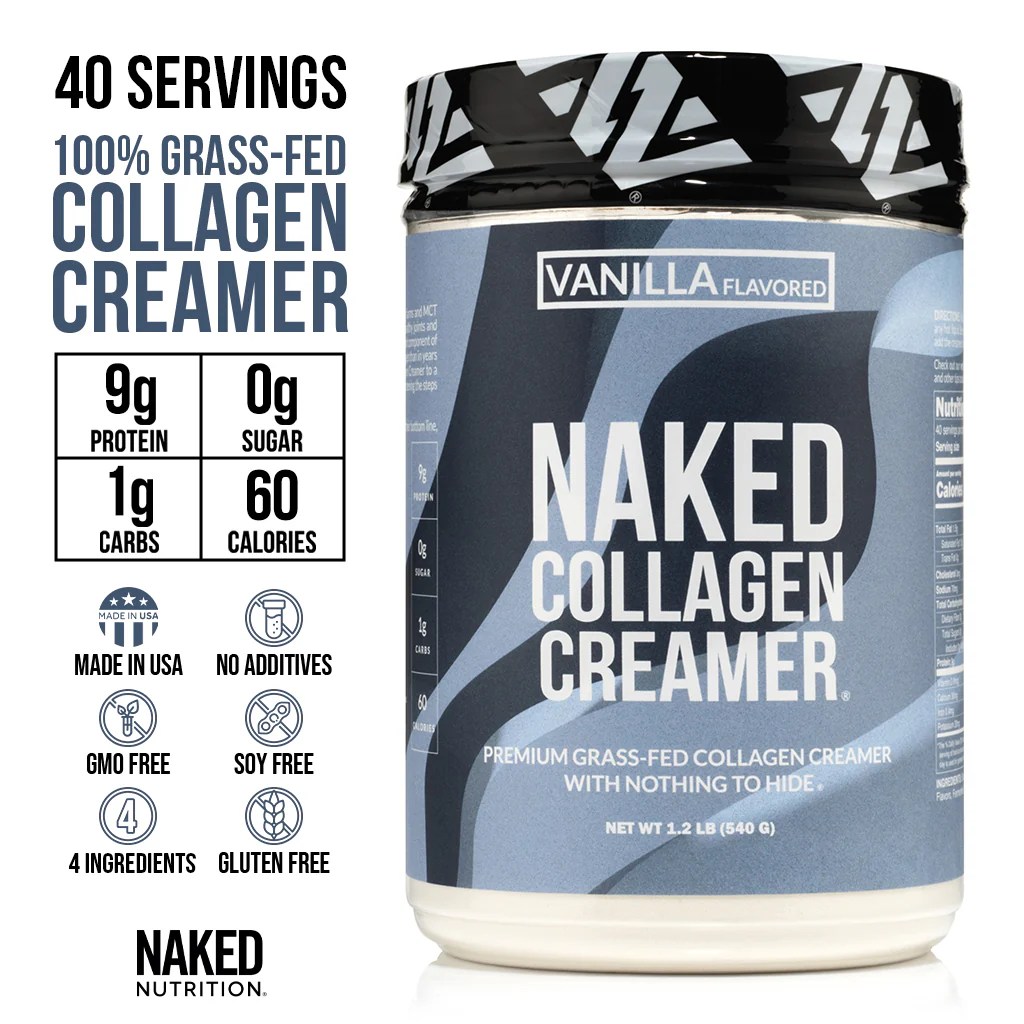
Naked Collagen Creamer is a dairy-free supplement that combines premium collagen peptides with MCT oil powder. Each serving delivers 9 grams of collagen sourced from European pasture-raised cows, aiming to support healthy skin, hair, nails, and joints. Since I like to fast, the addition of MCT oil provides me a quick energy boost, making it a versatile addition to your morning routine.

Key Ingredients and Nutritional Profile

  • Collagen Peptides: Sourced from grass-fed, pasture-raised cows, these peptides are intended to promote skin elasticity, joint health, and stronger hair and nails.
  • MCT Oil Powder: Derived from coconut oil, MCTs (Medium-Chain Triglycerides) are known for providing rapid energy and supporting cognitive function.
  • Natural Vanilla Flavor: Offers a subtle, pleasant taste without the use of artificial sweeteners or additives.
  • Acacia Fiber: A prebiotic fiber that supports digestive health.

Each 14g serving contains 60 calories, 9g of protein, 1.5g of fat (all saturated), 1g of carbohydrates, and no sugars, making it suitable for various dietary preferences, including gluten-free and soy-free diets.

Here is the label for you to review…

Potential Benefits

  • Skin, Hair, and Nail Health: Regular intake of collagen peptides may improve skin hydration and elasticity, leading to a more youthful appearance.
  • Joint Support: Collagen is a key component of cartilage; supplementing it can aid in maintaining joint health, potentially reducing discomfort during workouts.
  • Energy Boost: MCT oil provides a quick source of energy, which can be particularly beneficial before or after exercise.

Note: Always consult with a healthcare professional before adding new supplements to your diet, especially if you have underlying health conditions or are pregnant or nursing.


Naked Collagen Creamer – Why I Liked It

What stood out to me most about the Naked Collagen Creamer is its simplicity and clean ingredient list. It’s refreshing to find a product that delivers on health benefits without relying on artificial flavors, fillers, or sweeteners. The subtle vanilla flavor is just right—it enhances my morning coffee or tea without overpowering it.

Another win? Its versatility. Whether I’m in a rush and need a quick nutrient boost or want to experiment in the kitchen, this creamer fits seamlessly into my routine – it’s extremely versatile.

Naked Collagen Creamer – Ideas for How to Use It

While coffee and tea are the obvious go-to choices for mixing the creamer, there are plenty of other creative ways to enjoy it:

  • Smoothie Upgrade: Blend it with almond milk, frozen banana, and a dash of cinnamon for a creamy breakfast smoothie.
  • Baking: Add it to pancake batter or energy bites for a protein and collagen boost.
  • Overnight Oats: Stir it into your oats along with some almond butter for a delicious and nutritious start to your day.
  • Whipped Drinks: Dissolve it in hot water and whisk it with frothy almond milk for a luxurious latte experience.

BONUS: Golden Milk with Naked Collagen Creamer

Golden Milk, also known as turmeric latte, is a comforting, anti-inflammatory beverage that’s perfect for winding down in the evening or as a cozy pick-me-up. By adding Naked Collagen Creamer, you canboost its nutritional value with collagen peptides and MCT oil for joint, skin, and energy benefits.

Golden Milk Recipe:

  • 1 cup unsweetened almond milk (or your favorite milk alternative)
  • 1/2 tsp ground turmeric
  • 1/4 tsp ground cinnamon
  • 1/8 tsp ground ginger (optional, for extra warmth and spice)
  • Pinch of black pepper (enhances turmeric’s bioavailability)
  • 1 tsp honey or maple syrup (optional, for sweetness)
  • 1 scoop Naked Collagen Creamer
  • 1/4 tsp vanilla extract (optional, for a richer flavor)

Golden Milk Recipe Instructions:

  1. Heat the Milk:
    In a small saucepan, gently heat the almond milk over medium heat until warm but not boiling.
  2. Mix the Spices:
    Whisk in the turmeric, cinnamon, ginger, and black pepper. Stir well to ensure the spices are evenly distributed.
  3. Add Naked Collagen Creamer:
    Once the milk is warm, add one scoop of Naked Collagen Creamer. Stir until it dissolves completely.
  4. Sweeten (Optional):
    Add honey or maple syrup to taste, along with the vanilla extract if desired. Stir well.
  5. Blend for Froth (Optional):
    For a creamier, frothy texture, transfer the mixture to a blender and blend for 20–30 seconds.
  6. Serve:
    Pour into your favorite mug and enjoy while it’s warm. You can sprinkle a pinch of cinnamon on top for garnish.

Why You’ll Love It:

This Golden Milk recipe combines the potential anti-inflammatory properties of turmeric with the nourishing benefits of collagen and MCT oil. It’s a perfect way to relax while supporting your skin, joints, and digestion.

Enjoy this delightful blend as part of your nighttime ritual or an afternoon treat!


Why Trust Me?

Regular readers of my blog know I’m into all things healthy. Being over 50, I strive to live the 50+ Fitness lifestyle and as such not only do I regularly work out, but I also enjoy tracking everything I eat and drink. I hope me sharing my experiences with you will be helpful. If you read my blog, you’ve probably read my Trust Guarantee so you know I don’t endorse a company unless I use their products myself. When I recommend Naked Oats to you it’s because I have seen the results for myself – therefore I feel good about telling you to check it out too. I hope you find as much value from the product as my family and I do.

My Conclusion

Naked Nutrition’s Vanilla Collagen Creamer offers a convenient and tasty way to incorporate the benefits of collagen and MCT oil into your daily routine. Its clean ingredient list and health-focused formulation make it a noteworthy addition to the wellness regimens of fitness enthusiasts and health-conscious individuals alike.

Where to Buy

Naked Collagen Creamer is available for purchase on Amazon and through Naked Nutrition’s official website.

Top 7 Instant Pots: Understanding the Many Different Models and Choosing the Right One for You

Instant Pots have revolutionized home cooking by combining the functions of multiple kitchen appliances into a single, versatile device. I’ll admit I was late to the Instant Pot party and by the time I jumped in I was overwhelmed by all the different models. I’m writing this article to help you figure out what’s the difference between the most popular Instant Pots so you can figure out which one is best for. I’ll also tell you which model is my favorite.

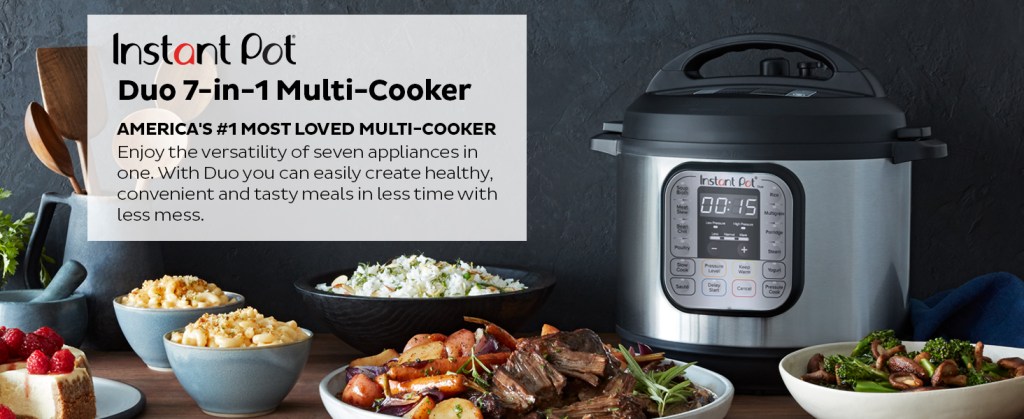
1. Instant Pot Duo 7-in-1

Overview

The Instant Pot Duo 7-in-1 is one of the most popular models, and for good reason. It offers seven functions: pressure cooker, slow cooker, rice cooker, steamer, sauté pan, yogurt maker, and warmer. This model is available in various sizes (3, 6, and 8 quarts), making it suitable for different household sizes.

Key Features

  • Seven Functions: Versatile cooking options.
  • Stainless Steel Inner Pot: Durable and easy to clean.
  • 14 One-Touch Programs: For quick and easy meal preparation.

Pros

  • User-Friendly: Intuitive controls and clear display.
  • Versatile: Suitable for a wide range of recipes.
  • Affordable: Offers great value for its features.

Cons

  • Basic Features: Lacks some advanced options found in higher-end models.
  • No Sous Vide Function: Not ideal for those interested in this cooking method.

    2. Instant Pot Duo Plus 9-in-1

    Overview

    The Duo Plus 9-in-1 builds on the Duo models by adding more functions, including egg cooking, cake making, and sterilizing. This makes it a great option for more adventurous cooks.

    Key Features

    • Nine Functions: Adds egg cooker, cake maker, and sterilizer.
    • Upgraded Display: Larger and more intuitive interface.
    • Sous Vide Function: For precise temperature control.

    Pros

    • More Functions: Greater versatility in cooking.
    • User-Friendly Display: Easy to navigate.
    • Precise Cooking: Ideal for sous vide enthusiasts.

    Cons

    • Higher Price: More expensive than the basic Duo models.
    • Complexity: Extra functions might be overwhelming for beginners.

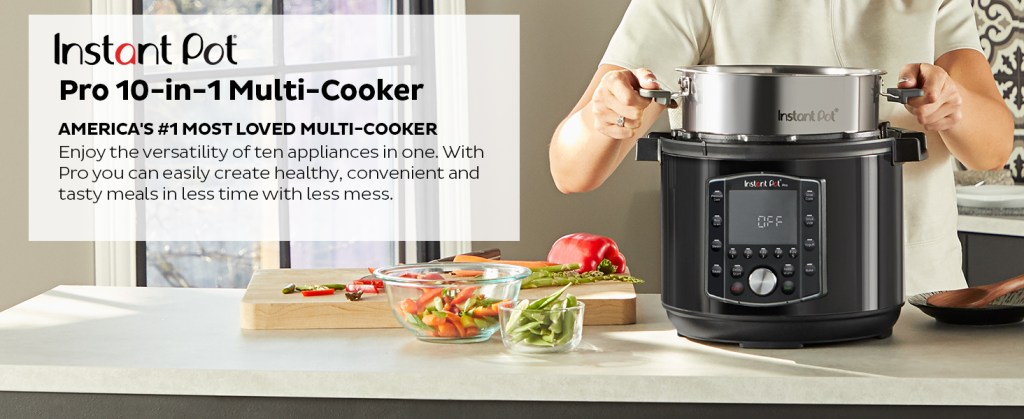
    3. Instant Pot Pro 10-in-1

    Overview

    The Pro 10 in 1 Instant Pot model takes versatility to the next level with ten functions and customizable cooking programs. It is designed for home cooks who want maximum control over their cooking.

    Key Features

    • 10 Functions: Includes all Duo Plus functions plus a cake maker and custom program.
    • Ultra Button: Allows for custom programming of pressure and temperature.
    • Altitude Adjustment: Automatically adjusts cooking parameters based on altitude.

    Pros

    • Highly Customizable: Great for precise cooking.
    • Advanced Features: Suitable for experienced cooks.
    • Large Display: Easy to read and use.

    Cons

    • Complex: Might be too advanced for casual users.
    • Price: Higher cost due to additional features.

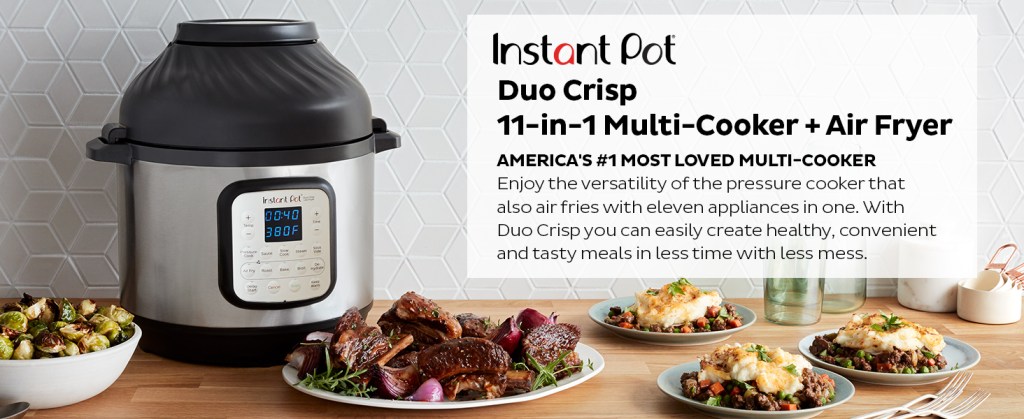
    4. Instant Pot Duo Crisp + Air Fryer

    Overview

    The Duo Crisp + Air Fryer model combines the functions of a pressure cooker and an air fryer, offering even more cooking possibilities. This is perfect for those who want to enjoy fried foods with less oil.

    Key Features

    • Pressure Cooker + Air Fryer: Combines both functionalities.
    • Two Lids: One for pressure cooking and one for air frying.
    • 11 Functions: Includes baking, roasting, and broiling.

    Pros

    • Versatile Cooking: Pressure cook and air fry in one device.
    • Healthier Frying: Less oil required compared to traditional frying.
    • Large Capacity: Available in 6 and 8 quarts.

    Cons

    • Bulkier: Takes up more counter space.
    • Price: Higher due to dual functionality.
    • Learning Curve: Requires understanding of both pressure cooking and air frying.

    5. Instant Pot Duo Mini

    Overview

    The Instant Pot Duo Mini is a smaller version of the popular Duo model, offering the same functions in a more compact size. It’s perfect for small households, dorm rooms, or as a second Instant Pot.

    Key Features

    • Compact Size: 3-quart capacity.
    • Seven Functions: Same as the full-sized Duo.
    • Portable: Easy to store and transport.

    Pros

    • Space-Saving: Ideal for small kitchens.
    • Affordable: Lower price than larger models.
    • Versatile: Same functions as larger Duo.

    Cons

    • Limited Capacity: Not suitable for large families or batch cooking.
    • Fewer Accessories: Limited availability of accessories compared to larger models.

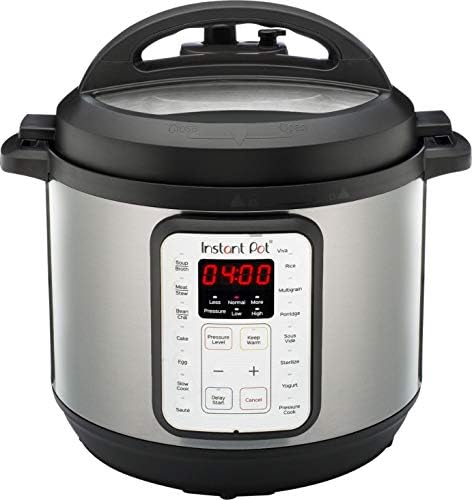
    6. Instant Pot Viva 9-in-1

    Overview

    The Instant Pot Viva 9-in-1 offers nine functions and several enhanced features at an affordable price. It’s a great option for those looking for more functionality without breaking the bank.

    Key Features

    • Nine Functions: Includes cake maker and sterilizer.
    • Enhanced Safety Features: Multiple safety mechanisms.
    • Variety of Programs: 15 one-touch programs.

    Pros

    • Affordable: Great value for the features.
    • Versatile: Wide range of cooking options.
    • User-Friendly: Easy to use and clean.

    Cons

    • Intermediate Model: Lacks some of the advanced features of higher-end models.
    • Build Quality: Not as durable as more expensive models.

    7. Instant Pot Rio

    Instant Pot Rio Model Overview

    The Instant Pot Rio is an upgraded version of the popular Duo series, designed to offer enhanced functionality and modern aesthetics while maintaining the convenience and efficiency that Instant Pot is known for.

    Key Features

    • 7-in-1 Functionality: The Rio can perform as a pressure cooker, slow cooker, rice cooker, yogurt maker, steamer, sauté pan, and warmer.
    • 13 Smart Programs: It includes customizable settings for pressure cooking, slow cooking, meat/stew, poultry, beans/chili, rice, multigrain, soup/broth, steam, sauté, yogurt, cake, and keep warm.
    • Anti-Spin Design: Features an anti-spin, stainless steel inner pot with a tri-ply bottom, making it easier to sauté and stir.
    • Easy-Release Switch: Simplifies and speeds up steam release, enhancing safety.
    • Energy Efficient: Cooks up to 70% faster with up to 60% energy savings compared to conventional methods.
    • Capacity: 6-quart capacity, ideal for family meals and batch cooking.
    • Safety Features: Includes overheat protection, an easy-seal lid, and multiple other safety mechanisms.
    • Dishwasher Safe: Both the lid and inner pot are dishwasher safe for easy cleanup.

    Pros

    • Modern Design: Sleeker and more modern than earlier models.
    • Versatile Cooking Options: Wide range of functions and smart programs.
    • Improved Safety and Usability: Enhanced safety features and a user-friendly interface.
    • Energy Efficient: Saves time and energy during cooking.

    Cons

    • Instruction Clarity: Some users have reported that the instructions could be more detailed.
    • Lid Sealing Issues: Occasionally, users find the lid tricky to seal properly.

    Overall, the Instant Pot Rio offers a great balance of advanced features and user-friendly design, making it a strong contender for both new users and Instant Pot veterans.


    How to Choose the Right Instant Pot for You

    When selecting the right Instant Pot model, consider the following factors:

    Cooking Needs

    Evaluate what types of cooking you’ll be doing most frequently. If you need basic pressure cooking, the Duo models are excellent. For more specialized cooking, consider models with additional functions like the Duo Plus, Ultra, or Pro.

    Kitchen Space

    Consider the available space in your kitchen. Larger models like the Duo Crisp + Air Fryer and Max take up more counter space, while the Duo Mini is perfect for smaller kitchens.

    Budget

    Instant Pots range from affordable to premium prices. Determine your budget and choose a model that offers the best features for your needs without overspending.

    Tech Savviness

    If you enjoy using smart devices, the Smart WiFi model offers remote control and monitoring. For those who prefer simplicity, models without WiFi may be more suitable.

    Family Size

    Choose

    a size that matches your household’s needs. Smaller families might opt for 3 or 6-quart models, while larger families or those who batch cook might prefer 8 or 10-quart options.

    Advanced Features

    Consider if you need advanced features like sous vide, air frying, or higher pressure. Models like the Duo Plus, Ultra, and Max cater to these needs.

    Safety Features

    If safety is a priority, look for models with enhanced safety features, such as the Duo Nova or Viva, which offer additional safety mechanisms and user-friendly designs.


    My Favorite Instant Pot

    I personally own the Instant Pot Pro 10-1. I chose this model because it provides all the features I wanted AND it was a very reasonable price compared to some of the other models that did things I don’t need. I’m really happy with my decision and I’ve been very satisfied with the Instant Pot Pro.


    Is an Instant Pot in YOUR future?

    The right Instant Pot model can transform your cooking experience, offering convenience, versatility, and efficiency. By understanding the features and capabilities of each model, you can select the one that best fits your lifestyle and culinary needs. Whether you opt for the basic Duo, the advanced Pro (my fav), or the innovative Duo Crisp + Air Fryer, Instant Pots are designed to make home cooking easier and more enjoyable. I’d love to know which model is YOUR favorite and why?

    What to read next?

    3 Fish Taco Recipes: Baja-style, Chipotle, and Blackened. Which is your fav?

    Fish tacos – the quintessential taste of summer! My wife loves them. Fresh, flavorful, and endlessly customizable, these handheld delights are a crowd-pleaser for any occasion. Let me give you 3 of our favorite recipes along with a few tips to make sure they come out great!

    Note: I’m actually gonna give you two FISH taco recipes and one SHRIMP taco recipe because it’s just too good to pass up.

    1. Baja-Style Fish Tacos: A Classic with a Twist

    This recipe captures the essence of the Baja California fish taco experience. Simple, yet bursting with flavor, it’s perfect for a laid-back gathering.

    Ingredients:

    • For the Fish:
      • 1 pound cod fillets, cut into bite-sized pieces
      • 1/2 cup all-purpose flour
      • 1 teaspoon chili powder
      • 1/2 teaspoon smoked paprika
      • 1/4 teaspoon garlic powder
      • 1/4 teaspoon onion powder
      • Salt and freshly ground black pepper, to taste
      • Vegetable oil, for frying
    • For the Slaw:
      • 2 cups shredded green cabbage
      • 1/2 cup chopped red onion
      • 1/4 cup chopped fresh cilantro
      • 1/4 cup mayonnaise
      • 1 tablespoon lime juice
      • 1/2 teaspoon chili powder
      • Salt and freshly ground black pepper, to taste
    • For the Tacos:
      • 12 corn tortillas, warmed
      • Cilantro sprigs, for garnish
      • Lime wedges, for serving
      • Optional toppings: Crema, crumbled queso fresco cheese, avocado slices, pico de gallo

    Instructions:

    1. Marinate the Fish: In a shallow bowl, combine the flour, chili powder, paprika, garlic powder, onion powder, salt, and pepper. Toss the fish pieces in the mixture to coat evenly.
    2. Prepare the Slaw: In a separate bowl, combine the cabbage, red onion, cilantro, mayonnaise, lime juice, chili powder, salt, and pepper. Mix well and set aside.
    3. Cook the Fish: Heat enough vegetable oil in a large skillet over medium-high heat. Carefully add the fish pieces and cook for 2-3 minutes per side, or until golden brown and cooked through. Drain on paper towels.
    4. Assemble the Tacos: Warm the tortillas according to package instructions. Top each tortilla with a generous helping of fish, slaw, and a sprinkle of cilantro. Add your desired toppings like crema, queso fresco, avocado, or pico de gallo. Serve with lime wedges for an extra burst of citrusy goodness.

    Tips:

    • For a more flavorful fish, marinate it for at least 30 minutes before cooking.
    • You can substitute cod with other white fish varieties like tilapia, halibut, or mahi-mahi.
    • For a gluten-free option, use gluten-free flour for the fish batter.
    • Leftover slaw can be stored in an airtight container in the refrigerator for up to 3 days.

    2. Spicy Chipotle Shrimp Tacos with Mango Salsa: A Fiesta in Every Bite

    This recipe takes fish tacos to a whole new level with the smoky heat of chipotle peppers and the sweet freshness of mango salsa.

    Ingredients:

    • For the Shrimp:
      • 1 pound large shrimp, peeled and deveined
      • 1 tablespoon olive oil
      • 1 tablespoon adobo sauce (from canned chipotle peppers in adobo sauce)
      • 1 teaspoon chili powder
      • 1/2 teaspoon smoked paprika
      • 1/4 teaspoon garlic powder
      • Salt and freshly ground black pepper, to taste
    • For the Mango Salsa:
      • 1 ripe mango, diced
      • 1/2 red onion, diced
      • 1/4 cup chopped fresh cilantro
      • 1 jalapeno pepper, seeded and finely chopped (adjust for desired spice level)
      • 1 tablespoon lime juice
      • Salt and freshly ground black pepper, to taste
    • For the Tacos:
      • 12 corn tortillas, warmed
      • Cilantro sprigs, for garnish
      • Lime wedges, for serving
      • Optional toppings: Crema, crumbled queso fresco cheese, crumbled cotija cheese, avocado slices

    Instructions:

    1. Marinate the Shrimp: In a bowl, combine olive oil, adobo sauce, chili powder, paprika, garlic powder, salt, and pepper. Toss the shrimp in the marinade to coat evenly. Let marinate for at least 15 minutes, or up to 30 minutes for a stronger flavor.
    2. Prepare the Mango Salsa: In a separate bowl combine the diced mango, red onion, cilantro, jalapeno, lime juice, salt, and pepper. Mix well and set aside. 3. Cook the Shrimp: Heat a large skillet over medium-high heat. Add the shrimp and cook for 2-3 minutes per side, or until opaque and cooked through. Be careful not to overcook the shrimp, as they can become tough. 4. Assemble the Tacos: Warm the tortillas according to package instructions. Top each tortilla with a few shrimp, a generous spoonful of mango salsa, and a sprinkle of cilantro. Add your desired toppings like crema, queso fresco, cotija cheese, or avocado slices. Serve with lime wedges for an extra tangy touch.

    Tips:

    • If you can’t find canned chipotle peppers in adobo sauce, you can substitute with 1/2 teaspoon of chipotle chili powder and a pinch of cayenne pepper for a similar smoky heat.
    • For a milder salsa, remove the seeds from the jalapeno before chopping.
    • This recipe works well with grilled shrimp as well. Simply preheat your grill to medium-high heat and grill the shrimp for 2-3 minutes per side, or until cooked through.
    • Leftover mango salsa can be stored in an airtight container in the refrigerator for up to 3 days.

    3. Blackened Mahi-Mahi Tacos with Creamy Avocado Crema: A Luxurious Twist

    This recipe elevates the fish taco experience with blackened mahi-mahi and a decadent creamy avocado crema.

    Ingredients:

    • For the Mahi-Mahi:
      • 1 pound mahi-mahi fillets, cut into bite-sized pieces
      • 1 tablespoon olive oil
      • 1 tablespoon blackening seasoning
    • For the Creamy Avocado Crema:
      • 1 ripe avocado, peeled and pitted
      • 1/4 cup sour cream
      • 1/4 cup chopped fresh cilantro
      • 1 tablespoon lime juice
      • 1/4 teaspoon garlic powder
      • Salt and freshly ground black pepper, to taste
    • For the Tacos:
      • 12 corn tortillas, warmed
      • Shredded red cabbage, for garnish
      • Cilantro sprigs, for garnish
      • Lime wedges, for serving

    Instructions:

    1. Prepare the Mahi-Mahi: Heat olive oil in a large skillet over medium-high heat. Season the mahi-mahi pieces generously with blackening seasoning. Carefully add the fish to the skillet and cook for 2-3 minutes per side, or until cooked through and blackened on the edges.
    2. Make the Creamy Avocado Crema: In a blender or food processor, combine the avocado, sour cream, cilantro, lime juice, garlic powder, salt, and pepper. Blend until smooth and creamy. Set aside.
    3. Assemble the Tacos: Warm the tortillas according to package instructions. Top each tortilla with a generous helping of blackened mahi-mahi, a dollop of creamy avocado crema, and a sprinkle of shredded red cabbage and cilantro. Serve with lime wedges for an extra burst of freshness.

    Tips:

    • If you don’t have blackening seasoning, you can create your own by combining paprika, cayenne pepper, garlic powder, onion powder, and thyme.
    • For a spicier crema, add a pinch of jalapeno pepper to the avocado mixture while blending.
    • Mahi-mahi can be a bit delicate, so be gentle when flipping it in the pan to avoid breaking it.
    • You can substitute mahi-mahi with another firm white fish like swordfish or halibut.

    These three recipes offer just a glimpse into the endless possibilities of the fish taco world. With a variety of flavors and textures to explore, you’re sure to find a combination that tantalizes your taste buds. So grab your tortillas, get creative with your toppings, and dive into the delicious world of fish tacos!


    What to read next?

    The 5 Best Sous Vide Machines

    Sous vide cooking is a game changer for home chefs – offering precision and consistency in every dish. In this article we’ll talk about what sous vide cooking is and also give you 5 great sous vide machines to consider – each boasting unique features and functionalities.

    What is Sous Vide?

    Sous vide, a French term meaning “under vacuum,” is a cooking method that involves sealing food in a vacuum-sealed bag and then cooking it to a precise temperature in a water bath. This technique has gained popularity among professional chefs and home cooks alike due to its ability to produce consistent, high-quality results with minimal effort.

    Origins and Development

    The origins of sous vide can be traced back to the 1970s when French chefs, including Georges Pralus and Bruno Goussault, began experimenting with the method to improve the texture and flavor of their dishes. Pralus discovered that cooking foie gras sous vide retained its fat and resulted in a better texture compared to traditional cooking methods. Goussault, on the other hand, focused on the science behind the technique, contributing to its widespread adoption in high-end restaurants.

    The Process

    The sous vide process involves three main steps: preparation, cooking, and finishing.

    1. Preparation: The food is seasoned and then placed in a vacuum-sealed bag. The vacuum sealing process removes air from the bag, preventing oxidation and allowing for better heat transfer during cooking. Vacuum sealers or water displacement methods can be used to achieve this.
    2. Cooking: The vacuum-sealed bag is submerged in a water bath set to a precise temperature, usually controlled by an immersion circulator. Unlike traditional cooking methods that use high temperatures and varying heat levels, sous vide cooks food at a consistent, lower temperature for a longer period. This gentle and even cooking method ensures that the food is cooked to the exact level of doneness throughout.
    3. Finishing: After the food is cooked sous vide, it is typically finished by searing, grilling, or broiling to develop a flavorful crust and an appealing appearance. This step is crucial for enhancing texture and adding the desired caramelization or Maillard reaction to the dish.

    What are the benefits of using Sous Vide?

    Sous vide cooking offers several benefits:

    • Precision: The ability to control the cooking temperature with exact precision ensures that food is cooked to the perfect doneness every time. This eliminates the risk of overcooking or undercooking.
    • Consistency: Because the temperature remains constant, sous vide provides consistent results, making it easier to replicate dishes with the same quality and taste.
    • Enhanced Flavor and Nutrition: Vacuum sealing food preserves its natural flavors and nutrients. The extended cooking time allows the flavors to meld and intensify, resulting in a more flavorful dish.
    • Tenderness: Cooking tough cuts of meat sous vide breaks down the collagen and connective tissues without drying out the meat, yielding tender and juicy results.

    Sous Vide Applications

    Sous vide is versatile and can be used for a wide range of foods, including meats, seafood, vegetables, and even eggs. For meats, sous vide ensures even cooking from edge to edge, making it ideal for steaks, chicken breasts, and pork chops. For vegetables, it preserves their natural color, texture, and nutrients. Eggs cooked sous vide achieve a perfect consistency, from soft-boiled to poached.


    5 Best Sous Vide Machines

    Anova Precision Cooker Pro:

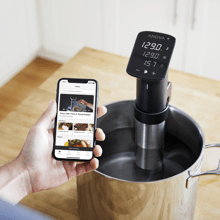
    Anova Precision Cooker Pro is a game-changer in the world of sous vide cooking. With its robust construction and powerful performance, it’s a favorite among professional chefs and home cooks alike. Its 1200 watts of power ensure rapid heating and precise temperature control, allowing you to achieve restaurant-quality results every time. The intuitive interface and Wi-Fi connectivity enable seamless control via the Anova app, making cooking a hassle-free experience. Its durable stainless steel body and detachable clamp make it easy to use and maintain.


    Breville Joule Sous Vide:

    Breville Joule Sous Vide combines elegance with efficiency, making it a must-have for discerning chefs. Its 1100 watts of power and compact design make it ideal for both professional kitchens and home use. The Joule app offers a wide range of recipes and cooking tips, making it easy to master sous vide cooking techniques. With precise temperature control and rapid heating capabilities, it delivers consistent results with minimal effort. The sleek stainless steel construction and magnetic base enhance its durability and usability, making it a valuable addition to any kitchen.

    Did you know Breville also makes a ‘professional’ model with their Breville Polyscience HydroPro Plus Sous Vide Immersion Circulator, 1450 Watt unit.


    SousVide Supreme Touch

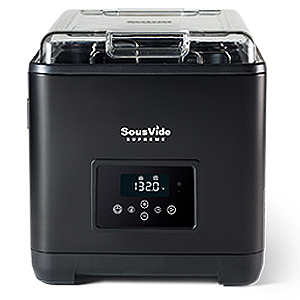
    SousVide Supreme Touch is known for its simplicity. The Touch 9 Liter’s unit is self-contained and said to be more energy-efficient than immersion circulator models. Once at temperature, the water oven uses about the energy of a 25W light bulb. This sous vide water oven has double-wall insulation and a see-through lid that contains steam to prevent evaporation, help retain heat and lower its energy consumption. The lid also doubles as a tray for transporting pouches and the cool-touch housing also protects the countertop from scorching and prevents accidental burns.


    KitchenBoss Sous Vide Cooker:

    KitchenBoss Sous Vide Cooker is a budget-friendly option that doesn’t compromise on performance. With 1100 watts of power and intuitive controls, it delivers restaurant-quality results without breaking the bank. The compact design and easy-to-read display make it suitable for both professional kitchens and home use. Its precise temperature control and timer functions ensure precise cooking, while the durable construction ensures long-lasting performance. Whether you’re a seasoned chef or a novice cook, KitchenBoss Sous Vide Cooker is sure to elevate your culinary creations.


    Instant Pot Accu Slim Sous Vide

    Instant Pot is a name you trust and it makes sense to consider their Sous Vide Machine – especially when it gets high marks from home chefs. The Instant Pot Accu Sous Vide machine adapts to any recipe, with cooking times from 1 minute to 72 hours and temperatures from 68°F to 203°F (20°C to 95°C). It also auto stops when you remove it from water which is nice and the entire unit is waterproof.


    Is THIS the Best Sous Vide Machine?

    Don’t just take my word for it. Thousands of home chefs have made Anova the #1 name in Sous vide machines and the Anova Precision Cooker Pro stands out as the ultimate sous vide machine in their lineup. Its combination of power, precision, and usability make it a cut above the rest. The 1200 watts of power ensure rapid heating and precise temperature control, allowing for flawless culinary creations. The intuitive interface and Wi-Fi connectivity make it easy to use, while the durable stainless steel construction ensures longevity. Whether you’re a professional chef or a home cook, the Anova Precision Cooker Pro is sure to elevate your sous vide cooking experience to new heights.


    Resources for Further Reading

    To learn more about sous vide cooking, check out these detailed guides and articles:

    1. The Spruce Eats’ Beginner’s Guide to Sous Vide Cooking​ (The Spruce Eats)​
    2. Anova Culinary’s Everything You Need to Know about Sous Vide​ (Anova Culinary)​
    3. Taste of Home’s Guide on What is Sous Vide Cooking​ (Taste of Home)​
    4. MasterClass’s Overview on Sous Vide Cooking​ (The Spruce Eats)​
    5. WebMD’s Explanation of Sous Vide​ (The Spruce Eats)​.

    These resources provide comprehensive insights into the sous vide method, equipment recommendations, and additional tips to help you get started with this innovative cooking technique.


    What to read next?

    Traeger Flatrock Grill vs Blackstone Griddle

    When it comes to outdoor cooking, griddles have gained immense popularity for their versatility and efficiency. If you read my blog you know I love my griddle cooking. Blackstone is the current leader in the griddle world, but Traeger has a new entry with their Flatrock Grill. Let’s compare the Traeger Flatrock Grill and the most popular Blackstone 36-Inch Griddle and see what we find out…

    Overview of Traeger Flatrock Grill and Blackstone 36-Inch Griddle

    Traeger Flatrock Grill

    The Traeger Flatrock Grill offers a robust build, precise temperature control, and versatile cooking capabilities. You can read my full review here: What is the Traeger Flatrock?

    Blackstone 36-Inch Griddle

    Blackstone is a well-established name in the griddle market, renowned for its reliable and versatile products. The Blackstone 36-Inch Griddle is a flagship model that offers a large cooking surface (769 sq inches!), powerful burners, and user-friendly features, making it a favorite among grilling enthusiasts.

    Key Features Comparison

    Let’s evaluate the Traeger Flatrock Grill and the Blackstone 36-Inch Griddle based on several key features: cooking surface, burners and heat distribution, versatility, temperature control, ease of use, build quality, and value for money.

    1. Cooking Surface

    Traeger Flatrock Grill:

    • The Traeger Flatrock Grill features a cooking surface of approximately 600 square inches.
    • The surface is made of cold-rolled steel, which is known for its excellent heat retention and even heat distribution.

    Blackstone 36-Inch Griddle:

    • The Blackstone 36-Inch Griddle offers a larger cooking surface, around 770 square inches!
    • The surface is constructed from cold-rolled steel, similar to the Traeger, ensuring good heat retention and distribution.

    Comparison:
    The Blackstone 36-Inch Griddle provides a larger cooking area, making it more suitable for cooking for large groups or preparing multiple dishes at once. Both griddles use cold-rolled steel, which ensures consistent heat across the surface. WINNER BLACKSTONE

    2. Burners and Heat Distribution

    Traeger Flatrock Grill:

    • The Flatrock Grill comes with a three-burner system.
    • Each burner can be controlled independently, allowing for different cooking zones and precise heat management.

    Blackstone 36-Inch Griddle:

    • The Blackstone Griddle is equipped with a four-burner system.
    • Independent control for each burner allows for versatile cooking zones and efficient heat distribution.

    Comparison:
    The Blackstone griddle has an additional burner compared to the Traeger, providing more control over heat zones and potentially better heat distribution across the larger cooking surface. However, both models offer excellent heat control capabilities. WINNER – BLACKSTONE

    3. Versatility

    Traeger Flatrock Grill:

    • The Traeger Flatrock Grill excels in versatility, capable of cooking a wide variety of foods from breakfast items to dinner entrees.
    • The flat top surface allows for searing, sautéing, and frying.

    Blackstone 36-Inch Griddle:

    • The Blackstone 36-Inch Griddle is also highly versatile, accommodating a wide range of cooking styles.
    • It can handle everything from pancakes and eggs to steaks and stir-fries.

    Comparison:
    Both griddles offer similar versatility, allowing users to cook a wide range of foods. The choice between the two might come down to personal preference or specific cooking needs, but in terms of versatility, both models perform exceptionally well. WINNER – TIE

    4. Temperature Control

    Traeger Flatrock Grill:

    • Features precise temperature control knobs for each burner.
    • A built-in thermometer helps monitor the cooking surface temperature.

    Blackstone 36-Inch Griddle:

    • Equipped with individual control knobs for each burner.
    • Lacks a built-in thermometer, but the controls are intuitive and responsive.

    Comparison:
    The Traeger Flatrock Grill has an edge with its built-in thermometer, providing an additional layer of temperature monitoring. However, both griddles offer precise and responsive temperature control through their burner knobs. WINNER – TRAEGER

    5. Ease of Use

    Traeger Flatrock Grill:

    • Features a push-button ignition system for quick startup.
    • Includes side shelves and hooks for utensils, enhancing convenience.

    Blackstone 36-Inch Griddle:

    • Also features a push-button ignition system for easy lighting.
    • Comes with a side shelf and a bottom shelf for storage, as well as hooks for utensils.

    Comparison:
    Both griddles are designed with user convenience in mind. They feature push-button ignition systems and include additional storage and organization options, making them both easy to use. WINNER – TIE

    6. Build Quality

    Traeger Flatrock Grill:

    • Constructed with high-quality materials, including a powder-coated finish to resist rust and corrosion.
    • The build quality reflects Traeger’s reputation for durable and reliable products.

    Blackstone 36-Inch Griddle:

    • Built with robust materials designed to withstand outdoor conditions.
    • Features a powder-coated steel frame and a thick cold-rolled steel griddle top.

    Comparison:
    Both griddles are constructed from high-quality materials and are built to last. Traeger and Blackstone both have strong reputations for producing durable outdoor cooking equipment, so build quality is excellent in both models. WINNER – TIE

    7. Value for Money

    Traeger Flatrock Grill:

    • Priced at a premium, reflecting its high-quality construction and advanced features.
    • Offers excellent value for those seeking a versatile and reliable griddle.

    Blackstone 36-Inch Griddle:

    • Generally more affordable than the Traeger Flatrock Grill.
    • Provides a large cooking surface and versatile features at a competitive price point.

    Comparison:
    The Blackstone 36-Inch Griddle offers better value for money, especially for those on a budget or needing a larger cooking surface without a high investment. The Traeger Flatrock Grill, while more expensive, justifies its price with its additional features and build quality. WINNER – BLACKSTONE

    Features Winner: BLACKSTONE


    User Feedback and Reviews

    Don’t just take my word for it, let’s see what other people have to say…

    Traeger Flatrock Grill

    Users of the Traeger Flatrock Grill often praise its versatility and build quality. The precise temperature control and even heat distribution are highlighted as significant advantages. However, some users note the premium price as a potential drawback.

    Common Praises:

    • Excellent heat retention and distribution.
    • Versatile cooking capabilities.
    • High-quality construction.

    Common Criticisms:

    • Higher price point.
    • Slightly smaller cooking surface compared to some competitors.

    Blackstone 36-Inch Griddle

    The Blackstone 36-Inch Griddle receives positive feedback for its large cooking surface, powerful burners, and affordability. Users appreciate the griddle’s ability to cook large quantities of food efficiently and its overall ease of use.

    Common Praises:

    • Large cooking surface.
    • Affordable price.
    • Powerful and efficient burners.

    Common Criticisms:

    • Lack of built-in thermometer.
    • Occasional maintenance required to prevent rust.

    Video Comparison

    I also found this video review of both griddles to be a helpful discussion. It’s from a 3rd party I have no affiliation with but the information shared is good…


    Final Verdict: Which One to Choose?

    Choosing between the Traeger Flatrock Grill and the Blackstone 36-Inch Griddle ultimately depends on your specific needs and preferences. Here’s a summary to help you decide:

    Choose the Traeger Flatrock Grill if:

    • You prioritize high build quality and advanced features like a built-in thermometer and the Traeger name.
    • You are willing to invest in a premium product.
    • You prefer a smaller, somewhat more manageable cooking surface.

    Choose the Blackstone 36-Inch Griddle if:

    • You need a larger cooking surface for cooking for large groups.
    • You are looking for a more affordable option.
    • You value powerful burners and efficient heat distribution.
    • You want the market leader

    Both the Traeger Flatrock Grill and the Blackstone 36-Inch Griddle offer exceptional performance and versatility. The decision between the two will depend on your budget, cooking needs, and preference for specific features. Either way, both griddles are excellent choices for enhancing your outdoor cooking experience.


    What to read next?