
How to Speed Up a Slow Computer

Is your computer crawling along at a snail’s pace, leaving you frustrated and unproductive? Don’t despair; there are several steps you can take to breathe new life into your sluggish machine. Whether you’re dealing with a desktop, laptop, or even a tablet, this guide will walk you through a variety of methods to speed up your system and get it running smoothly again. Give one or more of these a try and they may just solve your problem!

12 Tips for Speeding Up Your Computer

  1. Identify the Culprit:
    • Before diving into fixes, it’s essential to identify what’s causing your computer to slow down. Common culprits include too many startup programs, malware infections, outdated hardware, and a cluttered hard drive.
  2. Perform a Virus Scan:
    • Malware and viruses can wreak havoc on your computer’s performance. Run a full system scan using reliable antivirus software to detect and remove any malicious programs that may be lurking on your system.
  3. Clean Up Your Hard Drive:
    • Over time, your hard drive can become cluttered with unnecessary files, such as temporary files, old downloads, and cached data. Use disk cleanup tools to remove these files and free up disk space. Additionally, consider uninstalling unused programs to further declutter your system.
  4. Defragment Your Hard Drive:
    • Fragmentation occurs when files are stored in non-contiguous clusters on your hard drive, leading to slower read and write times. Running a disk defragmentation tool can reorganize these files and improve overall system performance.
  5. Upgrade Your Hardware:
    • If your computer is still running slowly after performing the above steps, it may be time to consider hardware upgrades. Adding more RAM or upgrading to a solid-state drive (SSD) can significantly improve performance and responsiveness.
  6. Manage Startup Programs:
    • Many programs automatically launch when you start your computer, consuming valuable system resources. Disable unnecessary startup programs to speed up boot times and free up memory for other tasks.
  7. Update Your Operating System and Drivers:
    • Outdated software and drivers can cause compatibility issues and hinder performance. Make sure your operating system is up to date with the latest patches and updates, and regularly check for driver updates from your hardware manufacturer’s website.
  8. Optimize Your Web Browser:
    • If you spend a lot of time browsing the web, your browser’s performance can have a significant impact on your overall computing experience. Clear your browser cache, disable or remove unnecessary extensions, and consider using a lightweight browser for better performance.
  9. Adjust Visual Effects:
    • Fancy visual effects and animations may look nice, but they can also consume valuable system resources. Consider disabling or reducing visual effects in your operating system settings to improve performance.
  10. Upgrade Your Internet Connection:
    • A slow internet connection can make your computer feel sluggish, especially when streaming videos or downloading large files. Consider upgrading to a faster internet plan or using a wired connection for better speed and stability.
  11. Keep Your System Cool:
    • Overheating can cause your computer to slow down or even crash. Make sure your computer is adequately ventilated and free of dust and debris. Consider investing in additional cooling solutions, such as fans or cooling pads, if necessary.
  12. Consider a Fresh Install:
    • If all else fails and your computer is still running slowly, you may want to consider performing a fresh install of your operating system. This will erase all data on your hard drive, so be sure to back up any important files before proceeding.

Look, we all know a slow computer can be a frustrating problem, but it’s not insurmountable. By following the steps outlined in this guide, you can identify the underlying causes of your computer’s sluggishness and take appropriate action to fix them. Whether it’s cleaning up your hard drive, upgrading your hardware, or optimizing your software settings, there are plenty of ways to speed up your system and get it running like new again.

What to read next…

How to Encrypt your Emails for Enhanced Privacy and Security – GMAIL, Outlook, Apple Mail, and more

In an age where digital privacy is increasingly important, encrypting your emails is one of the most effective ways to safeguard sensitive information from prying eyes. Whether you’re communicating with colleagues, clients, or friends, email encryption ensures that only intended recipients can access the contents of your messages. In this How To Guide, we’ll explore the importance of email encryption, the different encryption methods available for Gmail, Outlook, Apple, and more, as well step-by-step instructions on how to encrypt your emails for enhanced privacy and security.

Understanding Email Encryption:

Email encryption is a process that converts the content of an email message into a scrambled, unreadable format (cipher text) to protect it from unauthorized access during transmission. Only the intended recipient with the corresponding decryption key can decipher and read the encrypted message.

Importance of Email Encryption:

  • Protects Confidential Information: Encrypting emails prevents unauthorized individuals, including hackers and cybercriminals, from intercepting and accessing sensitive information such as financial data, personal details, and proprietary business information.
  • Ensures Privacy: By encrypting your emails, you maintain the privacy of your communications, reducing the risk of unauthorized surveillance or data breaches.
  • Regulatory Compliance: In certain industries, such as healthcare and finance, email encryption is mandated by regulations such as HIPAA (Health Insurance Portability and Accountability Act) and GDPR (General Data Protection Regulation) to ensure the protection of sensitive data.

Types of Email Encryption:

  • Symmetric Encryption: Uses a single shared key to both encrypt and decrypt messages. While efficient, symmetric encryption requires securely sharing the encryption key with the recipient.
  • Asymmetric Encryption (Public-Key Encryption): Employs a pair of cryptographic keys – a public key and a private key. The public key is used to encrypt messages, while the private key is used to decrypt them. This method eliminates the need for sharing encryption keys, enhancing security.
  • End-to-End Encryption: Ensures that only the sender and the intended recipient can read the contents of an email by encrypting messages on the sender’s device and decrypting them on the recipient’s device. End-to-end encryption provides the highest level of security, as even the email service provider cannot access the encrypted messages.

Now that we understand the importance and different methods of email encryption, let’s explore how to encrypt your emails using popular email clients and encryption tools.

Step-by-Step Guide to Email Encryption:

Using Built-In Encryption Features:

Gmail:

  • Compose a new email message in Gmail.
  • Click on the “More options” (three dots) icon at the bottom of the compose window.
  • Select “Confidential mode” from the menu.
  • Set expiration dates and permissions (such as preventing forwarding or downloading) for added security.
  • – Optionally, set a passcode to further restrict access to the email.
  • – Click “Save” to apply the confidential mode settings and send your encrypted email.

Outlook:

  • Compose a new email message in Outlook.
  • Click on the “Options” tab in the email compose window.
  • Select “Encrypt” from the “Permissions” group.
  • Choose whether to encrypt the message and attachments or just the message.
  • Send the email as usual, and it will be encrypted during transmission.

Apple Mail (macOS):

  • Compose a new email message in Apple Mail.
  • Click on the “Security” icon (lock with a curved arrow) in the email compose window.
  • Choose “Encrypt Message” from the dropdown menu.
  • If the recipient’s public key is available, Apple Mail will automatically encrypt the message.

Using Third-Party Encryption Tools:

  • PGP (Pretty Good Privacy):
    • Install a PGP-compatible email client or plugin, such as GPG Suite for macOS or Gpg4win for Windows.
    • Generate a public-private key pair using the PGP software.
    • Share your public key with your contacts and obtain their public keys.
    • Compose a new email message and select the option to encrypt the message using PGP.
    • Enter the recipient’s public key to encrypt the message before sending it.
  • S/MIME (Secure/Multipurpose Internet Mail Extensions):
    • Obtain an S/MIME certificate from a trusted certificate authority (CA) or your organization’s IT department.
    • Import the S/MIME certificate into your email client.
    • Compose a new email message and enable S/MIME encryption.
    • Select the recipient’s certificate to encrypt the message using S/MIME.

Using Encrypted Email Services:

  • Consider using encrypted email services that prioritize privacy and security, such as ProtonMail, Tutanota, or Hushmail.
  • Sign up for an account with the encrypted email service provider of your choice.
  • Compose and send emails within the encrypted email platform, where messages are automatically encrypted end-to-end.

Best Practices for Email Encryption:

  • Use Strong Encryption Algorithms:
    • Opt for encryption methods that utilize robust cryptographic algorithms, such as AES (Advanced Encryption Standard) for symmetric encryption and RSA or ECC for asymmetric encryption.
  • Protect Your Private Keys:
    • Safeguard your private encryption keys by storing them securely and avoiding sharing them with unauthorized individuals.
  • Regularly Update Encryption Software:
    • Keep your email client, encryption plugins, and encryption tools up-to-date to ensure they incorporate the latest security patches and enhancements.
  • Verify Recipient’s Encryption Support:
    • Before sending encrypted emails, verify that your recipients support email encryption and have the necessary encryption keys or certificates.
  • Educate Users:
    • Educate users about the importance of email encryption and how to securely exchange encryption keys or certificates. Encourage them to adopt encryption practices to enhance the security of their communications.

Time for Action

Encrypting your emails is a fundamental step towards protecting your privacy and ensuring the confidentiality of your sensitive information. By leveraging encryption technologies and following best practices, you can mitigate the risks associated with unauthorized access, interception, and surveillance of your email communications. Whether you’re using built-in encryption features in popular email clients, third-party encryption tools like PGP and S/MIME, or encrypted email services, prioritizing email encryption empowers you to communicate securely in an increasingly interconnected digital world.

Remember, email encryption is just one aspect of maintaining robust cybersecurity hygiene. Stay informed about emerging threats, regularly update your security measures, and remain vigilant against potential vulnerabilities to safeguard your digital assets effectively.

By implementing email encryption as part of your cybersecurity strategy, you contribute to a safer and more secure online environment for yourself and others.


What to read next

How to use ChatGPT – Tips, Best Practices, Examples, and Use Case Scenarios

ChatGPT, developed by OpenAI, is a cutting-edge language model that can generate human-like text based on the input it receives. It has numerous applications, ranging from casual conversation to professional content creation. This article will provide a comprehensive guide on how to use ChatGPT effectively, covering best practices and various use case scenarios.

Understanding ChatGPT

ChatGPT is built on the GPT-4 architecture, which stands for “Generative Pre-trained Transformer 4”. It has been trained on a diverse range of internet text, enabling it to generate coherent and contextually relevant responses. However, it doesn’t have consciousness or understanding but predicts and generates text based on patterns it has learned.

Getting Started with ChatGPT

To use ChatGPT, you typically interact with it through an interface provided by OpenAI or integrated into third-party applications. Here’s a step-by-step guide to get started:

  1. Access the Platform: Sign up on the OpenAI website or a platform that integrates ChatGPT.
  2. Input Your Query: Type your question or prompt into the text box.
  3. Receive the Response: ChatGPT processes your input and generates a response.
  4. Refine Your Query: If the response is not satisfactory, refine your query or provide more context.

Best Practices for Using ChatGPT

1. Be Clear and Specific

The clearer and more specific your input, the better the response you will get. Avoid ambiguous language and provide as much detail as necessary.

Example:

  • Less Clear: “Tell me about history.”
  • More Clear: “Give me a brief overview of the causes of World War I.”

2. Use Contextual Information

Providing context helps ChatGPT understand the background and generate more relevant responses.

Example:

  • Without Context: “What’s the weather like?”
  • With Context: “What’s the weather like in New York City today?”

3. Break Down Complex Queries

If you have a complex question, break it down into smaller, more manageable parts.

Example:

  • Complex Query: “Explain quantum mechanics.”
  • Broken Down: “What is a quantum particle? How do quantum particles interact?”

4. Experiment with Rephrasings

If ChatGPT doesn’t provide a satisfactory answer, try rephrasing your question or providing additional information.

Example:

  • Initial Query: “Why is the sky blue?”
  • Rephrased: “Can you explain why the sky appears blue during the day?”

5. Use System Messages for Tone and Style

You can guide ChatGPT on the tone and style of the response by framing your request accordingly.

Example:

  • Formal: “Please provide a detailed analysis of economic factors contributing to inflation.”
  • Informal: “Can you break down what’s causing prices to go up lately?”

Use Case Scenarios

ChatGPT can be used in a variety of scenarios, from casual to professional settings. Here are some common use cases:

1. Personal Assistant

Tasks: Scheduling, reminders, general information searches, and more.

Example:

  • “Set a reminder for my meeting at 3 PM tomorrow.”
  • “What’s the best route to get from my house to the office?”

2. Content Creation

Tasks: Writing articles, generating ideas, drafting emails, and creating social media posts.

Example:

  • “Generate an outline for an article about renewable energy sources.”
  • “Write a friendly email to thank a colleague for their help on a project.”

3. Education and Tutoring

Tasks: Answering questions, explaining concepts, and providing study tips.

Example:

  • “Explain the Pythagorean theorem.”
  • “What are the key points of Shakespeare’s Hamlet?”

4. Customer Support

Tasks: Responding to customer inquiries, providing product information, and troubleshooting issues.

Example:

  • “How do I reset my password?”
  • “What are the features of the latest software update?”

5. Brainstorming and Ideation

Tasks: Generating ideas for projects, problem-solving, and creative thinking.

Example:

  • “What are some unique marketing strategies for a new product launch?”
  • “Give me some ideas for a science fiction short story.”

6. Professional Development

Tasks: Resume writing, interview preparation, and career advice.

Example:

  • “How should I format my resume for a tech job?”
  • “What are some common interview questions for a project manager role?”

Advanced Tips for Using ChatGPT

1. Leveraging System Prompts

System prompts are special instructions that guide the model on how to behave or what style to adopt. Use them to tailor responses to specific needs.

Example:

  • “You are a helpful assistant. Provide a step-by-step guide to planting a garden.”

2. Iterative Refinement

Sometimes, the first response may not be perfect. Use an iterative process to refine the output.

Example:

  • Initial Response: “Plant seeds in soil.”
  • Refined Query: “Can you provide a detailed step-by-step guide on planting seeds in soil?”

3. Utilizing External Data

While ChatGPT doesn’t have real-time data access, you can provide it with specific data to generate more accurate responses.

Example:

  • “Based on the following data, analyze the market trends: [Insert data].”

4. Multi-turn Conversations

Engage in multi-turn conversations to build on previous responses, making interactions more natural and contextually rich.

Example:

  • User: “Tell me about the Great Wall of China.”
  • ChatGPT: “The Great Wall of China is a series of fortifications made of stone, brick, tamped earth, and other materials.”
  • User: “How long is it?”
  • ChatGPT: “The Great Wall is approximately 13,171 miles (21,196 kilometers) long.”

Ethical Considerations

When using ChatGPT, it’s important to be aware of ethical considerations:

  1. Privacy: Avoid sharing personal, sensitive, or confidential information.
  2. Bias: Be mindful that AI can reflect and propagate biases present in the training data.
  3. Misinformation: Verify critical information from trusted sources, as AI can sometimes generate plausible-sounding but incorrect information. In other words just because they say “Trust the Science” doesn’t necessarily mean it’s true!

Give ChatGPT a try

I’ve found ChatGPT to be a versatile tool that can significantly enhance productivity and creativity across various domains. By following best practices and exploring different use case scenarios, users can maximize the benefits of this advanced AI model. Whether for personal use, educational purposes, or professional tasks, understanding how to effectively interact with ChatGPT will unlock its full potential, providing valuable assistance and insights.


What to read next?

The Best Saltwater Inshore Fishing Reels

If you’re a saltwater inshore fishing fan like me, you know one of the most important pieces of equipment is your fishing REEL. I fish the flats and barrier islands of the Gulf Coast of Florida and my reel can mean the difference between netting that redfish or losing him. To help you navigate the many options for saltwater inshore fishing reels, we’ve compiled a list of our favorite top five saltwater inshore fishing reels. This article is a combo with my article on the best saltwater inshore fishing RODS. Together, if you cast with any of these, and you’re sure to hook a big one!

What is “Inshore” Fishing?

Before we get started I’ll clarify that I’m talking about “inshore fishing” as the type of fishing you might do from a boat, kayak, or shore in which the water is 1 to 6 feet deep and you’re generally fishing about some type of structure (mangroves, grass flats, oyster beds, docks, sea wall, etc). So it’s not ‘surf’ fishing from the beach or offshore fishing – both of which would use different gear. For inshore fishing, I prefer a 3000-4000 reel, a 7 to 7’6″ rod, light to medium action and pretty light tackle – that may or may not include a bobber/float, small weight, and small-medium hooks. We’re generally targeting things like Redfish, Sea Trout, Snapper, Snook, Mackeral, and the like. These fish are in the 6 to 40 inch range so we’re not talking monsters here, but they are sure a lot of fun to catch!

Now that we’re on the same page, let’s talk about some great REELS for this type of fishing…


Shimano Stradic FL

The Shimano Stradic FL is a favorite among anglers for its exceptional performance and durability. It’s a top of the line choice. I’m choosing the 3000 model for Florida inshore fishing.

Featuring a Hagane body, this Shimano reel is built to withstand the corrosive effects of saltwater. The X-Protect water-resistant technology ensures that internal components remain protected, enhancing the reel’s longevity.

    Equipped with Shimano’s renowned Hagane gearing, the Stradic FL delivers smooth and powerful retrieves, making it ideal for battling saltwater species like redfish, snook, and speckled trout. Its X-Ship technology provides increased gear efficiency and power transmission, ensuring maximum performance with every cast.

    Additionally, the Stradic FL boasts a lightweight design, making it comfortable to use for extended periods. With its combination of durability, smoothness, and performance, the Shimano Stradic FL earns its place as one of the best saltwater inshore fishing reels on the market.


    Penn Battle III Spinning Reel

    Penn is a trusted name in the fishing industry, known for producing high-quality reels that can handle tough saltwater conditions. The Penn Battle III Spinning Reel is no exception, offering anglers a rugged and reliable option for inshore fishing.

    I’m choosing the Penn Battle III 3000 model.

    Constructed with a full metal body, side plate, and rotor, the Battle III is built to withstand the corrosive effects of saltwater and the rough handling that comes with fishing inshore environments. Its HT-100 carbon fiber drag system provides smooth and consistent drag pressure, allowing anglers to tackle hard-fighting fish with confidence.

      The reel’s 5 sealed stainless steel ball bearings ensure smooth operation, even after repeated exposure to saltwater. With its durable construction and reliable performance, the Penn Battle III Spinning Reel is a top choice for anglers targeting saltwater species inshore.


      Daiwa BG Spinning Reel

      The Daiwa BG Spinning Reel is renowned for its rugged construction and powerful performance, making it an excellent choice for saltwater inshore fishing. Built with a machined aluminum body and side cover, this reel is designed to withstand the harsh conditions of coastal environments.

      There are a number of reels in this lineup. I’d go with the 3000 for most inshore setups.

      One of the standout features of the Daiwa BG is its Digigear system, which provides increased gear durability and smoothness. The reel’s waterproof drag system delivers consistent drag pressure, allowing anglers to battle large saltwater species with ease.

        Additionally, the Daiwa BG features an oversized Digigear system that provides increased gear efficiency and power transmission, ensuring smooth retrieves even when targeting hard-fighting fish. With its durable construction and impressive performance, the Daiwa BG Spinning Reel is a top contender for saltwater inshore fishing.


        Abu Garcia Revo SX Inshore Spinning Reel

        The Abu Garcia Revo SX Inshore Spinning Reel is specifically designed to meet the demands of saltwater inshore fishing. Featuring a corrosion-resistant X2-Cräftic alloy frame and C6 carbon side plates, this reel is built to withstand the corrosive effects of saltwater while maintaining its lightweight and ergonomic design.

        Equipped with Abu Garcia’s renowned Carbon Matrix drag system, the Revo SX Inshore delivers smooth and consistent drag pressure, allowing anglers to control hard-fighting fish with ease. The reel’s AMGearing system provides increased gear efficiency and durability, ensuring reliable performance in any saltwater environment.

          I’m picking the Abu 30 here. With its durable construction, smooth drag, and powerful gearing, the Abu Garcia Revo Sx Inshore Spinning Reel is an excellent choice for anglers targeting saltwater species inshore.


          Okuma Azores Blue Saltwater Spinning Reel

            The Okuma Azores Blue Saltwater Spinning Reel is designed to handle the toughest saltwater conditions while delivering exceptional performance. Constructed with a die-cast aluminum body, side plate, and rotor, this reel is built to withstand the corrosive effects of saltwater and the rough conditions of inshore fishing.

            For the Okuma I’d go with the 4000, 10lb, 5:8;1 Model…

            Featuring Okuma’s Dual Force Drag system, the Azores Blue delivers smooth and consistent drag pressure, allowing anglers to tackle hard-fighting saltwater species with confidence. The reel’s 6HPB + 1RB corrosion-resistant stainless steel ball bearings ensure smooth operation, even after repeated exposure to saltwater.

            Additionally, the Okuma Azores Blue features a precision machine-cut brass pinion gear and CRC (Corrosion Resistant Coating) process, further enhancing its durability and performance in saltwater environments. With its rugged construction and reliable performance, the Okuma Azores Blue Saltwater Spinning Reel is a top contender for inshore fishing.


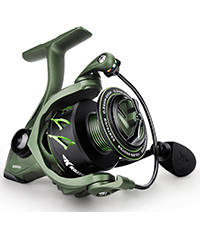
            KastKing Kapstan Elite Saltwater Spinning Reel

            As with the saltwater reels, one of my favorite brands is KastKing – they make great products for saltwater fishing for an affordable price. I find myself using KastKing reels all the time and they always perform.

            The KastKing Kapstan Elite Saltwater Spinning Reel is designed to withstand the toughest saltwater conditions while delivering unmatched performance. Featuring a fully waterproof IPX6 rating, this reel is protected from water intrusion, ensuring reliable operation in any environment.

            Constructed with a rugged aluminum frame and rotor, the Kapstan Elite is built to withstand the corrosive effects of saltwater and the rough conditions of inshore fishing. Its precision machined brass gears and stainless steel components provide smooth and powerful retrieves, allowing anglers to tackle hard-fighting saltwater species with ease.

            The reel’s carbon fiber drag system delivers smooth and consistent drag pressure, giving anglers the control they need to land their target fish. With its waterproof construction and high-performance features, the KastKing Kapstan Elite Saltwater Spinning Reel is a top choice for serious anglers.

            BONUS: the KastKing Spartacus series is another great option – it’s at a lower price point. My son uses a 3000 Spartacus reel and catches tons of inshore fish with it.


            Conclusion:

            When it comes to saltwater inshore fishing, having the right reel can make all the difference in casting AND reeling in your catch. Each of the reels mentioned above offers unique features and capabilities tailored to meet the demands of coastal environments. Whether you prefer the smoothness of the Shimano Stradic FL or the ruggedness of the Penn Battle III, there’s a reel on this list to suit every angler’s needs. And don’t overlook the KastKing models for value. With any of these top saltwater inshore fishing reels, you’ll be well-equipped to tackle the challenges of coastal fishing and reel in your next trophy catch.

            Remember to also see my article on the best saltwater fishing RODS too…

            How to Upgrade Your Computer’s RAM + Best RAM Upgrade Recommendations for PC and Mac

            Are you looking to upgrade your computer’s RAM? We can help. This article will give you a review of WHY you might want to upgrade your RAM along with 5 specific recommendations on RAM upgrade products for both a PC as well as a MAC.

            I’ve updated my RAM on my computers multiple times – its not as hard as you might think, it doesn’t cost very much, and it DOES make a noticeable difference in computer performance.

            Did you know? One of the most effective ways to give your computer a boost is by upgrading its RAM (Random Access Memory). Why? Because RAM plays a crucial role in multitasking, allowing your computer to run multiple programs simultaneously without slowing down.

            Understanding RAM:

            RAM is a type of computer memory that temporarily stores data and instructions that the CPU (Central Processing Unit) needs to access quickly. Unlike permanent storage devices like hard drives or SSDs (Solid State Drives), RAM is volatile, meaning it loses its data when the computer is turned off.

            The amount of RAM your computer has directly impacts its performance, especially when running multiple applications simultaneously or performing memory-intensive tasks like gaming or video editing. Upgrading your RAM can lead to improved multitasking capabilities, faster program loading times, and smoother overall performance.

            What you need to know BEFORE you try to upgrade RAM

            Is your computer CAPABLE of a RAM upgrade?

            Before purchasing new RAM modules, it’s crucial to ensure compatibility with your computer. Here’s what you need to consider:

            a. Type of RAM:

            There are different types of RAM, including DDR (Double Data Rate), DDR2, DDR3, DDR4, and DDR5. Check your computer’s specifications to determine which type of RAM is compatible.

            b. Capacity:

            Determine the maximum amount of RAM your computer can support. This information can usually be found in your computer’s manual or on the manufacturer’s website.

            c. Speed:

            RAM speed is measured in MHz (megahertz) and indicates how quickly data can be transferred to and from the memory modules. Make sure the speed of the new RAM matches or is compatible with your computer’s existing RAM.

            d. Form Factor:

            RAM modules come in different form factors, such as DIMM (Dual In-line Memory Module) for desktops and SODIMM (Small Outline Dual In-line Memory Module) for laptops. Ensure you select the correct form factor for your computer.

            Purchase the Right RAM:

            Once you’ve determined the compatibility requirements, it’s time to purchase the new RAM modules. Consider factors such as brand reputation, warranty, and customer reviews when selecting the RAM. It’s also essential to purchase the appropriate amount of RAM based on your computing needs.


            How to Install your new RAM

            What follows is only a general guide but NOT a substitute for YOUR computer’s specific manual and recommendations…

            Prepare Your Computer:

            Before installing the new RAM, it’s essential to prepare your computer:

            a. Turn off your computer and unplug all cables.

            b. Remove the case cover to access the internal components. Refer to your computer’s manual for specific instructions on how to do this.

            c. Ground yourself to discharge any static electricity by touching a metal surface or using an anti-static wrist strap. Static electricity can damage sensitive electronic components, including RAM modules.

            Remove Existing RAM (if applicable):

            If your computer’s RAM slots are already occupied, you’ll need to remove the existing RAM modules before installing the new ones:

            a. Press down on the tabs located at either end of the RAM slot to release the existing RAM module. b. Carefully remove the RAM module from the slot by pulling it straight out.

            c. Place the removed RAM modules in an anti-static bag or container to prevent damage.

            Install the New RAM:

            With the old RAM removed (if applicable), it’s time to install the new RAM modules:

            a. Align the notch on the RAM module with the notch in the RAM slot to ensure proper orientation.

            b. Gently insert the RAM module into the slot at a 45-degree angle.

            c. Once the RAM module is fully seated in the slot, press down firmly until the retention clips on both sides click into place.

            d. Repeat the process for additional RAM modules if you’re installing more than one.

            Replace the Case Cover and Power On:

            After installing the new RAM modules, follow these final steps to complete the upgrade:

            a. Replace the case cover and secure it with the screws.

            b. Reconnect all cables and peripherals to your computer.

            c. Power on your computer and wait for it to boot up.

            d. Once your computer has booted up, verify that the new RAM is detected by checking the system properties or using diagnostic tools.

            Test Performance:

            After upgrading your computer’s RAM, it’s a good idea to test its performance to ensure everything is functioning correctly. Open multiple applications or run memory-intensive tasks to gauge the improvement in speed and responsiveness.


            Top 5 RAM Upgrades for Personal Computers/Windows

            Now that we’ve know HOW to upgrade our RAM, let’s take a look at some of the best picks for RAM upgrades for a PC…

            Corsair Vengeance LPX 16GB (2 x 8GB) DDR4 3200MHz

            • Pros: High performance, reliable brand, excellent heat dissipation with aluminum heat spreader.
            • Cons: Slightly more expensive than other brands.
            • Review: Corsair’s Vengeance LPX is known for its stability and performance. The 3200MHz speed is great for gaming and heavy multitasking. It’s also XMP 2.0 ready, making it easy to overclock.
            • Price Check: Corsair’s Vengeance LPX 16GB

            Crucial Ballistix 3200 MHz DDR4 16GB (2 x 8GB)

            • Pros: Competitive pricing, reliable performance, attractive design.
            • Cons: May not fit in smaller cases due to height.
            • Review: Crucial’s Ballistix series offers solid performance at a reasonable price. It’s designed for gamers and performance enthusiasts, providing reliable speed and performance.
            • Price Check: Crucial Ballistic 3200

            G.Skill Ripjaws V Series 16GB (2 x 8GB) DDR4 3200MHz

            • Pros: Good value for money, solid performance, sleek design.
            • Cons: Basic heat spreader.
            • Review: G.Skill Ripjaws V is known for its excellent price-to-performance ratio. It offers reliable speeds and compatibility with most motherboards, making it a great choice for budget-conscious users.
            • Price Check: G Skill Ripjaws V Series 16GB

            Kingston HyperX Fury 16GB (2 x 8GB) 3200MHz DDR4

            • Pros: Auto-overclocking, reputable brand, reliable.
            • Cons: May be slightly more expensive than other similar options.
            • Review: Kingston’s HyperX Fury series is praised for its plug-and-play overclocking and stability. It’s a reliable choice for both gamers and professionals.
            • Price Check: Kingston HyperX Fury 16GB (2 x 8GB) 3200MHz DDR4

            TeamGroup T-Force Vulcan Z 16GB (2 x 8GB) DDR4 3200MHz

            • Pros: Affordable, decent performance, good heat spreader design.
            • Cons: Less known brand.
            • Review: TeamGroup’s T-Force Vulcan Z offers good performance at a lower price point. It’s an excellent choice for those looking to upgrade without breaking the bank.
            • Price Check: TeamGroup T-Force Vulcan Z 16GB (2 x 8GB) DDR4 3200MHz

            Top 5 RAM Upgrades for Macs

            You have a MAC and want to upgrade your RAM? I’ve done that too. Here’s some good RAM upgrades to consider…

            Crucial 16GB Kit (2 x 8GB) DDR4 2666 MHz SODIMM

            • Pros: Highly compatible with Mac, reliable, good performance.
            • Cons: Slightly higher price.
            • Review: Crucial is known for making reliable RAM, and this kit is specifically tailored for Mac systems, ensuring compatibility and performance.
            • Price Check: Crucial 16GB Kit

            OWC 16.0GB (2x 8.0GB) DDR4 2400MHz SODIMM

            • Pros: Excellent Mac compatibility, lifetime warranty, good customer support.
            • Cons: Slightly slower speed compared to 2666 MHz.
            • Review: OWC (Other World Computing) is a well-regarded brand among Mac users, known for high-quality, Mac-specific memory upgrades.
            • Price Check: OWC 16GB Mac

            Timetec Hynix IC 16GB KIT(2x8GB) DDR3 1600MHz

            • Pros: Affordable, good performance for older Macs, reliable.
            • Cons: Not compatible with newer models requiring DDR4.
            • Review: Timetec offers a cost-effective upgrade for older Mac models using DDR3. It’s a great choice for extending the life of an older machine.

            • Price Check: Timetec Hynix IC 16GB Kit

            Samsung 16GB (2 x 8GB) DDR4 2666MHz SODIMM

            • Pros: High performance, reliable brand, compatible with newer Macs.
            • Cons: Premium price.
            • Review: Samsung is a leading name in memory, and this kit offers excellent performance and reliability, making it ideal for demanding applications on newer Mac models.
            • Price Check: Samsung 16GB SODIMM Kit

            A-Tech 16GB Kit (2 x 8GB) DDR4 2666MHz SODIMM

            • Pros: Affordable, good performance, lifetime warranty.
            • Cons: Lesser-known brand.
            • Review: A-Tech provides a budget-friendly option with good performance and a lifetime warranty, making it a solid choice for those looking to upgrade their Mac without spending too much.
            • Price: A-TECH 16 GB Kit

            These RAM upgrades represent a range of performance and price points, catering to different user needs whether for general use, gaming, or professional applications. Each of these options is well-reviewed and reliable, ensuring a significant performance boost for both personal computers and Macs. I hope you find one that works for you.


            Links to Learn more

            1. How to Upgrade Your Computer’s RAM – PCWorld
            2. RAM Upgrade: How To Upgrade Your Computer’s Memory – Crucial
            3. How to Upgrade Laptop RAM and How to Install Laptop Memory – PCWorld
            4. A Beginner’s Guide to Upgrading Your PC – TechRadar

            Putting it all together on RAM Upgrades…


            Upgrading your computer’s RAM is a relatively simple and cost-effective way to enhance its performance and productivity. By following the steps outlined in this guide, you can successfully upgrade your computer’s RAM and enjoy smoother multitasking, faster program loading times, and overall improved performance. Remember to prioritize compatibility and handle the RAM modules with care to avoid any damage during the installation process. With the right approach, you can breathe new life into your computer and optimize its capabilities for years to come.


            What to read next?

            How a Massage Gun helped me overcome Sciatica Pain – Ahhh, Relief at Last


            Sciatica, characterized by radiating pain along the sciatic nerve, can be debilitating, affecting one’s ability to move and perform daily tasks – believe me I know. In this article I tell you more about Sciatica, how my own pain started, how I later used a massage gun to relieve it completely, and what type of massage gun I used.

            What is Sciatica?

            Before delving into my story or how massage guns can help alleviate sciatica pain, it’s crucial to understand the condition itself. Sciatica occurs when the sciatic nerve, which runs from the lower back down the back of each leg, becomes compressed or irritated. This compression can result from various factors, including a herniated disc, spinal stenosis, muscle spasm, or in my case a constant pressure on the nerve over time. The hallmark symptom of sciatica is pain that radiates from the lower back through the buttocks and down the leg, often accompanied by tingling or numbness. For me it was a debilitating pain all along the outside of my right leg.

            How did I get sciatica?

            I drive a lot for work and my company vehicle has a driver’s seat with ‘wings’ on the side – specifically the sides of the seat are raised about 2 inches as you can see here….

            I’m not sure what the benefit of that is supposed to be but I can tell you about the negative – it pinches the outside of your thighs and glutes and over time it led to intense sciatic pain! I tried moving my legs around, using ice, stretching, doing a bunch of exercises for sciatica from vids online, etc – nothing was working. Eventually I got a seat cushion to level out the seat, and while that helped eliminate the problem going forward, I still had the pain that was already there. Iced helped but only temporary and the pain remained. Until eventually I tried my wife’s massage gun – and that’s what finally did the trick!

            What is a Massage Gun?

            While traditional treatments like medication, physical therapy, and surgery exist, there’s a growing interest in alternative therapies such as massage guns. These handheld devices, once primarily used by athletes, are gaining recognition for their ability to provide targeted relief for pain.

            How do they work? Massage guns, also known as percussion massagers or percussive therapy devices, utilize rapid pulses of pressure to target specific areas of the body. These devices typically feature a vibrating or percussive mechanism that delivers high-frequency pulses deep into the muscle tissue. The rapid oscillations help relax tight muscles, improve blood flow, and reduce inflammation, ultimately relieving tension and discomfort.

            Benefits of Massage Guns for Sciatica Pain Relief:

            Here’s how a massage gun might help you…

            1. Targeted Muscle Relief: One of the primary benefits of massage guns is their ability to target specific muscle groups affected by sciatica. By applying concentrated pressure to the affected area, massage guns can help release tension and reduce muscle tightness, providing relief from sciatic nerve compression. This was a major benefit for me!
            2. Increased Blood Flow: Proper blood circulation is essential for healing injured tissues and reducing inflammation. Massage guns stimulate blood flow to the affected area, promoting the delivery of oxygen and nutrients while flushing out toxins and metabolic waste products. This improved circulation can expedite the healing process and alleviate sciatica symptoms.
            3. Reduced Inflammation: Inflammation plays a significant role in exacerbating sciatica pain. Massage guns help reduce inflammation by breaking up adhesions and scar tissue, loosening tight muscles, and facilitating lymphatic drainage. By addressing the underlying inflammatory response, massage guns can provide long-lasting relief from sciatic nerve discomfort.
            4. Improved Range of Motion: Sciatica often limits mobility, making it challenging to perform everyday activities. Regular use of massage guns can help improve flexibility and range of motion by loosening stiff muscles and promoting joint mobility. By restoring proper movement patterns, massage guns empower individuals with sciatica to engage in activities they enjoy without fear of exacerbating their symptoms. Another winner for me – the massage gun gave me the ability to walk normally again.
            5. Drug-Free Pain Management: Unlike medications that may carry side effects or dependency risks, massage guns offer a natural, drug-free alternative for managing sciatica pain. By harnessing the body’s innate healing mechanisms, massage therapy can provide sustainable relief without the need for pharmaceutical interventions.

            Tips for Using Massage Guns Safely and Effectively:

            While massage guns can be highly effective in relieving sciatica pain, it’s essential to use them safely to avoid exacerbating existing conditions or causing further injury. Here are some tips for using massage guns safely and effectively:

            1. Start Slowly: Begin with the lowest intensity setting and gradually increase the pressure as tolerated. Avoid applying excessive force, especially in areas of acute pain or inflammation.
            2. Focus on Trigger Points: Target trigger points or tender areas along the sciatic nerve pathway, including the lower back, buttocks, and outer thigh. Spend extra time on areas of tension or discomfort to facilitate muscle relaxation.
            3. Use Proper Technique: Maintain proper posture and positioning while using the massage gun to ensure optimal results. Keep the device perpendicular to the skin and move it in slow, circular motions, paying attention to any areas of tightness or restriction.
            4. Stay Hydrated: Drinking plenty of water before and after using a massage gun can help flush out toxins released during the massage and prevent dehydration. Proper hydration is essential for supporting muscle recovery and reducing soreness.
            5. Consult a Healthcare Professional: If you have underlying health conditions or concerns about using a massage gun, consult with a healthcare professional before incorporating it into your treatment plan. They can provide personalized guidance based on your individual needs and medical history.

            Conclusion:

            Massage guns offer a promising approach to managing sciatica pain by providing targeted relief, improving circulation, reducing inflammation, and promoting muscle relaxation. It definitely worked for me as I am now pain free.

            When used safely and effectively, these handheld devices can complement traditional treatment modalities and empower individuals with sciatica to take control of their pain management. However, it’s prudent to realize that you should use massage therapy as part of a comprehensive treatment plan under the guidance of a healthcare professional. With proper care and attention, massage guns have the potential to make a significant difference in the lives of those suffering from sciatica. I hope it can help you too!

            What type of Massage Gun did I buy?

            Amazon has tons of massage guns to choose from – they range in price from $20-50 all the way up into the hundreds. I chose a model in the $30-40 range and it’s been great.

            Top 5 Saltwater Inshore Fishing Rods

            If you’re a saltwater inshore fishing fan like me, then you know that saltwater inshore fishing presents its own set of challenges (and opportunities!), requiring specialized gear to tackle the diverse species and conditions found in coastal waters – especially here in Florida and the Gulf Coast. One of the most important pieces of equipment for any angler is your fishing rod. To help you navigate the sea of options, we’ve compiled a list of our favorite top five saltwater inshore fishing rods. This article is a combo with my article on the best saltwater inshore fishing REELS. Together, if you cast with any of these, and you’re sure to hook a big one!

            What is “Inshore” Fishing?

            Before we get started I’ll clarify that I’m talking about “inshore fishing” as the type of fishing you might do from a boat, kayak, or shore in which the water is 1 to 6 feet deep and you’re generally fishing about some type of structure (mangroves, grass flats, oyster beds, docks, sea wall, etc). So it’s not ‘surf’ fishing from the beach or offshore fishing – both of which would use different gear. For inshore fishing, I prefer a 7 to 7’6″ rod with a light to medium action and pretty light tackle – that may or may not include a bobber/float, small weight, and small-medium hooks. We’re generally targeting things like Redfish, Sea Trout, Snapper, Snook, Mackeral, and the like. These fish are in the 6 to 40 inch range so we’re not talking monsters here, but they are sure a lot of fun to catch!

            Now that we’re on the same page, let’s talk about some great RODS for this type of fishing…


            St. Croix Mojo Inshore Spinning Rod

            The St. Croix Mojo Inshore Spinning Rod is a top contender for anglers targeting saltwater species in shallow coastal waters and the Mojo 7’6″ Medium/Fast version is a rod I find myself using a lot.

            Crafted with premium SCII graphite, this rod offers exceptional strength and sensitivity, allowing anglers to feel even the subtlest of bites. The rod features specialized saltwater-grade components, including corrosion-resistant guides and a durable Fuji DPS reel seat. With models ranging from 7 to 8 feet in length and various power and action options, there’s a Mojo Inshore rod to suit every angler’s preferences and fishing style.


            Ugly Stik GX2 Spinning Rod

            Don’t let the low price fool you. Renowned for its legendary toughness, the Ugly Stik GX2 Spinning Rod is an excellent choice for saltwater inshore fishing enthusiasts on a budget.

            Constructed with a combination of fiberglass and graphite, this rod offers unmatched durability, capable of withstanding the rigors of saltwater environments. The rod’s clear tip design provides added sensitivity, allowing anglers to detect even the faintest strikes. Available in lengths ranging from 6 to 7 feet and varying power ratings, the Ugly Stik GX2 offers versatility and performance at an affordable price point. For this rod, I prefer the 7′ medium action rod.


            Penn Battalion Inshore Spinning Rod

            Engineered for serious inshore anglers, the Penn Battalion Inshore Spinning Rod combines strength, sensitivity, and precision to tackle a wide range of saltwater species. Constructed from a lightweight and durable graphite composite blank, this rod offers exceptional sensitivity, allowing anglers to detect subtle bites and movements. The rod features Fuji aluminum oxide guides and a Fuji reel seat, ensuring reliable performance in harsh saltwater environments. With models available in lengths ranging from 7 to 8 feet and varying power ratings, the Penn Battalion offers versatility and performance for anglers of all skill levels. I’d choose the 7 or 7’6″ rod here.


            St Croix Triumph Inshore Spinning Rod

            The St. Croix scores another place on my list with theirTriumph Inshore Spinning Rod. Having two of the five best on my list is a testament to the brand’s commitment to quality and performance. Here again I’m going with the 7’6′ medium/fast as my first choice.

            Built with a premium SCII graphite blank, the Triumph offers exceptional sensitivity and responsiveness, allowing anglers to detect even the most subtle strikes. The rod’s Fuji DPS reel seat ensures a secure and comfortable grip, while the corrosion-resistant stainless steel guides with aluminum oxide inserts provide smooth line flow and durability in harsh saltwater environments. With a range of lengths, powers, and actions available, the St. Croix Triumph Inshore Spinning Rod is a versatile option for anglers targeting a variety of saltwater species. Whether you’re casting lures for snook along the mangroves or jigging for flounder in the bay, this rod delivers the performance and reliability you need to succeed on the water.


            KastKing Estuary Inshore Saltwater Fishing Rods

            The first 4 rods are all winners, but my personal fav and the one I find myself choosing again and again is actually the KastKing Estuary Inshore Saltwater Fishing Rod. This rod has a great feel, it casts FAR, and I’ve caught some of my best fish with this rod!

            With a variety of lengths, powers, and actions available, there’s a KastKing Estuary rod to suit every inshore fishing scenario – as with the others, my preference is the 7’6 medium/fast rod.

            The KK Estuary Inshore rod offer anglers a winning combination of performance, durability, and value. Crafted with high-quality graphite blanks, these rods provide the perfect blend of sensitivity and strength, allowing anglers to feel even the subtlest of bites while maintaining the power needed to tackle saltwater species. The rod’s stainless steel guides with zirconium oxide rings ensure smooth line flow and minimize friction, while the ergonomic reel seat provides a comfortable and secure grip during long days on the water.

            Whether you’re targeting speckled trout in the flats or battling bull redfish in the marshes, the KastKing Estuary Inshore Saltwater Fishing Rods deliver the performance you need to reel in the big ones.


            Conclusion:

            When it comes to saltwater inshore fishing, selecting the right rod is essential for success on the water. Each of the five rods highlighted in this review offers unique features and benefits to suit different angling preferences and styles. Whether you’re targeting trout in the grass flats or casting a chunk of mullet for redfish along the mangroves, there’s a rod on this list that’s sure to meet your needs. So, grab your gear, hit the water, and get ready to reel in the big ones with me out on the water.

            Remember to also see my article on the best saltwater fishing REELS too…

            5 Best Saltwater Inshore Fishing Rod and Reel Combos – Save Money with these combos

            If you’re a fan of saltwater inshore fishing, you know the importance of having a good rod and reel – especially if you fish the flats in Florida like me. If you’ve been at it for awhile, you’re likely to purchase your rod and reel separately so you can fine tune the specs to your specific needs, but if you’re just starting out or want a simpler approach then a rod and reel ‘combo’ is the way to go. To help you navigate the sea of options, we’ve curated a list of the top five fishing rod and reel combos that can help you up your game. From casting accuracy to battling the many saltwater species, these combos are up for the challenge.

            What is “Inshore” Fishing?

            Before we get started I’ll clarify that I’m talking about “inshore fishing” as the type of fishing you might do from a boat, kayak, or shore in which the water is 1 to 6 feet deep and you’re generally fishing about some type of structure (mangroves, grass flats, oyster beds, docks, sea wall, etc). So it’s not ‘surf’ fishing from the beach or offshore fishing – both of which would use different gear. For inshore fishing, I prefer a 3000-4000 reel, a 7 to 7’6″ rod, light to medium action and pretty light tackle – that may or may not include a bobber/float, small weight, and small-medium hooks. We’re generally targeting things like Redfish, Sea Trout, Snapper, Snook, Mackeral, and the like. These fish are in the 6 to 40 inch range so we’re not talking monsters here, but they are sure a lot of fun to catch!


            Penn Battle III Combo

            The Penn Battle III Combo combines the renowned Penn Battle III reel with a high-quality graphite composite rod. The reel features a full metal body and side plates, offering exceptional durability against saltwater corrosion. Its HT-100 carbon fiber drag system provides smooth and reliable drag performance, crucial for handling powerful inshore species like snook and redfish. The rod’s graphite composite construction ensures sensitivity and responsiveness, allowing anglers to feel even the subtlest of bites. Available in various lengths and actions, this combo caters to different fishing preferences and techniques.

            I’d pick the 3000 reel with the 7′ rod combo.


            Daiwa BG Saltwater Spinning Combo

            Daiwa’s BG Saltwater Spinning Combo pairs the reliable Daiwa BG spinning reel with a rugged graphite rod. The BG reel boasts a machined aluminum body and side cover, providing excellent corrosion resistance in saltwater environments. Its waterproof drag system offers consistent drag pressure, essential for taming aggressive fish. The graphite rod offers a perfect blend of sensitivity and strength, allowing anglers to detect bites and control fish with ease. Whether targeting speckled trout or flounder, this combo delivers performance and reliability.

            Once again I’d go with the 3000 reel with 7′ rod for inshore saltwater setups.


            Shakespeare Ugly Stik GX2 Combo

            The Shakespeare Ugly Stik GX2 Combo is a budget-friendly option without compromising on quality. The Ugly Stik GX2 rod is renowned for its legendary toughness, thanks to its combination of fiberglass and graphite construction. Paired with a reliable Shakespeare spinning reel, this combo offers durability and versatility for saltwater inshore fishing. The reel features a smooth drag system and precise gear alignment for seamless operation. Whether casting lures or live bait, the Ugly Stik GX2 Combo is a dependable choice for anglers of all skill levels.

            Take a look at the Size 35 reel with the 6’6″ rod from Ugly Stik.


            Abu Garcia Revo X Combo


            The Abu Garcia Revo X Combo combines Abu Garcia’s advanced reel technology with a lightweight yet durable rod.

            The Revo X reel features an X2-Craftic alloy frame and C6 carbon side plates, providing unmatched corrosion resistance and rigidity. Its Carbon Matrix drag system offers smooth and consistent drag performance, ensuring optimal control over fast-running fish. Paired with a sensitive graphite rod, this combo offers the perfect balance of strength and finesse. With its ergonomic design and precision engineering, the Abu Garcia Revo X Combo is a top contender for saltwater inshore anglers seeking performance and comfort.


            KastKing Royal Combo

            If you read my blog you know I’m a fan of the KastKing brand – their rods and reels are great value with high performance. Royale Legend II Rod & Reel combos are available in many combinations of power, action, and length. I like the 3000 reel and 7’3″ spinning rod combo. As a bonus you get a ‘twin’ tip which means you also have a backup if one breaks.


            Ultra-Light and Sensitive: Constructed with true IM6 Graphite Blanks and KastFlex technology, these rods are ultra-light and sensitive, allowing you to feel even the slightest bite.


            The KastKing rods have stainless-steel guides and Titanium Oxide Ceramic Rings reduce friction, allowing for long casts and reliable performance. Additional features like custom KastKing Reel Seats, EVA handle, fighting butt, and foregrip provide a comfortable and secure grip, allowing anglers to fish for hours without fatigue.


              When it comes to saltwater inshore fishing, having the right rod and reel combo can greatly enhance your chances of success. Each of the combos mentioned above offers a unique blend of performance, durability, and value, catering to a wide range of angling preferences and budgets. Whether you’re a seasoned angler or just starting out, investing in a quality rod and reel combo from our list will ensure countless memorable fishing experiences on the water.

              Don’t miss my other articles on this topic…

              What is Google Bard and what can you do with this AI chatbot technology?

              Google Bard is an advanced AI chatbot developed by Google, leveraging its extensive experience in artificial intelligence and natural language processing. Bard is designed to assist users in generating text, answering questions, providing translations, and much more, by engaging in conversational interactions. It uses Google’s proprietary language models, including the latest Gemini model, which builds on previous models like LaMDA and PaLM 2, to provide more accurate and nuanced responses.

              How to Access Google Bard

              Step 1: Sign In

              To begin using Google Bard, visit the official Google Bard website. Click on the “Sign In” button and log in with your Google account credentials.

              Step 2: Enter Your Prompt

              Once signed in, you will be directed to the main interface where you can start interacting with Bard. Simply type your question or prompt into the input box and press the “Enter” key or click the arrow button to submit your query.

              Key Features and Options

              1. Main Interface Options

              • Edit Prompt: Allows you to edit your previously sent message.
              • View Other Drafts: Provides alternative drafts of Bard’s response to your query.
              • Regenerate Drafts: Lets you regenerate the response if you are not satisfied with the initial answer.
              • Export Response: You can export Bard’s response to Google Docs or as a draft in Gmail.
              • Google It: Opens a new tab to search Google for more information based on your query.
              • Feedback: Thumbs up or down buttons help improve Bard by providing feedback on the quality of its responses.

              2. Advanced Features

              • Voice Input: Use the microphone to input queries via voice, a feature especially useful for hands-free operation.
              • Sharing and Exporting: Share responses via public links, or export them to Google Sheets, Docs, Colab, or Replit. This feature is particularly useful for collaborative work and coding projects.
              • Pinned and Recent Threads: Manage your conversations by pinning, renaming, or deleting previous threads. This helps in keeping track of ongoing projects or repeated queries.

              Practical Applications

              1. Content Creation

              Google Bard can assist in writing various types of content such as emails, poems, scripts, and code. It’s an invaluable tool for writers and developers looking to generate creative content or automate parts of their workflow.

              2. Information Retrieval

              Unlike a traditional Google search, Bard provides direct answers to queries in a conversational manner, which can be further expanded or clarified through follow-up questions. This makes it an excellent tool for quickly gathering and understanding information.

              3. Summarization

              Bard can summarize long articles or documents, extracting key points to provide a concise overview. This feature is especially useful for researchers and students who need to digest large amounts of information efficiently.

              4. Translation

              Google Bard supports over 100 languages, making it a powerful tool for translation. Whether you need to translate a sentence or an entire document, Bard can handle the task with ease.

              Benefits and Limitations

              Benefits

              • Real-Time Data: Bard provides up-to-date information by accessing current internet data through Google Search.
              • User-Friendly Interface: Its conversational interface is easy to use, even for those who are not tech-savvy.
              • Multifunctional: From generating creative content to summarizing articles and translating languages, Bard offers a wide range of functionalities.

              Limitations

              • Accuracy Issues: As with any AI, Bard’s responses can sometimes be inaccurate or incomplete. Users are encouraged to verify critical information.
              • Dependence on Google Ecosystem: Bard’s full potential is realized when integrated with other Google services like Docs, Sheets, and Gmail. This could be a limitation for users not deeply embedded in the Google ecosystem.

              Future Prospects

              Google is continuously improving Bard by updating its language models and adding new features. As AI technology advances, Bard is expected to become even more accurate and versatile, offering enhanced capabilities for both personal and professional use.

              Conclusion

              Google Bard represents a significant advancement in AI-driven conversational agents, offering a wide range of functionalities that can enhance productivity and creativity. By understanding its features and capabilities, users can effectively leverage Bard to meet their diverse needs, from content creation to complex problem-solving.

              For more detailed information and to start using Google Bard, visit the official Google Bard website.

              What is Google Gemini AI and what can you do with it? Gemini Ultra vs Pro vs Nano

              Google Gemini is the latest in AI technology developed by Google DeepMind, designed to provide state-of-the-art performance across a variety of tasks through its multimodal capabilities. This advanced AI model is integrated into numerous Google products and services, aiming to enhance user experience, improve productivity, and offer sophisticated assistance for both personal and professional use.

              Overview of Google Gemini

              Gemini represents a significant leap in AI technology, offering advanced capabilities in understanding and processing different types of information, including text, images, audio, and video. The Gemini family includes models of various sizes and capabilities, optimized for different use cases:

              1. Gemini Ultra: The most powerful model, designed for highly complex tasks.
              2. Gemini Pro: A versatile model suitable for a wide range of tasks and scalable applications.
              3. Gemini Nano: An efficient model optimized for on-device tasks, particularly in mobile applications.

              Key Features and Capabilities

              1. Multimodal Processing: Gemini is natively multimodal, allowing it to seamlessly integrate and process information from various sources such as text, images, audio, and video. This capability makes it highly effective for tasks that require understanding and reasoning across different types of data.
              2. High Performance: Gemini models, particularly Gemini Ultra, achieve state-of-the-art performance on numerous benchmarks, outperforming previous models in tasks such as natural language understanding, image recognition, and complex problem-solving.
              3. Long Context Windows: Gemini 1.5 introduces a breakthrough in long-context understanding, processing up to 1 million tokens, which enables it to handle more extensive and complex inputs efficiently.
              4. Efficiency and Scalability: Gemini’s architecture is designed for efficiency, utilizing techniques like the Mixture-of-Experts (MoE) to selectively activate relevant parts of the model, enhancing its performance while reducing computational requirements.

              How to Use Google Gemini

              Accessing Gemini

              1. Online Access: You can access Gemini through its dedicated website ( gemini.google.com ). It provides a free version powered by Gemini Pro, where users can interact with the model similarly to using a web-based AI assistant.
              2. Mobile Apps: For Android users, the Gemini app can be downloaded from the Google Play Store. Alternatively, users can opt-in to an upgrade within Google Assistant. For iOS users, Gemini is accessible via the Google app, which includes the new AI functionalities.
              3. Google Services Integration: Gemini is being integrated into Google’s Workspace applications such as Docs, Sheets, and Slides. Users with the Google One Premium AI Plan can access Gemini Ultra within these apps, allowing for advanced AI assistance in document creation and data management.

              Using Gemini

              1. Personal Assistance: Gemini can be used for a variety of personal tasks. For instance, users can ask it to summarize articles, generate photo captions, or provide step-by-step guides for tasks like repairing a flat tire. The AI’s ability to understand and process images and text makes it a versatile personal assistant.
              2. Professional Use: In professional settings, Gemini can assist with writing cover letters, creating schedules, and managing communications. Its integration with Google Drive allows it to access and utilize data stored in your files, providing a highly customized and efficient workflow.
              3. Development and Custom Applications: Developers can use Gemini’s capabilities through Google’s AI Studio and Vertex AI. These platforms provide access to Gemini’s APIs, allowing for the creation and deployment of custom applications that leverage the model’s advanced AI functionalities.

              Subscription Services

              For users seeking the most powerful features, Google offers a subscription service called Gemini Advanced, part of the Google One Premium AI Plan. This subscription provides access to Gemini Ultra, enabling enhanced capabilities and performance for both personal and professional use.

              Ethical Considerations and Safety

              Google has emphasized the importance of safety and ethical considerations in the development and deployment of Gemini. This includes measures such as watermarking generated images to prevent misuse and ensuring that the AI adheres to ethical guidelines in its operations. The company is continuously working on improving these safeguards to mitigate potential risks and ensure responsible usage – whether this proves to be true or not will be discovered over time. Given Google’s past history with censorship, one has to be somewhat concerned.

              Is Google Gemini right for you?

              Google Gemini represents a significant advancement in AI technology, offering powerful, flexible, and efficient capabilities across various domains. Whether for personal assistance, professional productivity, or custom application development, Gemini provides a robust platform for leveraging AI’s potential. Its integration into Google’s ecosystem ensures that users have seamless access to its features, making it a valuable tool for enhancing everyday tasks and complex projects alike. As Google continues to refine and expand Gemini’s capabilities, it is poised to become an indispensable part of the digital landscape – let’s just hope it’s a future in which humanity remains in control of the AI tools we’re using.