
If you’re looking for instructions on how to take a full or partial screenshot on your Windows 10 PC, your Chromebook, or your Mac computer, this brief article can help you. The instructions here are not unique and you can find them on plenty of sites, but I’m tired of looking them up elsewhere so I’m putting them on my site too. 🙂
Table of Contents
- How to Take a Screenshot on a Windows 10 PC
- How to Take a Screenshot on a Chromebook
- How to Take a Screenshot on a Mac
I. How to Take a Screenshot on a Windows 10 PC
A. How to take a FULL Screenshot on a Windows 10 PC
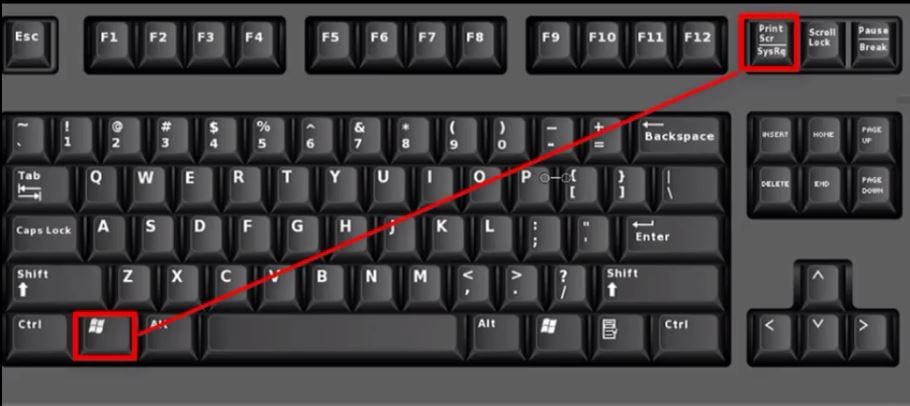
- Press the Windows Logo button+PrtScn buttons on your keyboard to save the screenshot to a file. This will save the full screenshot into a folder called Screenshots that is a sub-folder of your Pictures Folder under your This PC Menu.
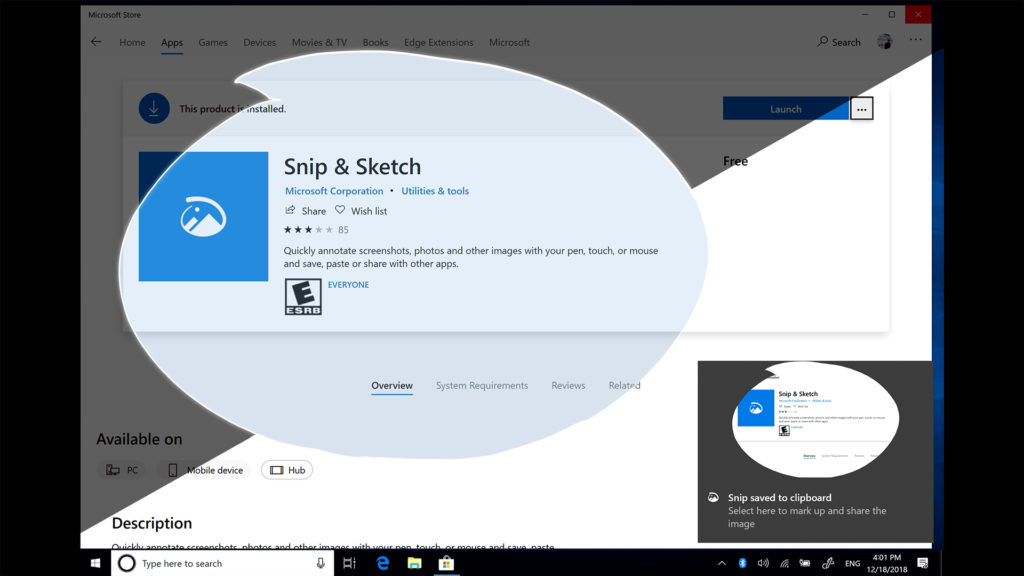
- Use the Windows 10 Snip & Sketch Tool (formerly Snipping Tool app).
This is a really easy option, assuming you have it already installed on your PC (if not visit the Microsoft App store to download the new Snip & Sketch app). Then go to your apps and open (‘launch’) it. It’ll look like this…
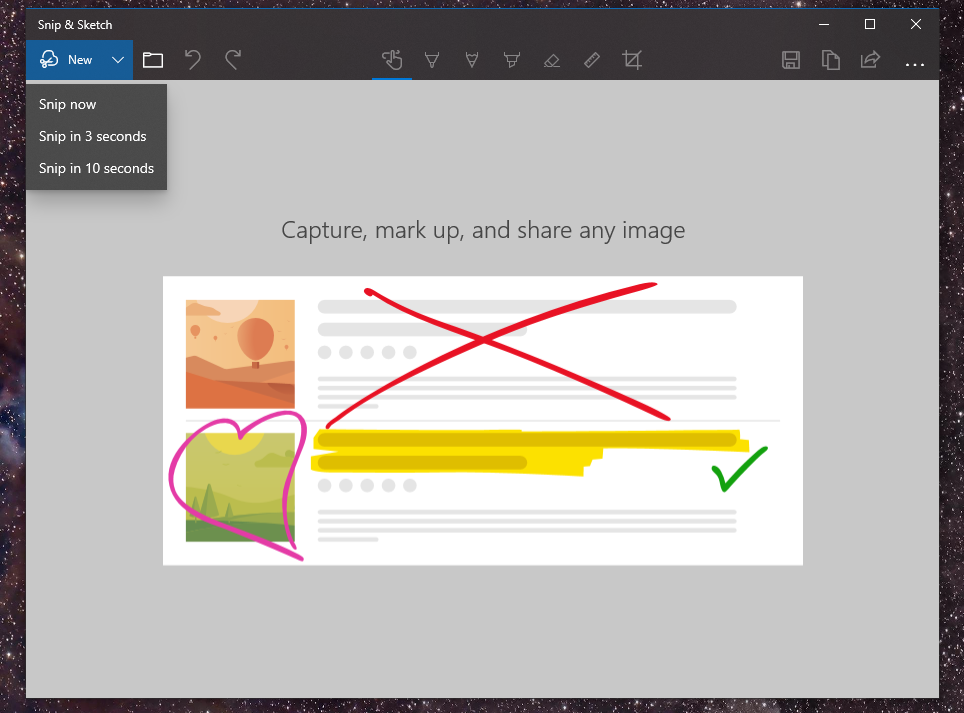
Once Snip & Sketch is open, you’ll be able to use this powerful little app to take full or partial screenshots, markup the pics, and much more. Just click the “NEW” button in the top LEFT of the tool’s menu to get started – here’s what it looks like…
Snip & Sketch has a lot more to it than just screenshots so if you want to know more, check out this helpful article from WindowsCentral.
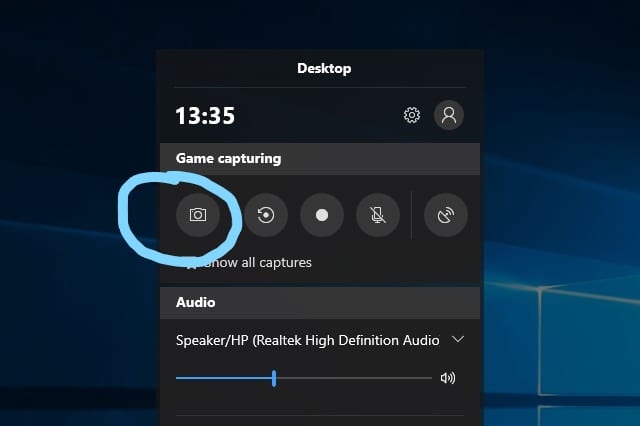
- A 3rd option for a full screenshot is to Press the Windows Logo button + G to open the new Game Bar option in Windows 10. These screenshots will be in the Captures Folder which is a sub-folder of the VIDEOS Folder on your This PC Menu
HowtoGeek has a nice article about screenshots if you’re more interested in this topic.
B. How to take a PARTIAL Screenshot on a Windows 10 PC
- The easiest way is to just press the Windows Logo + Shift Key + S key. Then you can select the area you want to take a partial screenshot of.
- Use the Windows 10 Snip & Sketch Tool (formerly Snipping Tool app) as noted above.
II. How to Take a Screenshot on a Chromebook
Screenshots on a Chromebook are pretty simple. All the screenshots are stored in your FILES Folder.
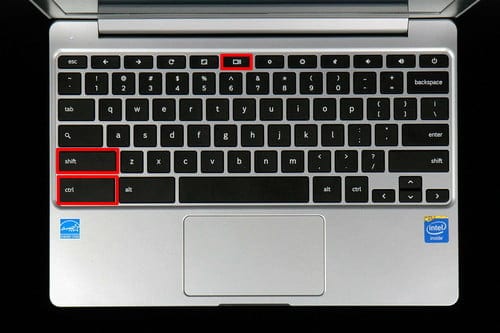
A. How to take a FULL Screenshot on a Chromebook
Press the Control + Shift Window Key. It looks like this…
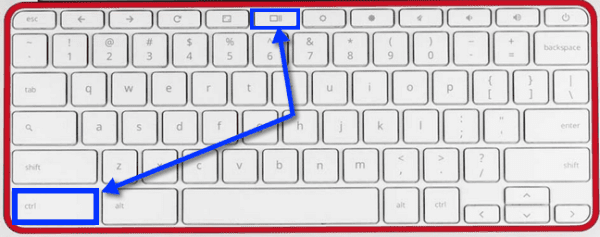
B. How to take a PARTIAL Screenshot on a Chromebook
Press the Control key + the Shift key + the Shift Window Key. It looks like this…
III. How to Take a Screenshot on a Mac
A. How to take a FULL Screenshot on a Mac
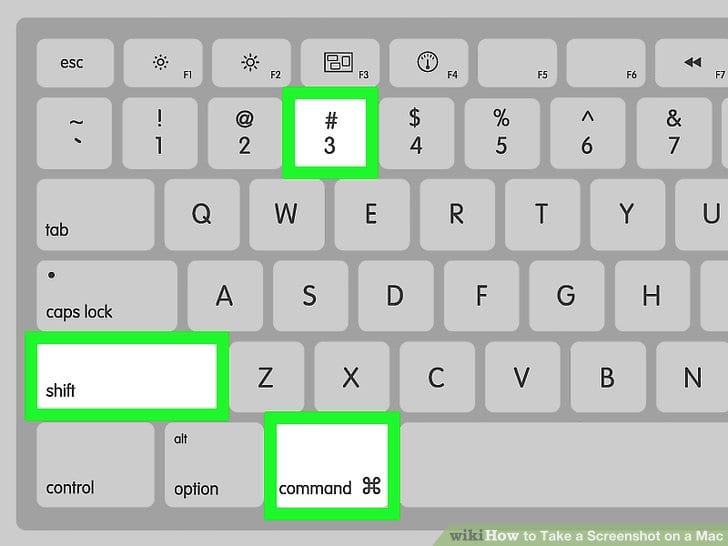
Instructions from Apple: “Press Shift key + Command key + 3 key. Find the screenshot on your desktop.”
B. How to take a PARTIAL Screenshot on a Mac
Instructions from Apple: “Press Shift key + Command key + 4 key. Drag to select the area of the screen to capture. To move the entire selection, press and hold Space bar while dragging. After you release your mouse or trackpad button, find the screenshot on your desktop.”

There are obviously other ways to take screenshots on your computer, but these are the ones I use because they seem to be the easiest. If you have one you recommend, let me know in the comments below.
What to Read Next