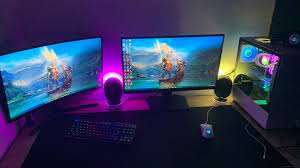
In today’s digital age, having multiple monitors can significantly enhance productivity and workflow efficiency for both Mac and Windows PC users. Whether you’re a creative professional needing more screen space for design work or a multitasker like me who’s always looking to streamline workflow, setting up dual monitors is a relatively simple process that can yield substantial benefits. In this guide, we’ll walk you through step-by-step instructions on how to set up dual monitors for both Mac and Windows PC systems, highlighting the similarities and differences along the way.
Understanding Dual Monitors:
Before diving into the setup process, it’s essential to understand the basics of dual monitors. Dual monitors, also known as dual display or multi-monitor setup, involve connecting two monitors to a single computer, allowing you to extend your desktop across both screens. This setup offers several advantages, including increased workspace, improved multitasking capabilities, and enhanced productivity.
Setting Up Dual Monitors on a Mac:
Mac users can easily configure dual monitors using the built-in features of macOS. Here’s a step-by-step guide to setting up dual monitors on your Mac:
Step 1: Check Compatibility and Ports:
Ensure that your Mac supports dual monitors and identify the available ports for connecting your monitors. Most modern Mac computers come equipped with Thunderbolt or USB-C ports, which can be used to connect external displays.
Step 2: Connect the Monitors:
Using the appropriate cables or adapters, connect your additional monitor(s) to the available ports on your Mac. For example, if your Mac has Thunderbolt 3 ports, you may need Thunderbolt to HDMI or Thunderbolt to DisplayPort adapters to connect the monitors.
Step 3: Adjust Display Settings:
Once the monitors are connected, navigate to “System Preferences” on your Mac and select “Displays.” In the Displays preference pane, you’ll see options to arrange and configure the connected monitors. You can choose to mirror your displays or extend your desktop across both screens. Adjust the resolution, refresh rate, and orientation as needed.
Step 4: Arrange Display Layout:
Drag and arrange the display icons to match the physical layout of your monitors. You can specify the primary display and set the arrangement to your preference. macOS allows for flexible positioning of displays, making it easy to customize your workspace.
Step 5: Fine-Tune Settings:
Explore additional display settings in System Preferences to customize the behavior of your dual monitors further. You can adjust color profiles, display mirroring options, and screen savers according to your preferences.
Keyboard Shortcut for Mirroring (Mac): Press Command + F1 to toggle between extended desktop mode and mirrored display mode. If you’re using an external keyboard with a Mac laptop, you may need to use the “fn” key along with the Command + F1 shortcut.
Setting Up Dual Monitors on a Windows PC:
Windows PC users can also configure dual monitors using the native features of the operating system. Here’s a detailed guide to setting up dual monitors on your Windows PC:
Step 1: Check Compatibility and Ports:
Verify that your Windows PC supports dual monitors and identify the available ports for connecting your monitors. Most modern PCs feature HDMI, DisplayPort, or VGA ports for connecting external displays.
Step 2: Connect the Monitors:
Using the appropriate cables or adapters, connect your additional monitor(s) to the available ports on your PC. Ensure that the monitors are securely connected and powered on.
Step 3: Adjust Display Settings:
Right-click on the desktop and select “Display settings” from the context menu. In the Display settings window, you’ll see options to configure the multiple displays. Windows allows you to extend, duplicate, or project your desktop onto the connected monitors. Select the “Extend desktop to this display” option to use dual monitors.
Step 4: Arrange Display Layout:
Drag and drop the display icons to arrange the monitors according to their physical placement. You can specify which monitor is the primary display and adjust the orientation as needed. Windows offers flexibility in arranging displays, allowing you to create a seamless workspace.
Step 5: Fine-Tune Settings:
Explore additional display settings in the Display settings window to customize the behavior of your dual monitors. You can adjust the resolution, orientation, scaling, and…
Keyboard Shortcut for Mirroring (Windows PC): Press Windows key + P to open the “Project” menu and cycle through different projection modes. Select the “Duplicate” option to mirror your screen onto the connected monitors.
What to Read Next…
- How to make your Morning Routine Successful
- Top 7 Instant Pots: Understanding the Many Different Models and Choosing the Right One for You
- ChatGPT FAQs, Troubleshooting, Advanced Features, and Practical Applications
- Understanding ChatGPT vs GPT-4 vs DALL-E – When do you use which one?
- 10 Tips for using ChatGPT + a detailed example of how a student can use ChatGPT for school projects.
- Ashwagandha Mental Health Benefits for teens and adults.
- 3 Fish Taco Recipes: Baja-style, Chipotle, and Blackened. Which is your fav?
- Google Bard vs ChatGPT – which one is best?
- The 5 Best Sous Vide Machines
- Traeger Flatrock Grill vs Blackstone Griddle

